> ## Documentation Index
> Fetch the complete documentation index at: https://help.decodo.com/llms.txt
> Use this file to discover all available pages before exploring further.
# Decodo Chrome Extension
> Manage Decodo and third-party proxies directly in Chrome. No login required - supports endpoint config, location switching, and protocol selection.
For a quick and easy setup on the Chrome browser, download the **Decodo Chrome Extension** [**here**](https://chrome.google.com/webstore/detail/smartproxy-extension/hdemabfejemmmicoabglpocdmmkjphpo?hl=en).
## Connecting After Login
Select `Login` or `Create account`, which will take you to our dashboard:
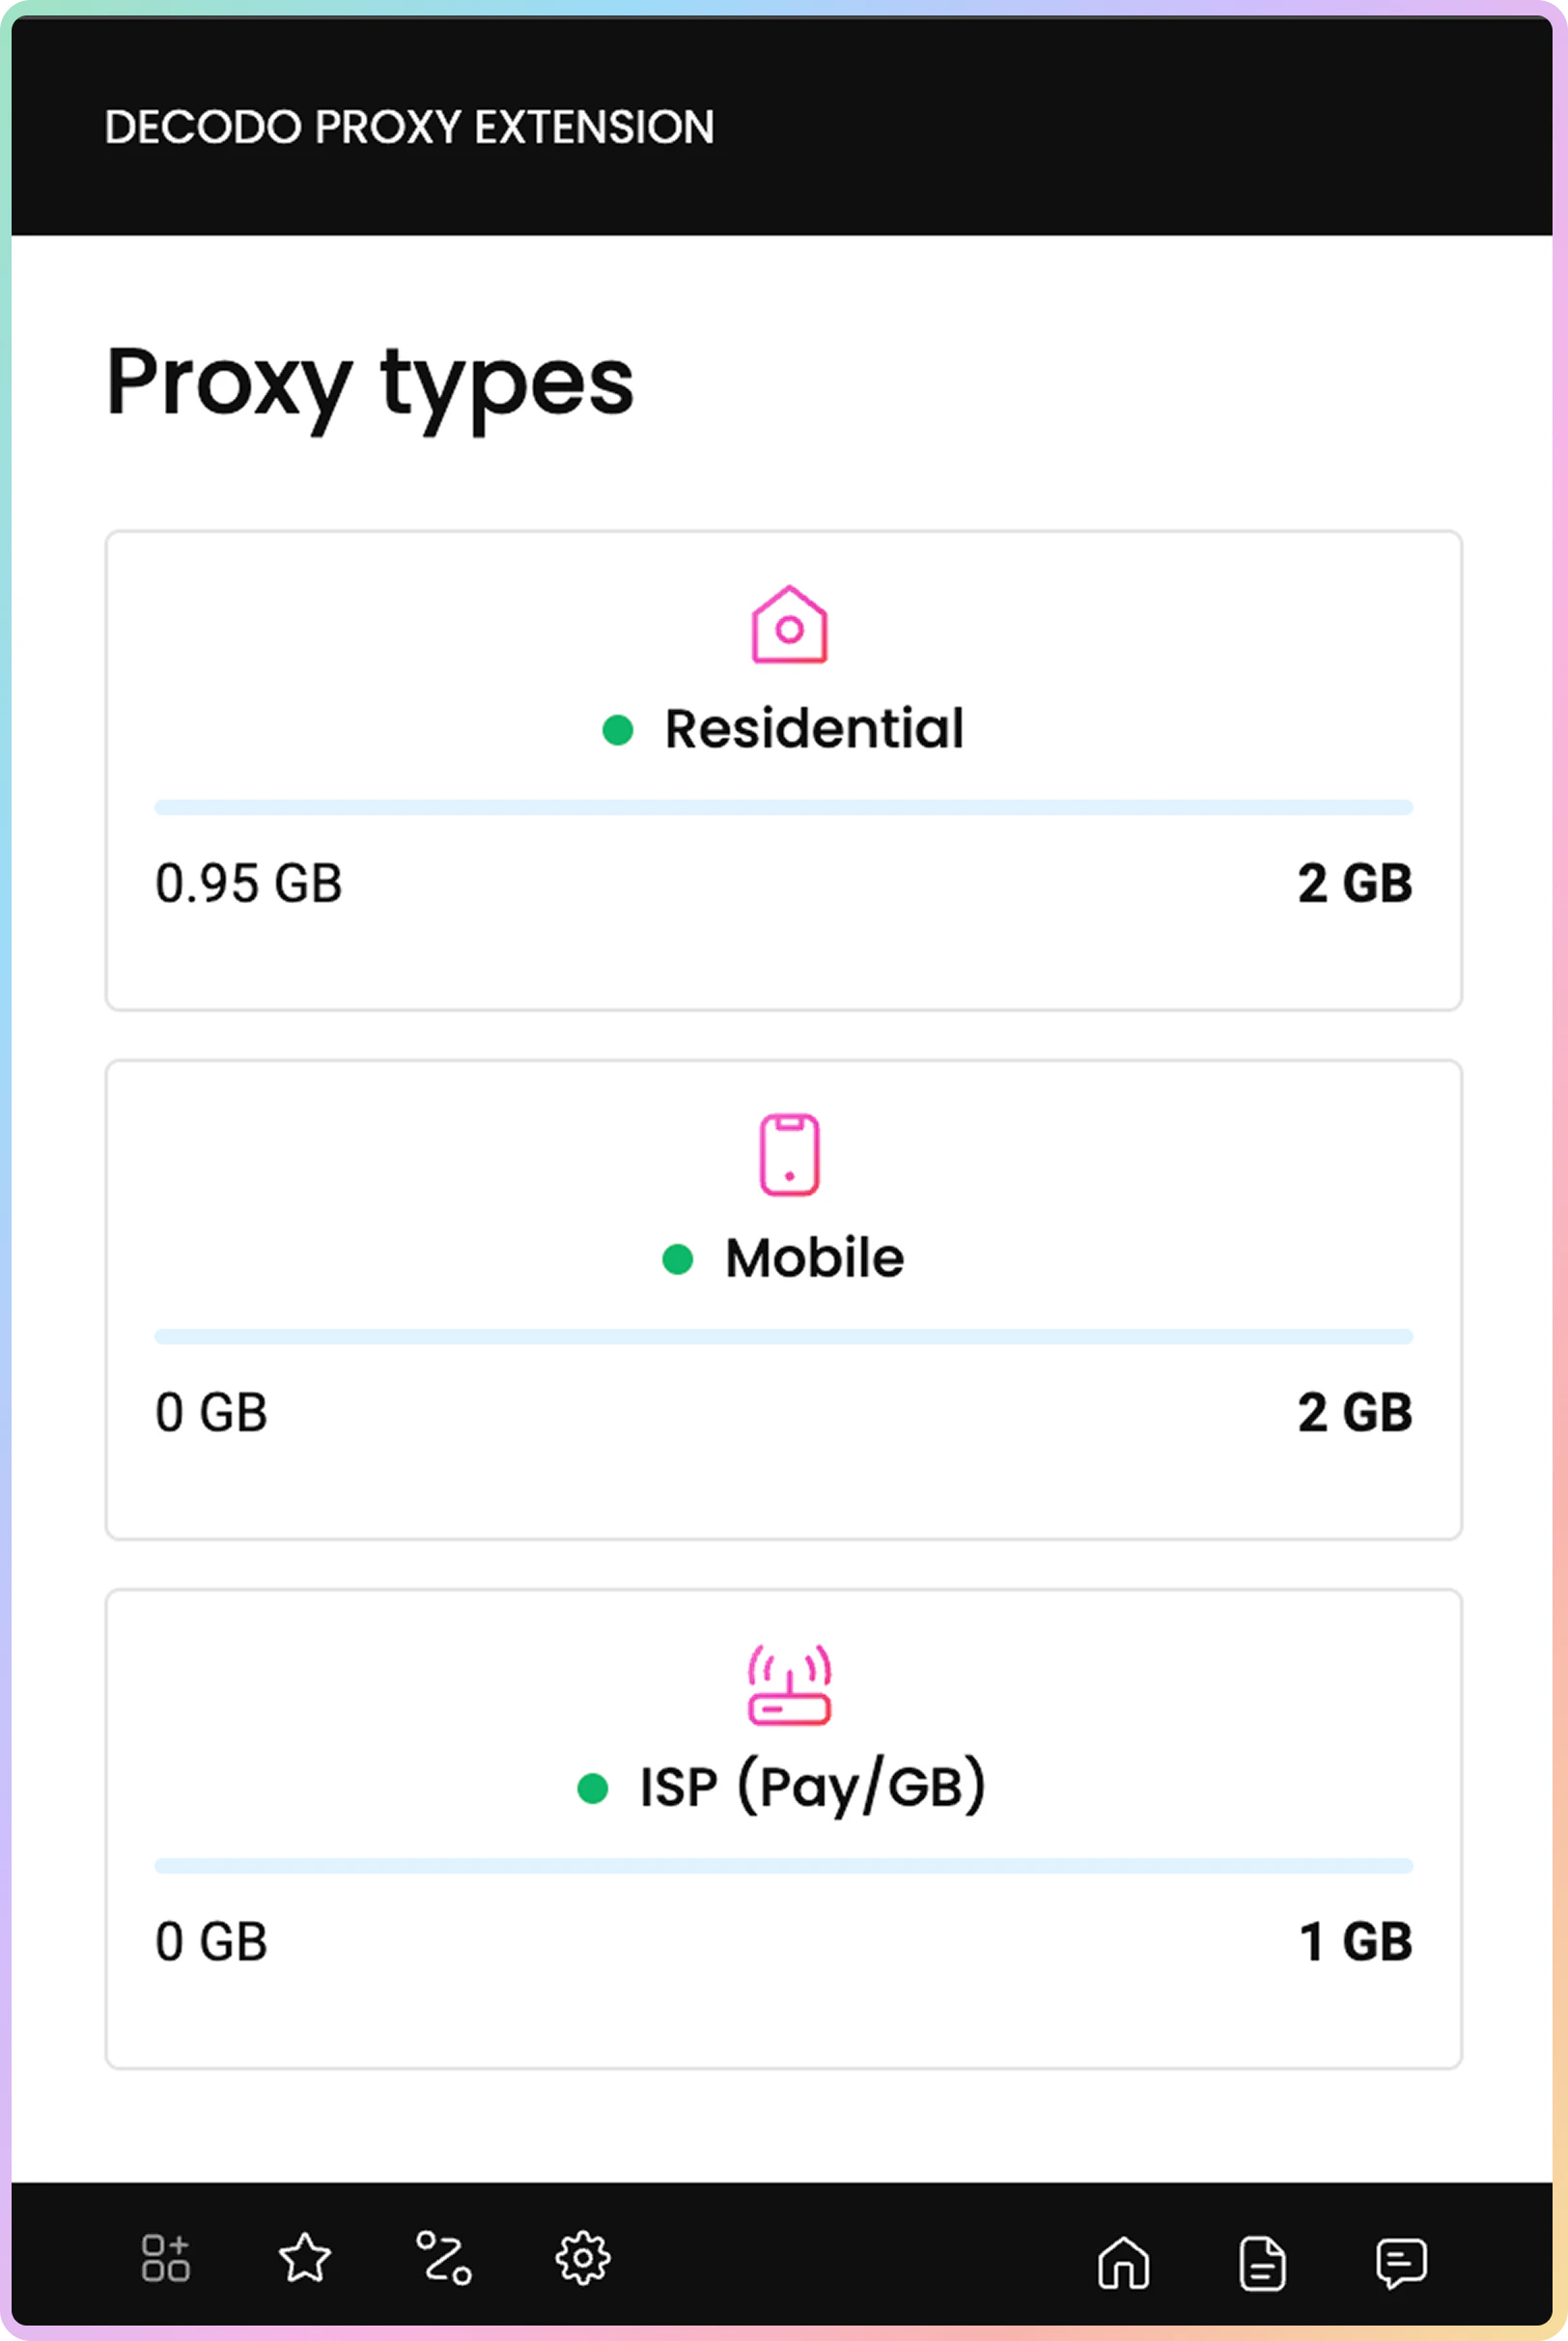
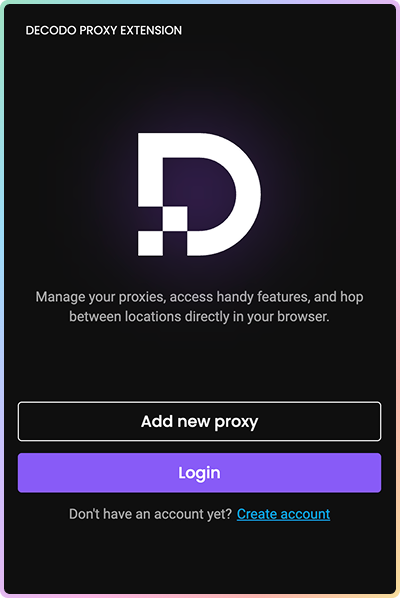 Choose your proxy type by scrolling through the menu:
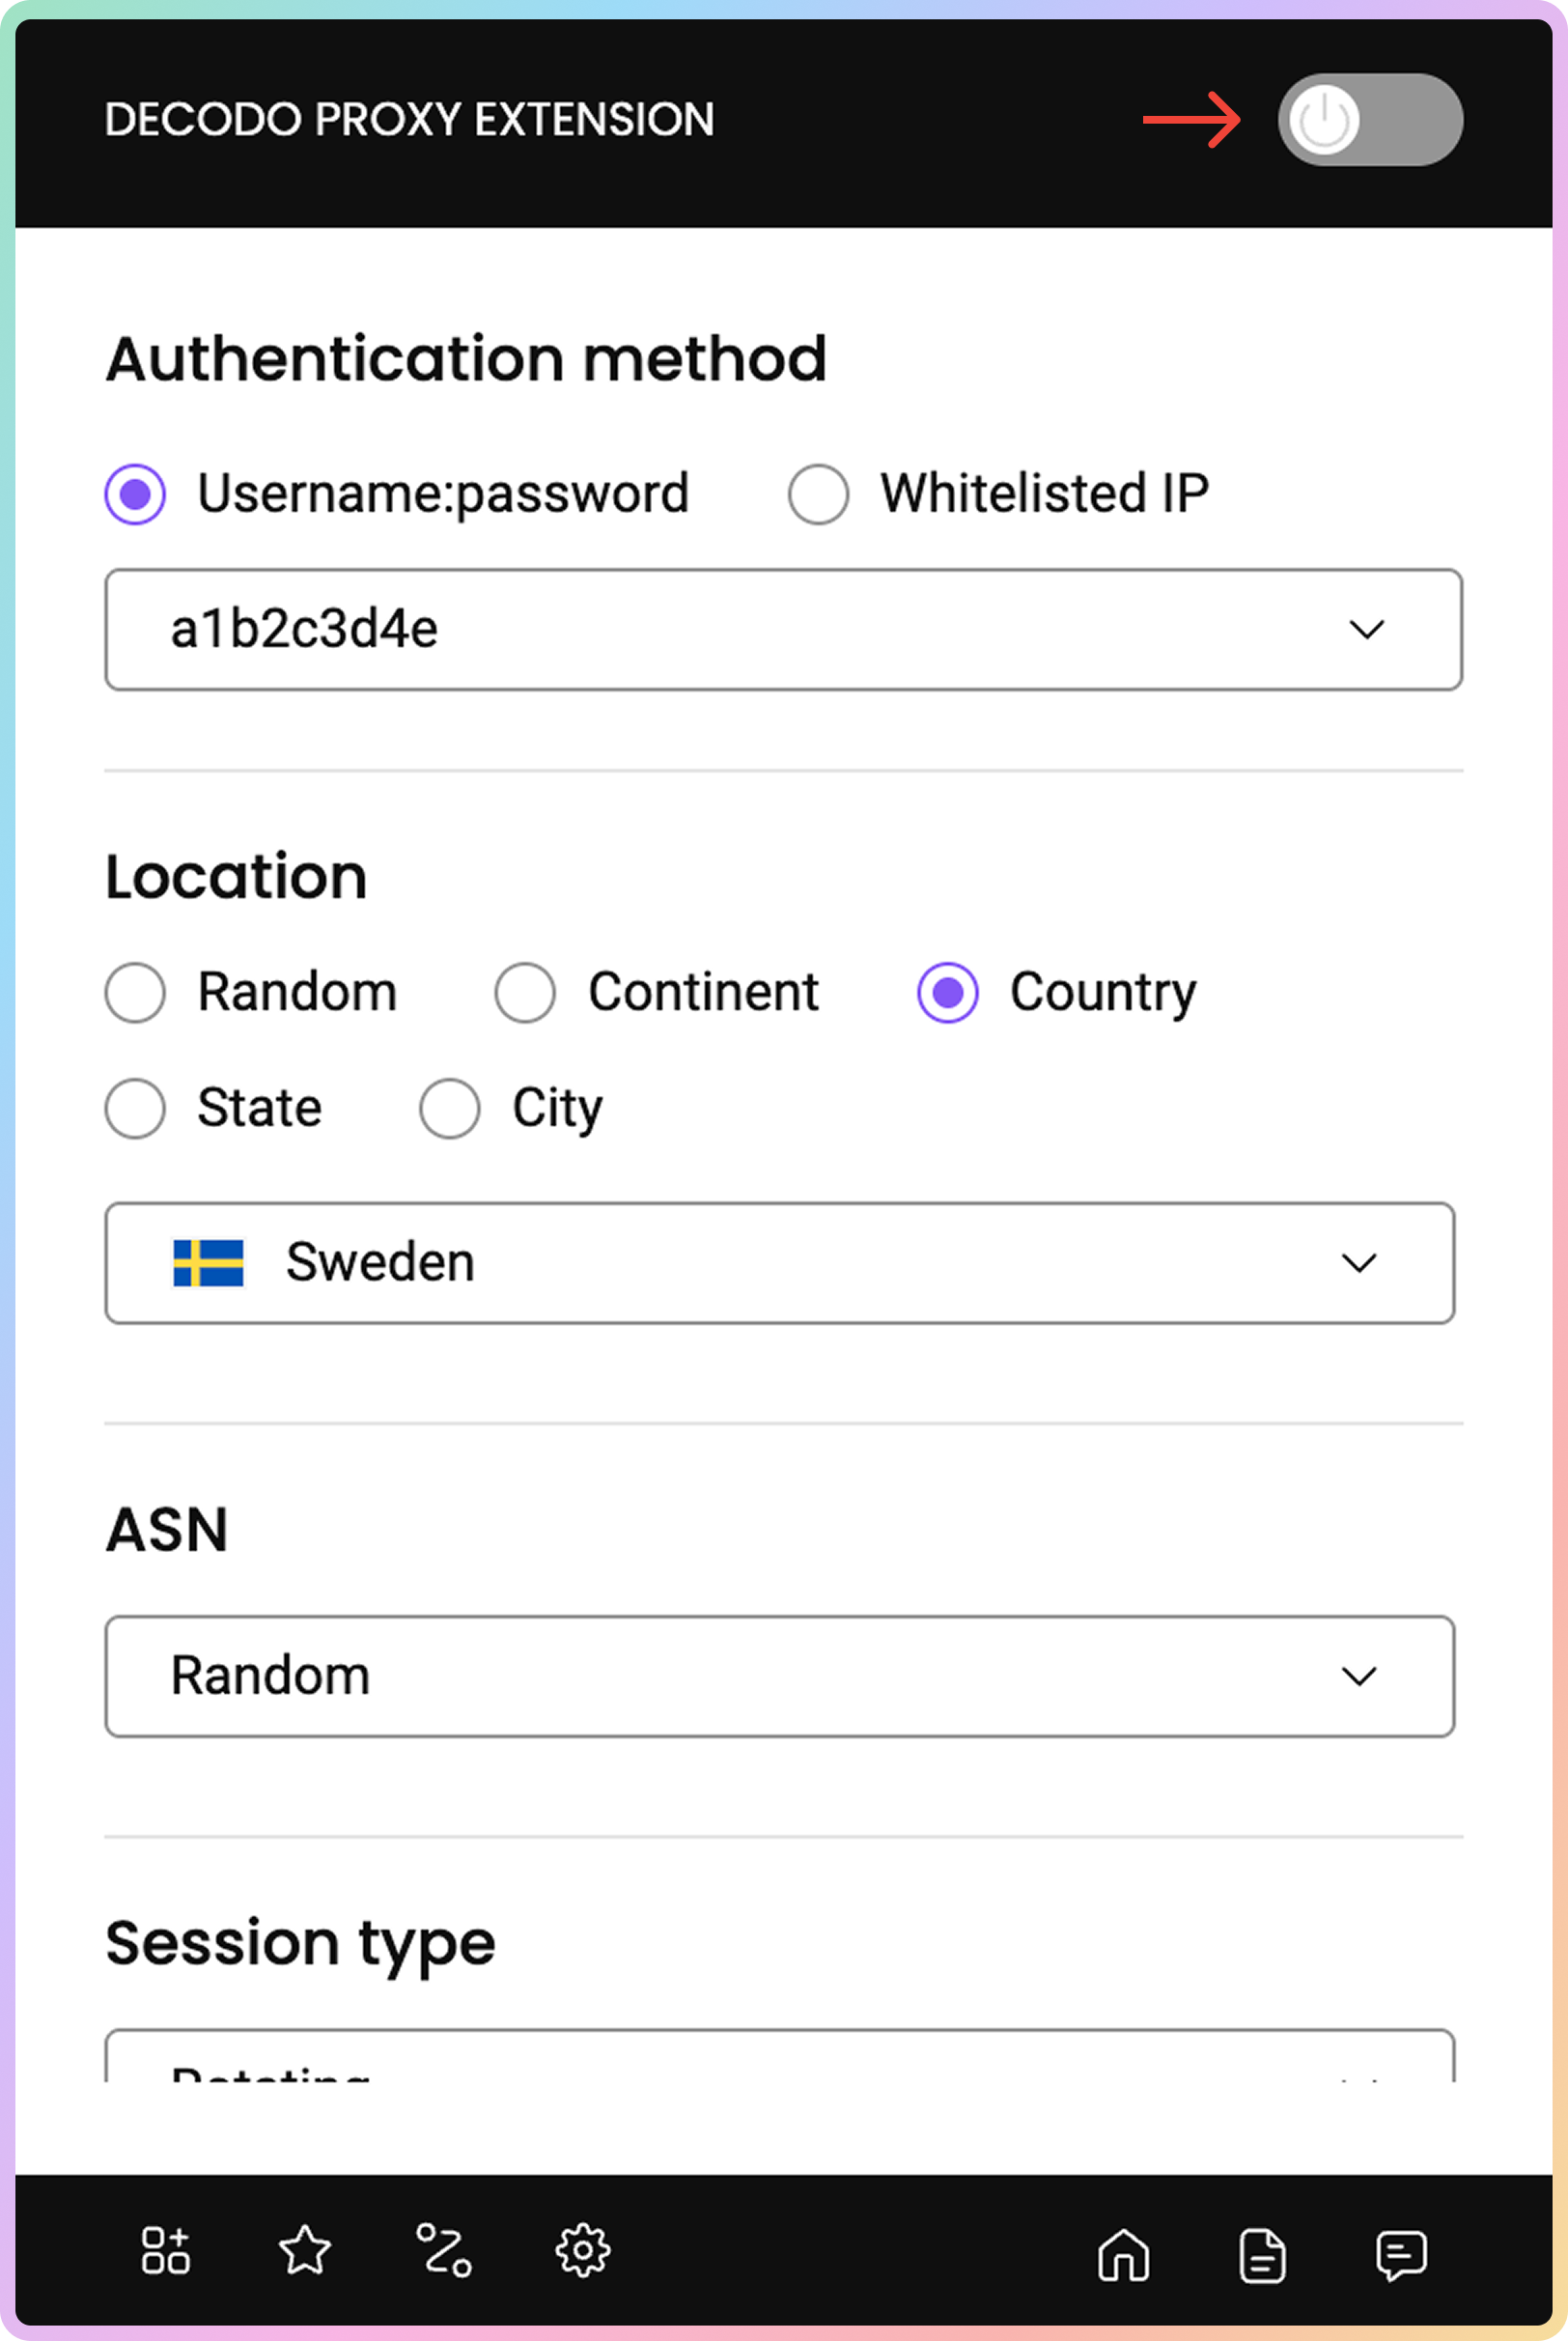
 From there, you will be able to choose:
* Authentication method, as well as your created users, in the drop-down
* Location
* ASN
* Session Type
* Protocol
### `Socks5` Support
Only `HTTP` and `HTTPS` are available. `SOCKS5` **is currently disabled.**
From there, you will be able to choose:
* Authentication method, as well as your created users, in the drop-down
* Location
* ASN
* Session Type
* Protocol
### `Socks5` Support
Only `HTTP` and `HTTPS` are available. `SOCKS5` **is currently disabled.**
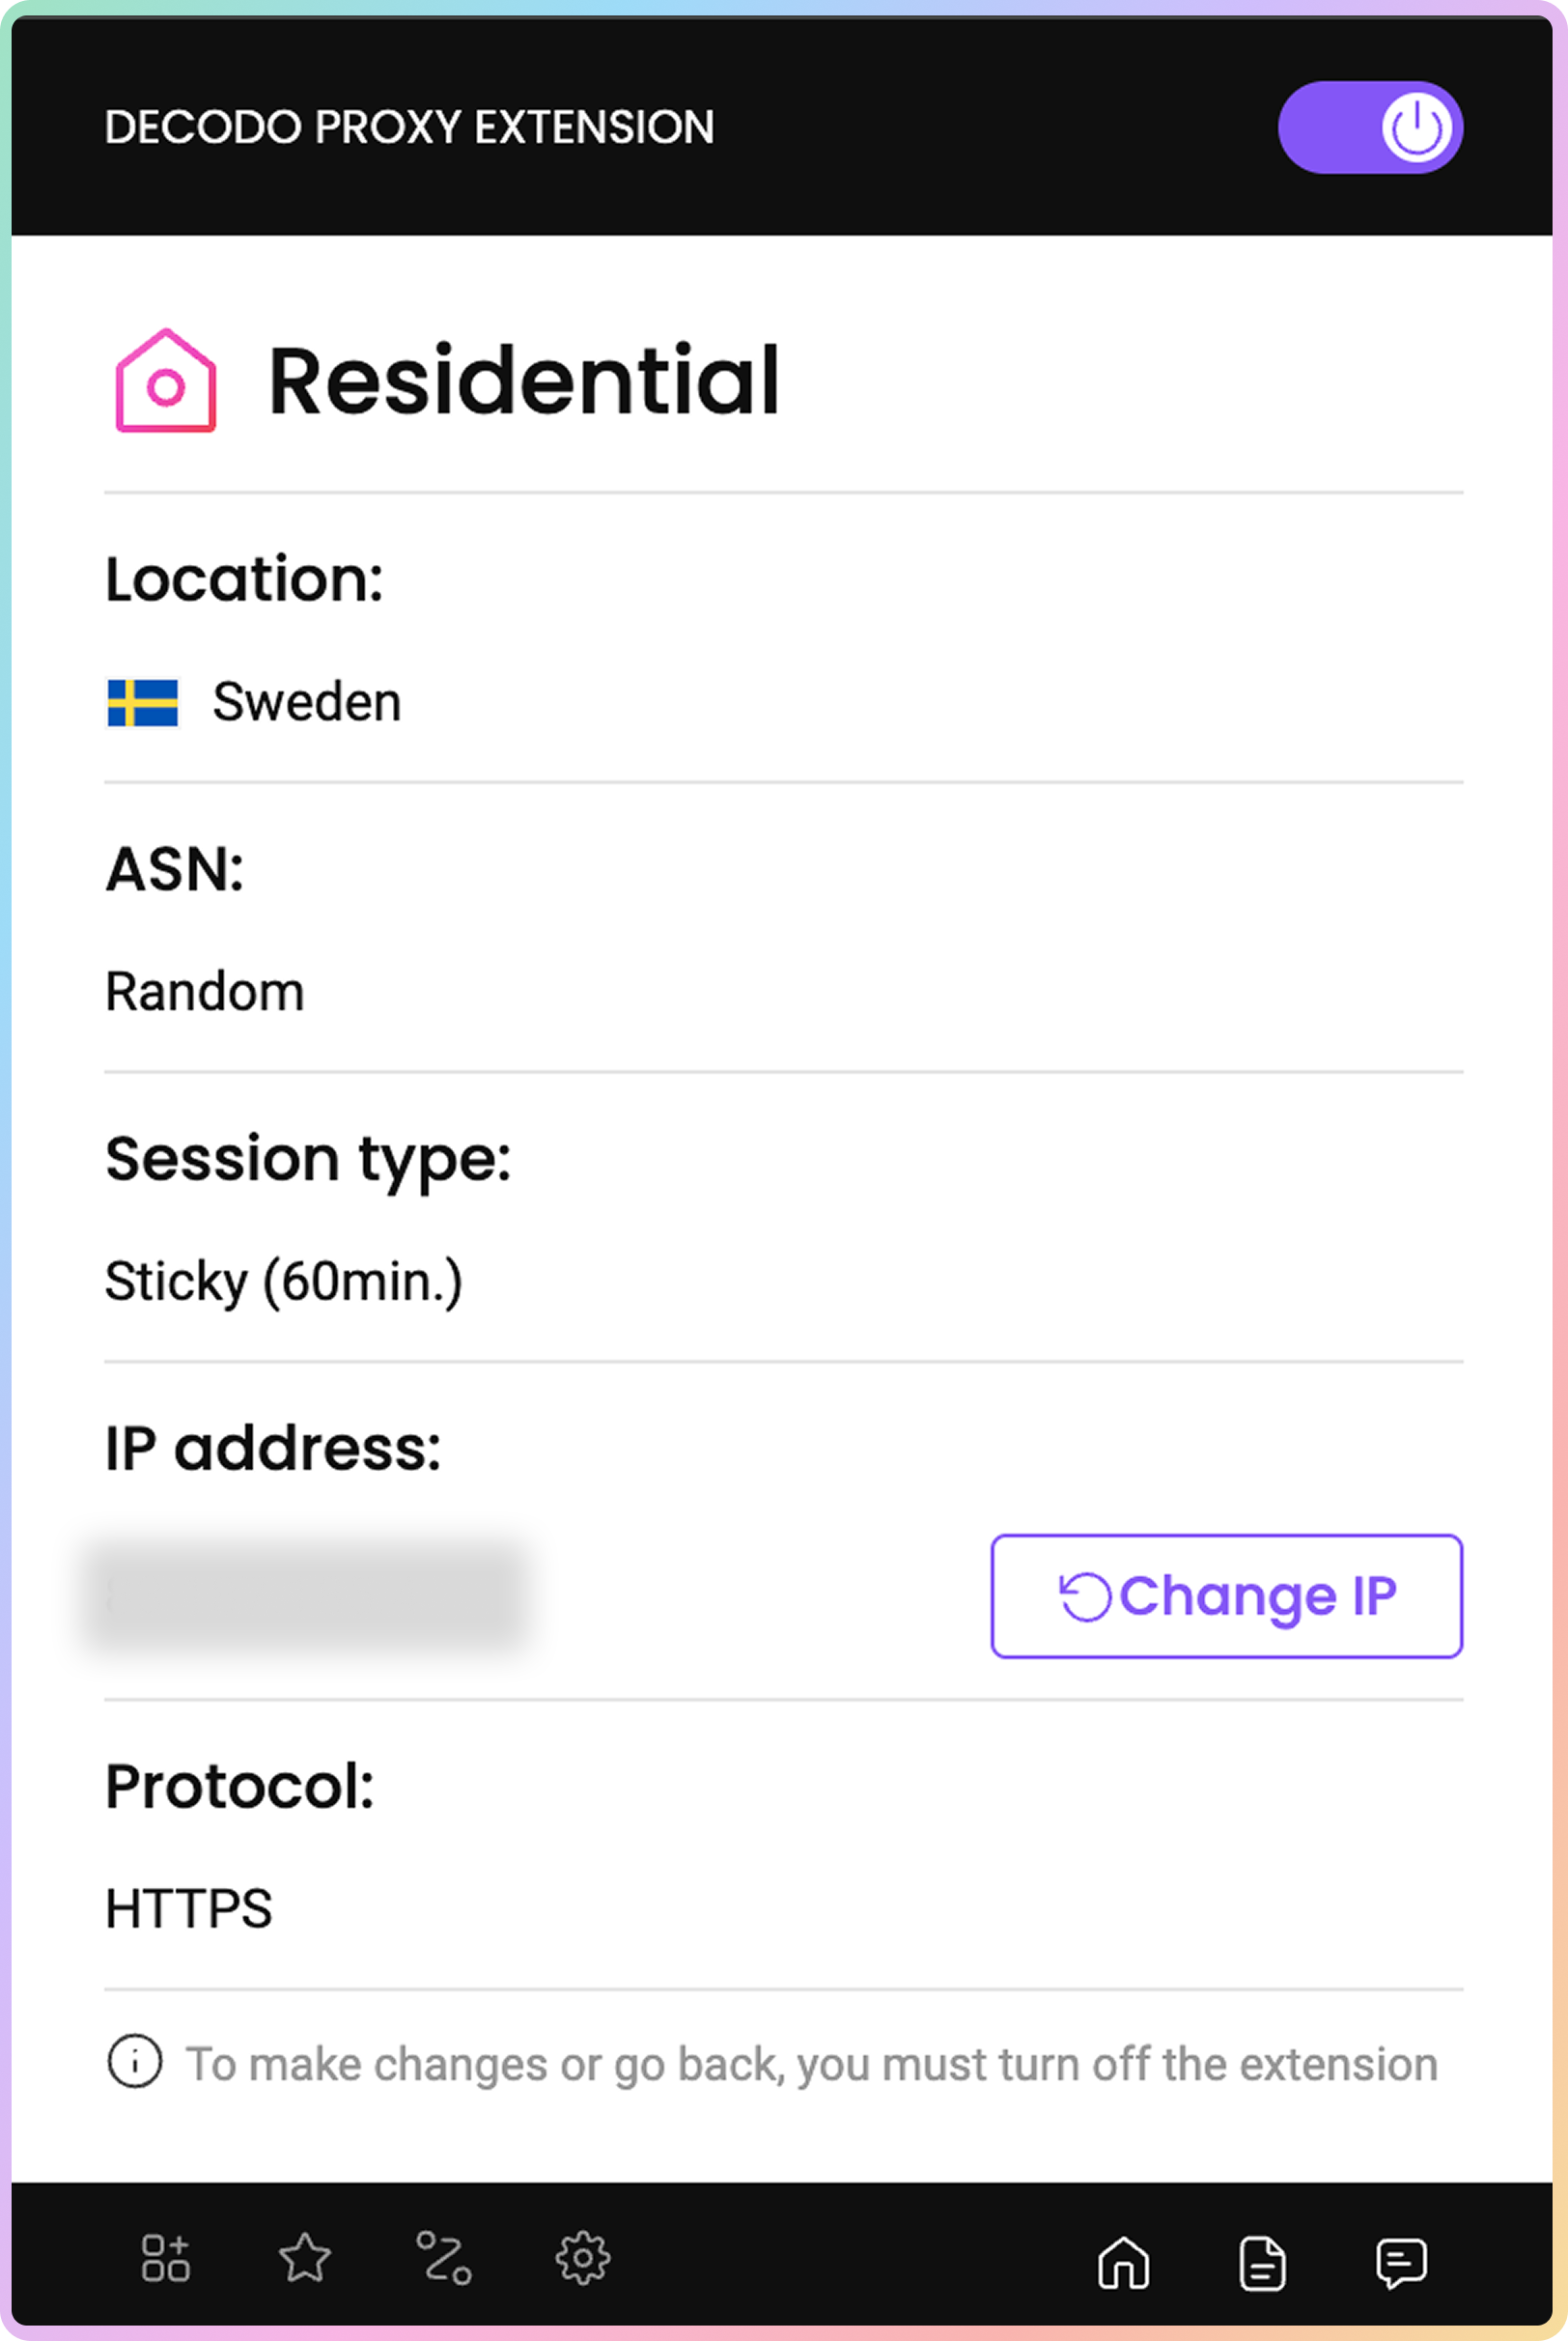
 To return to the proxy type selection, press **`Select other proxy type`**.
To connect, press the toggle button in the top right corner of the window. Once connected, the extension will display your chosen location, session type, and protocol.
To return to the proxy type selection, press **`Select other proxy type`**.
To connect, press the toggle button in the top right corner of the window. Once connected, the extension will display your chosen location, session type, and protocol.
 ## Connecting Without Login
Once you've added the extension, follow these simple steps to start connecting via proxy without logging in via the Decodo dashboard:
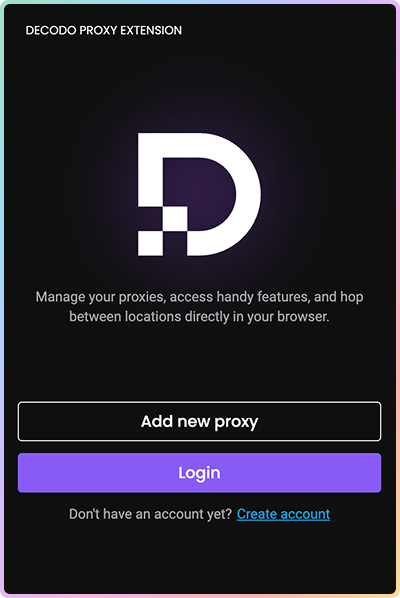
Select `Add new proxy` in the initial screen, and then `Manual setup`:
## Connecting Without Login
Once you've added the extension, follow these simple steps to start connecting via proxy without logging in via the Decodo dashboard:
Select `Add new proxy` in the initial screen, and then `Manual setup`:
 Fill the fields with any proxy server information (yes, even outside Decodo!):
* Available protocols: `HTTP`, `HTTPS` and `SOCKS5` (Decodo `SOCKS5` is unsupported).
Fill the fields with any proxy server information (yes, even outside Decodo!):
* Available protocols: `HTTP`, `HTTPS` and `SOCKS5` (Decodo `SOCKS5` is unsupported).
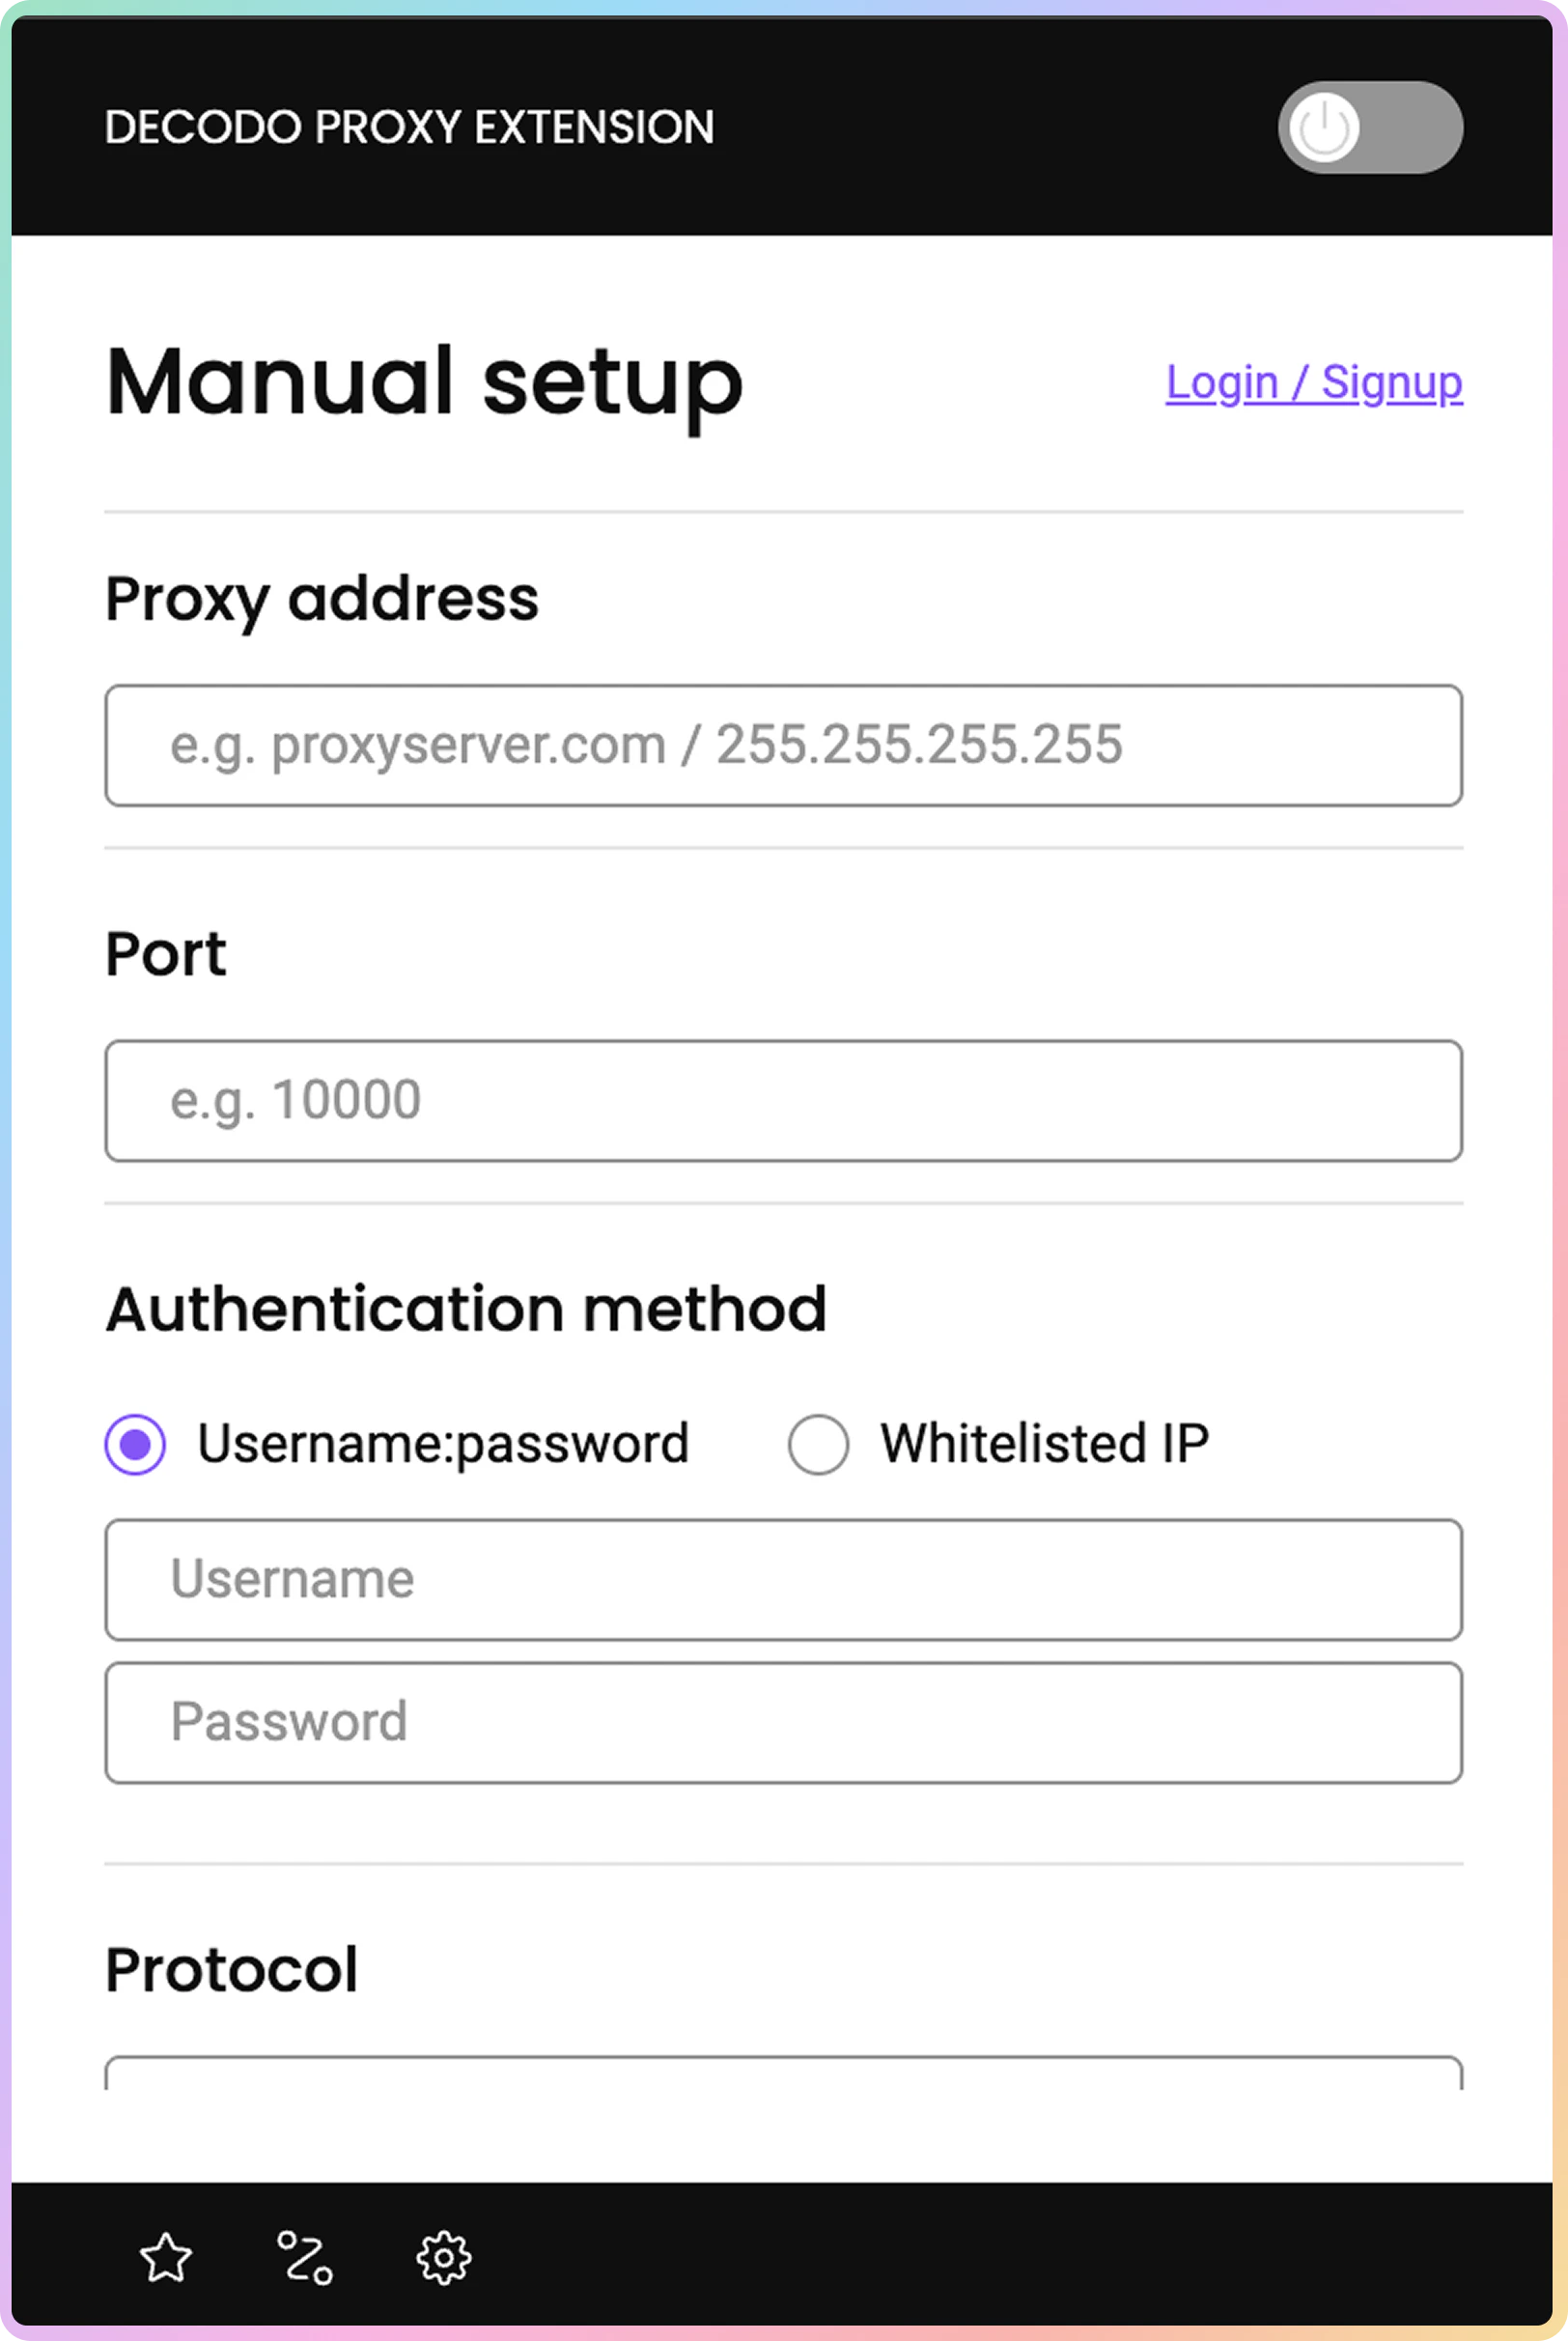 Press the toggle button in the top-right corner to connect. Easy!
### Manual Setup With Login
The Manual setup option is also available after login. Simply scroll down through all of the available proxy types, and you will find it at the bottom.
## Settings
### WebRTC leak prevention
By enabling the **WebRTC Leak Prevent** option via a toggle button, you can stop WebRTC from bypassing your proxy, masking both your real IP address and location. To enable it:
Open the Decodo extension and click on the settings button in the bottom-right corner.
Click on the WebRTC Leak Prevent toggle button, and there you go!
Press the toggle button in the top-right corner to connect. Easy!
### Manual Setup With Login
The Manual setup option is also available after login. Simply scroll down through all of the available proxy types, and you will find it at the bottom.
## Settings
### WebRTC leak prevention
By enabling the **WebRTC Leak Prevent** option via a toggle button, you can stop WebRTC from bypassing your proxy, masking both your real IP address and location. To enable it:
Open the Decodo extension and click on the settings button in the bottom-right corner.
Click on the WebRTC Leak Prevent toggle button, and there you go!
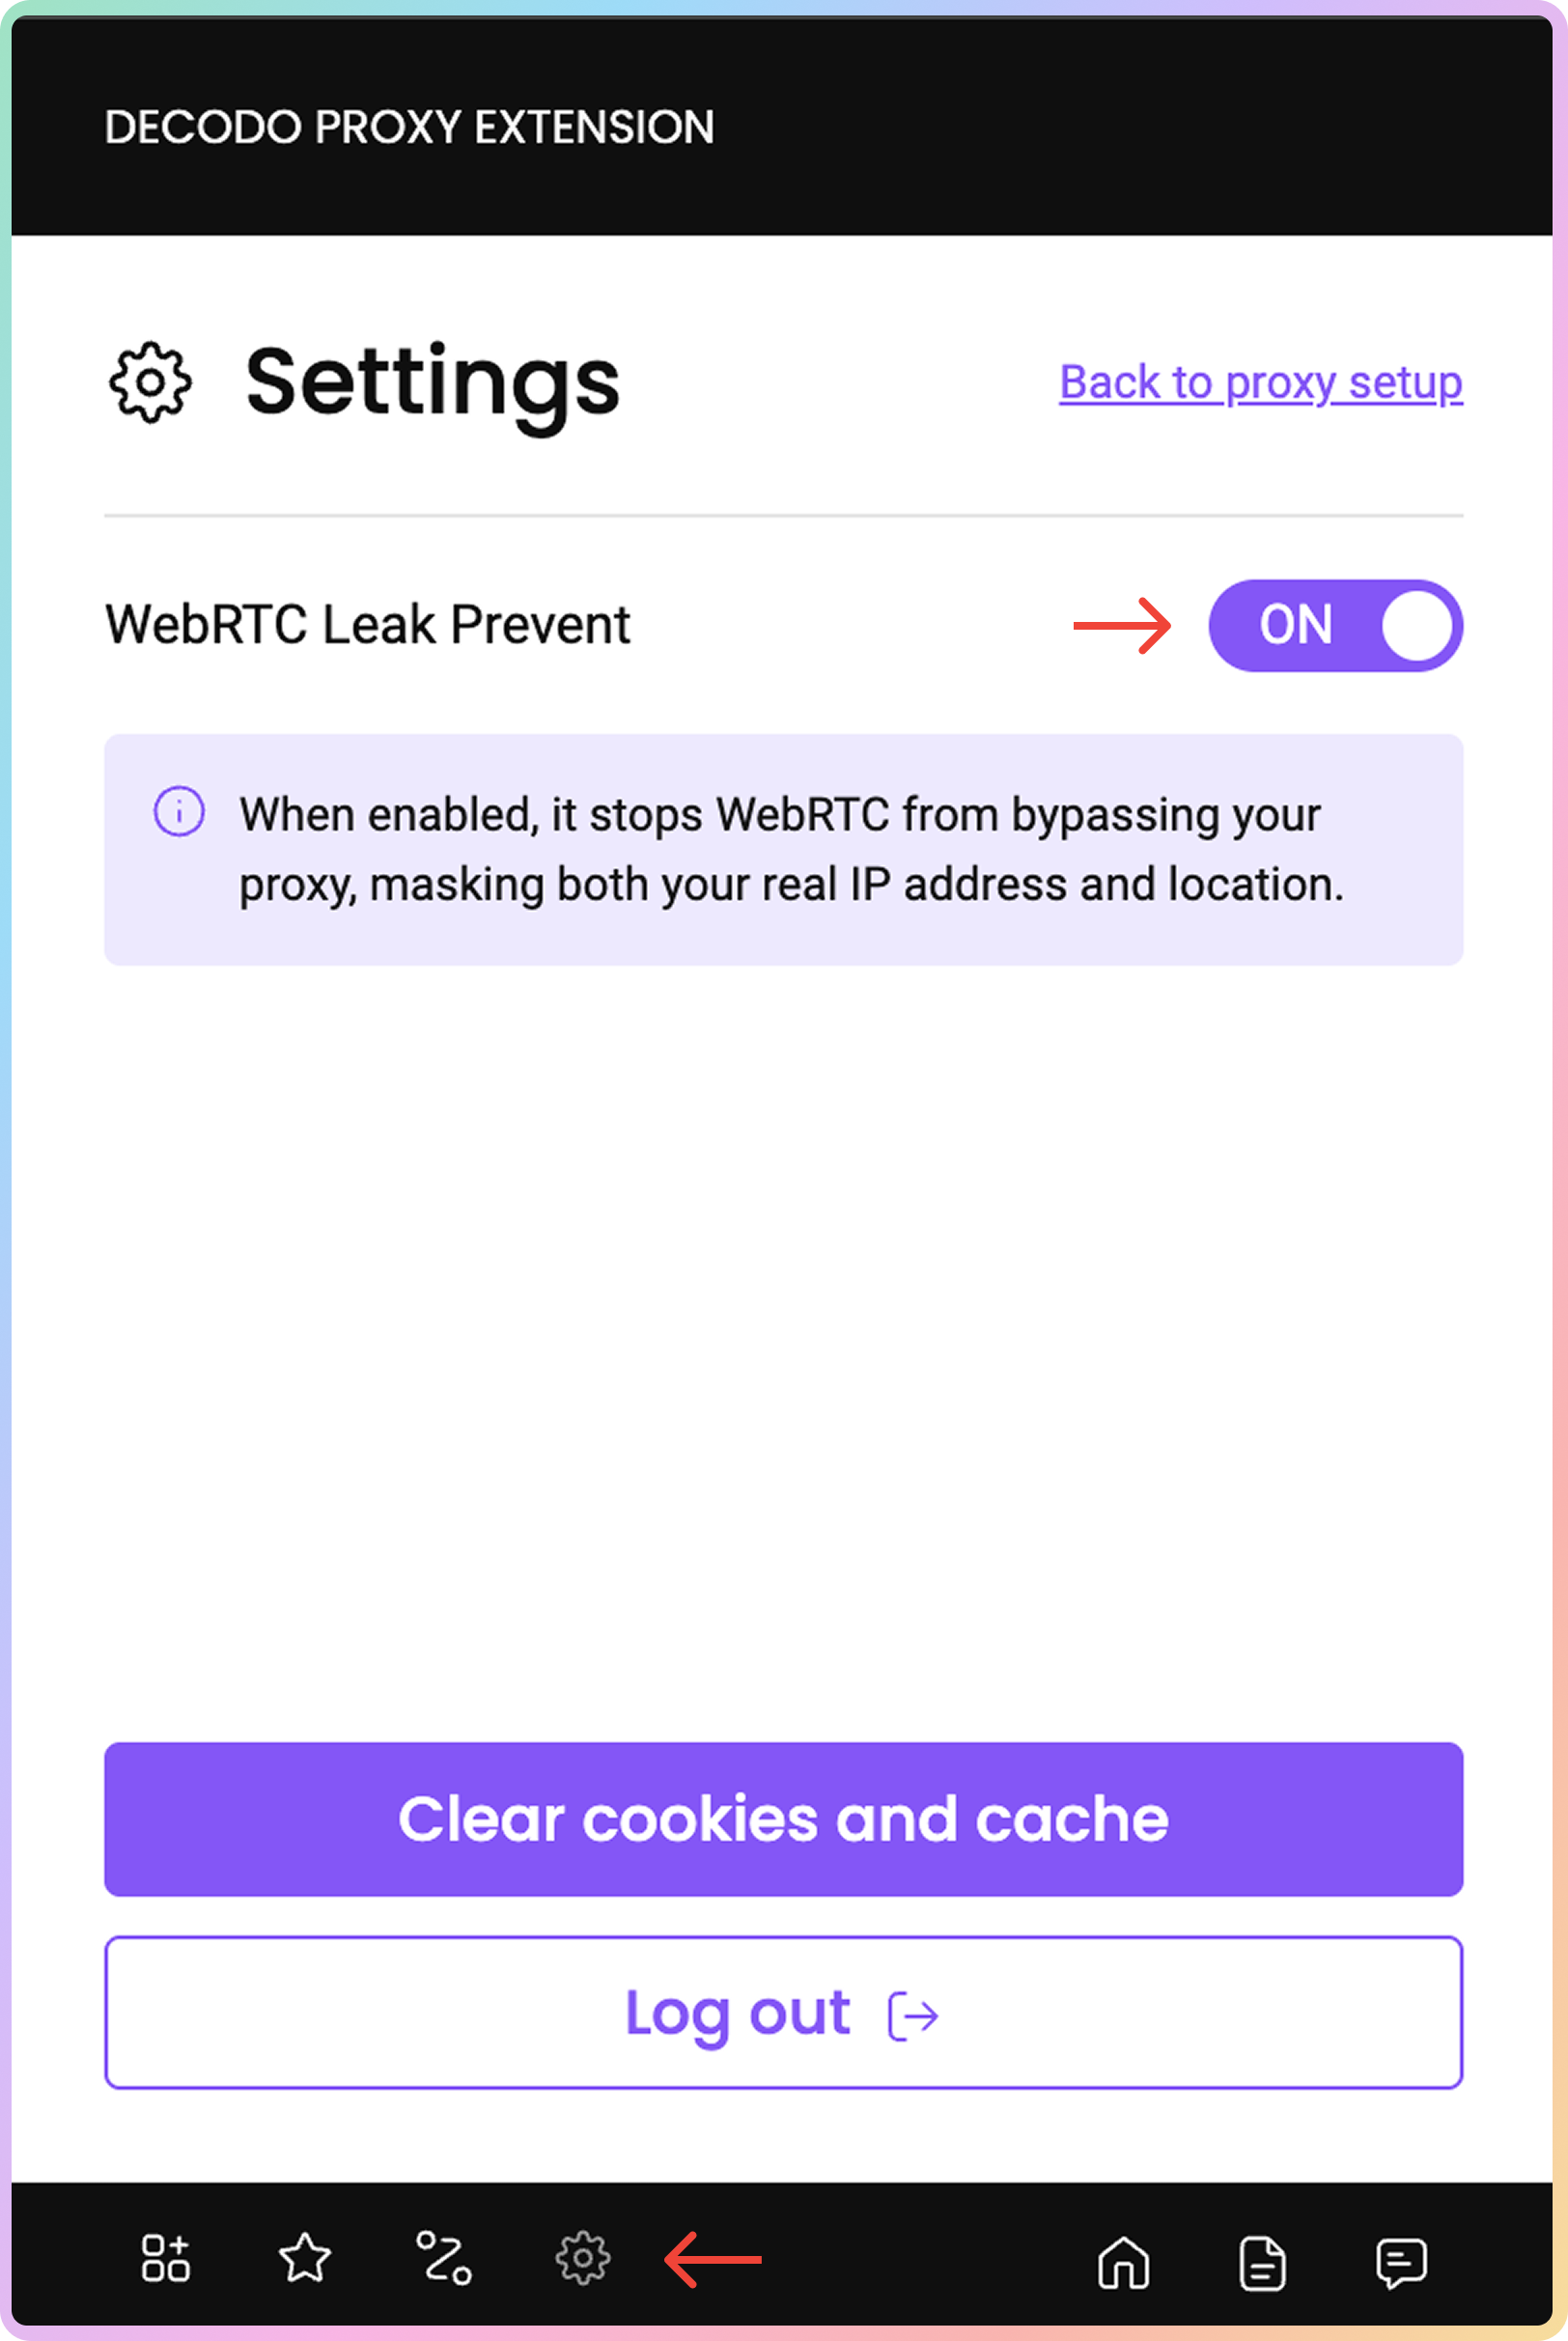 WebRTC leak prevention is enabled by default in the extension.
### Clear cookies and cache
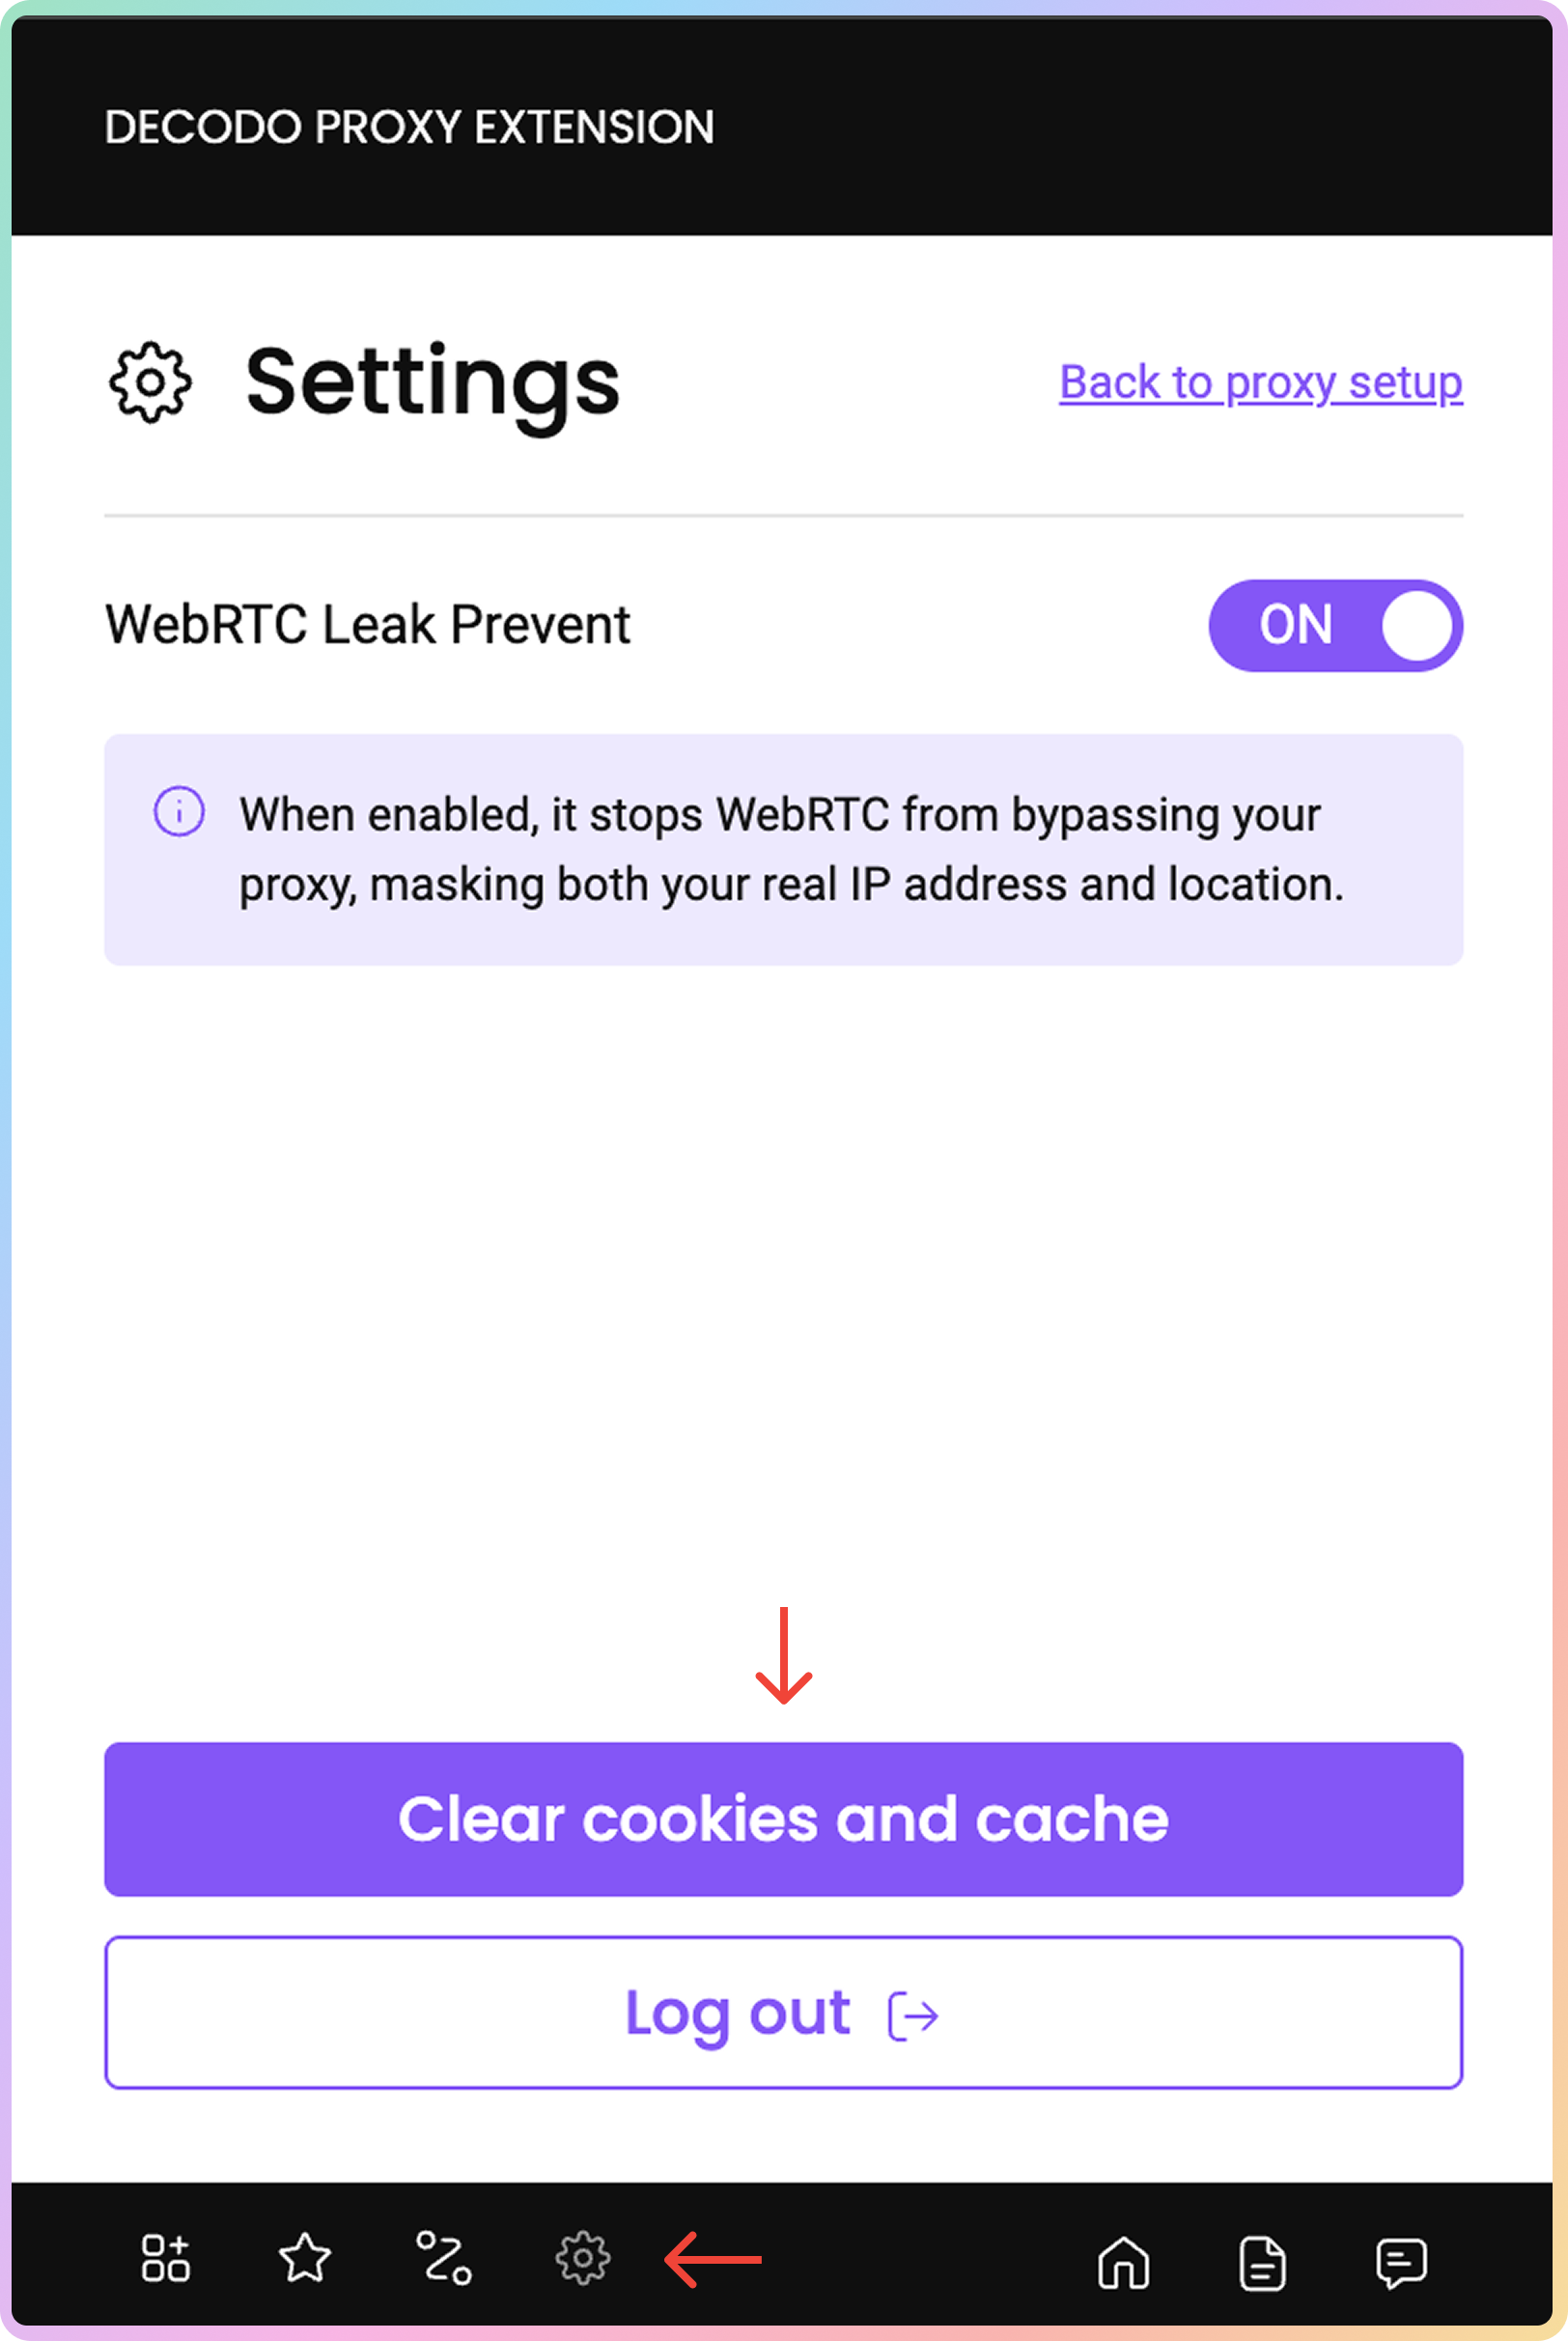
With the help of this setting, you can clear your browser's cache and cookies with just a click. To clear them:
Open the Decodo extension and click on the settings button in the bottom-right corner.
Click on Clear cookies and cache, and voilà!
WebRTC leak prevention is enabled by default in the extension.
### Clear cookies and cache
With the help of this setting, you can clear your browser's cache and cookies with just a click. To clear them:
Open the Decodo extension and click on the settings button in the bottom-right corner.
Click on Clear cookies and cache, and voilà!
 ## Profiles
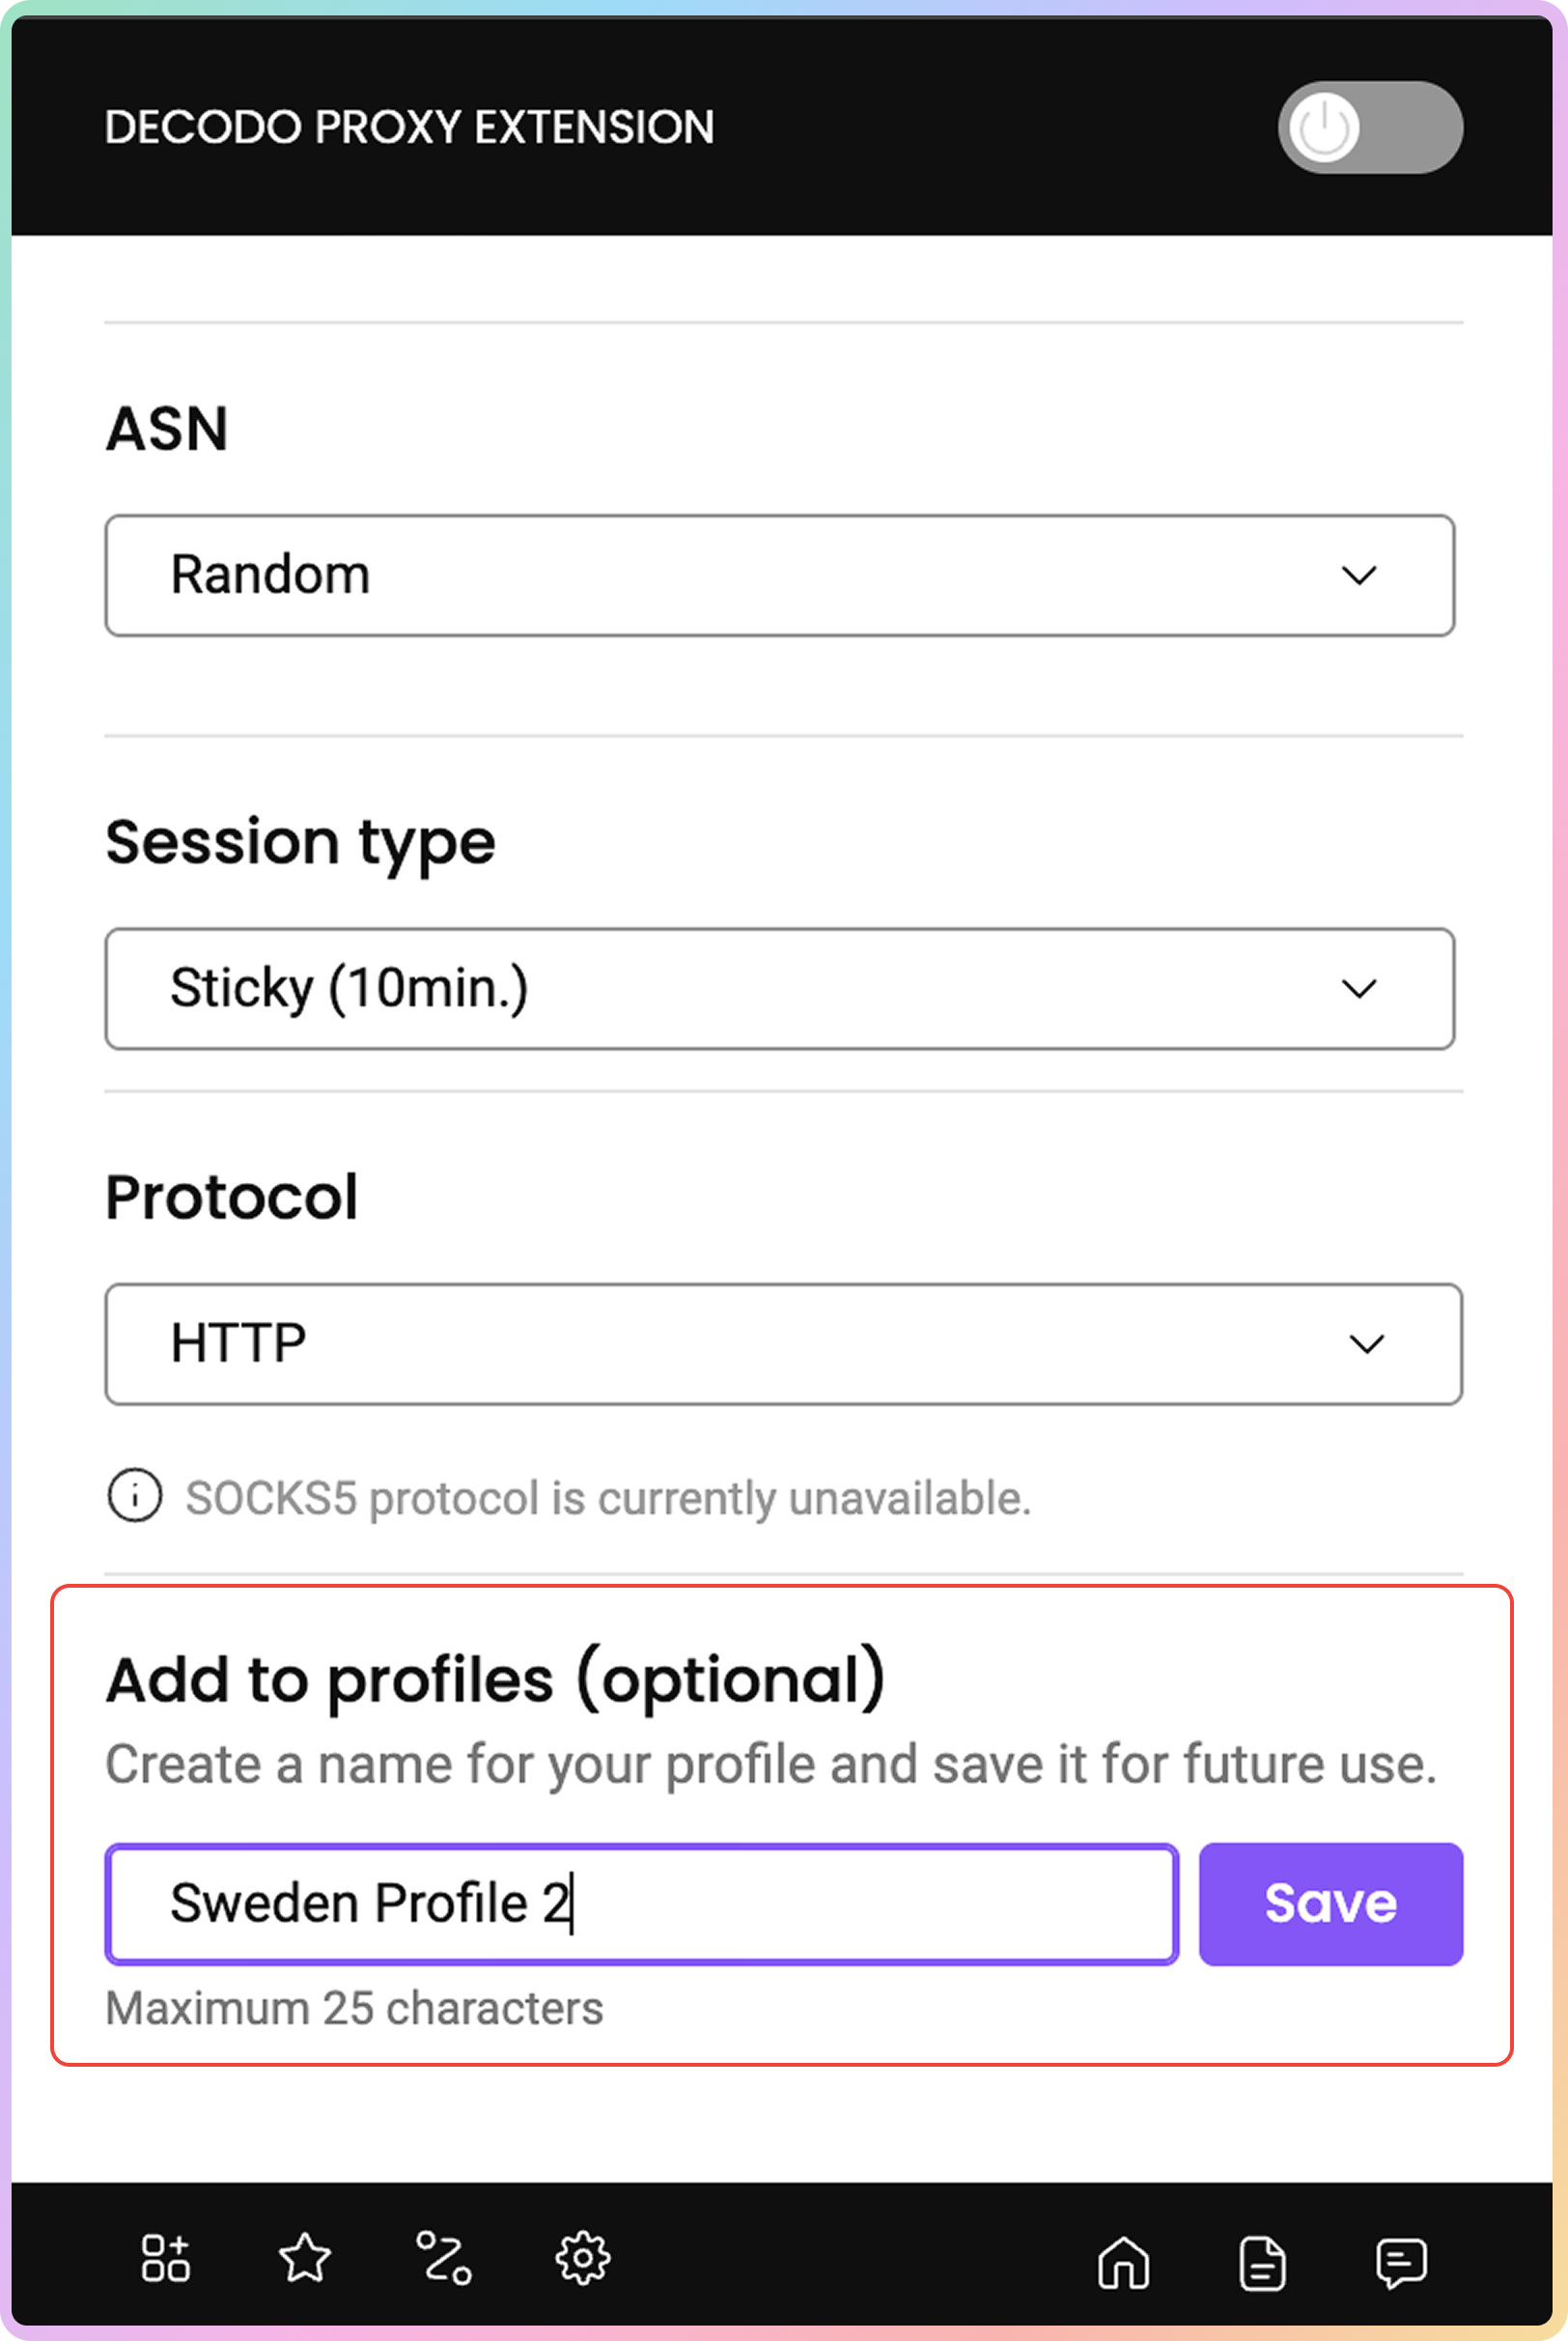
You can also save various profiles, both of Decodo and other proxy connections, by specifying the name of the profile you want to save in the **Add to profiles (optional) section** and clicking on `Save`:
## Profiles
You can also save various profiles, both of Decodo and other proxy connections, by specifying the name of the profile you want to save in the **Add to profiles (optional) section** and clicking on `Save`:
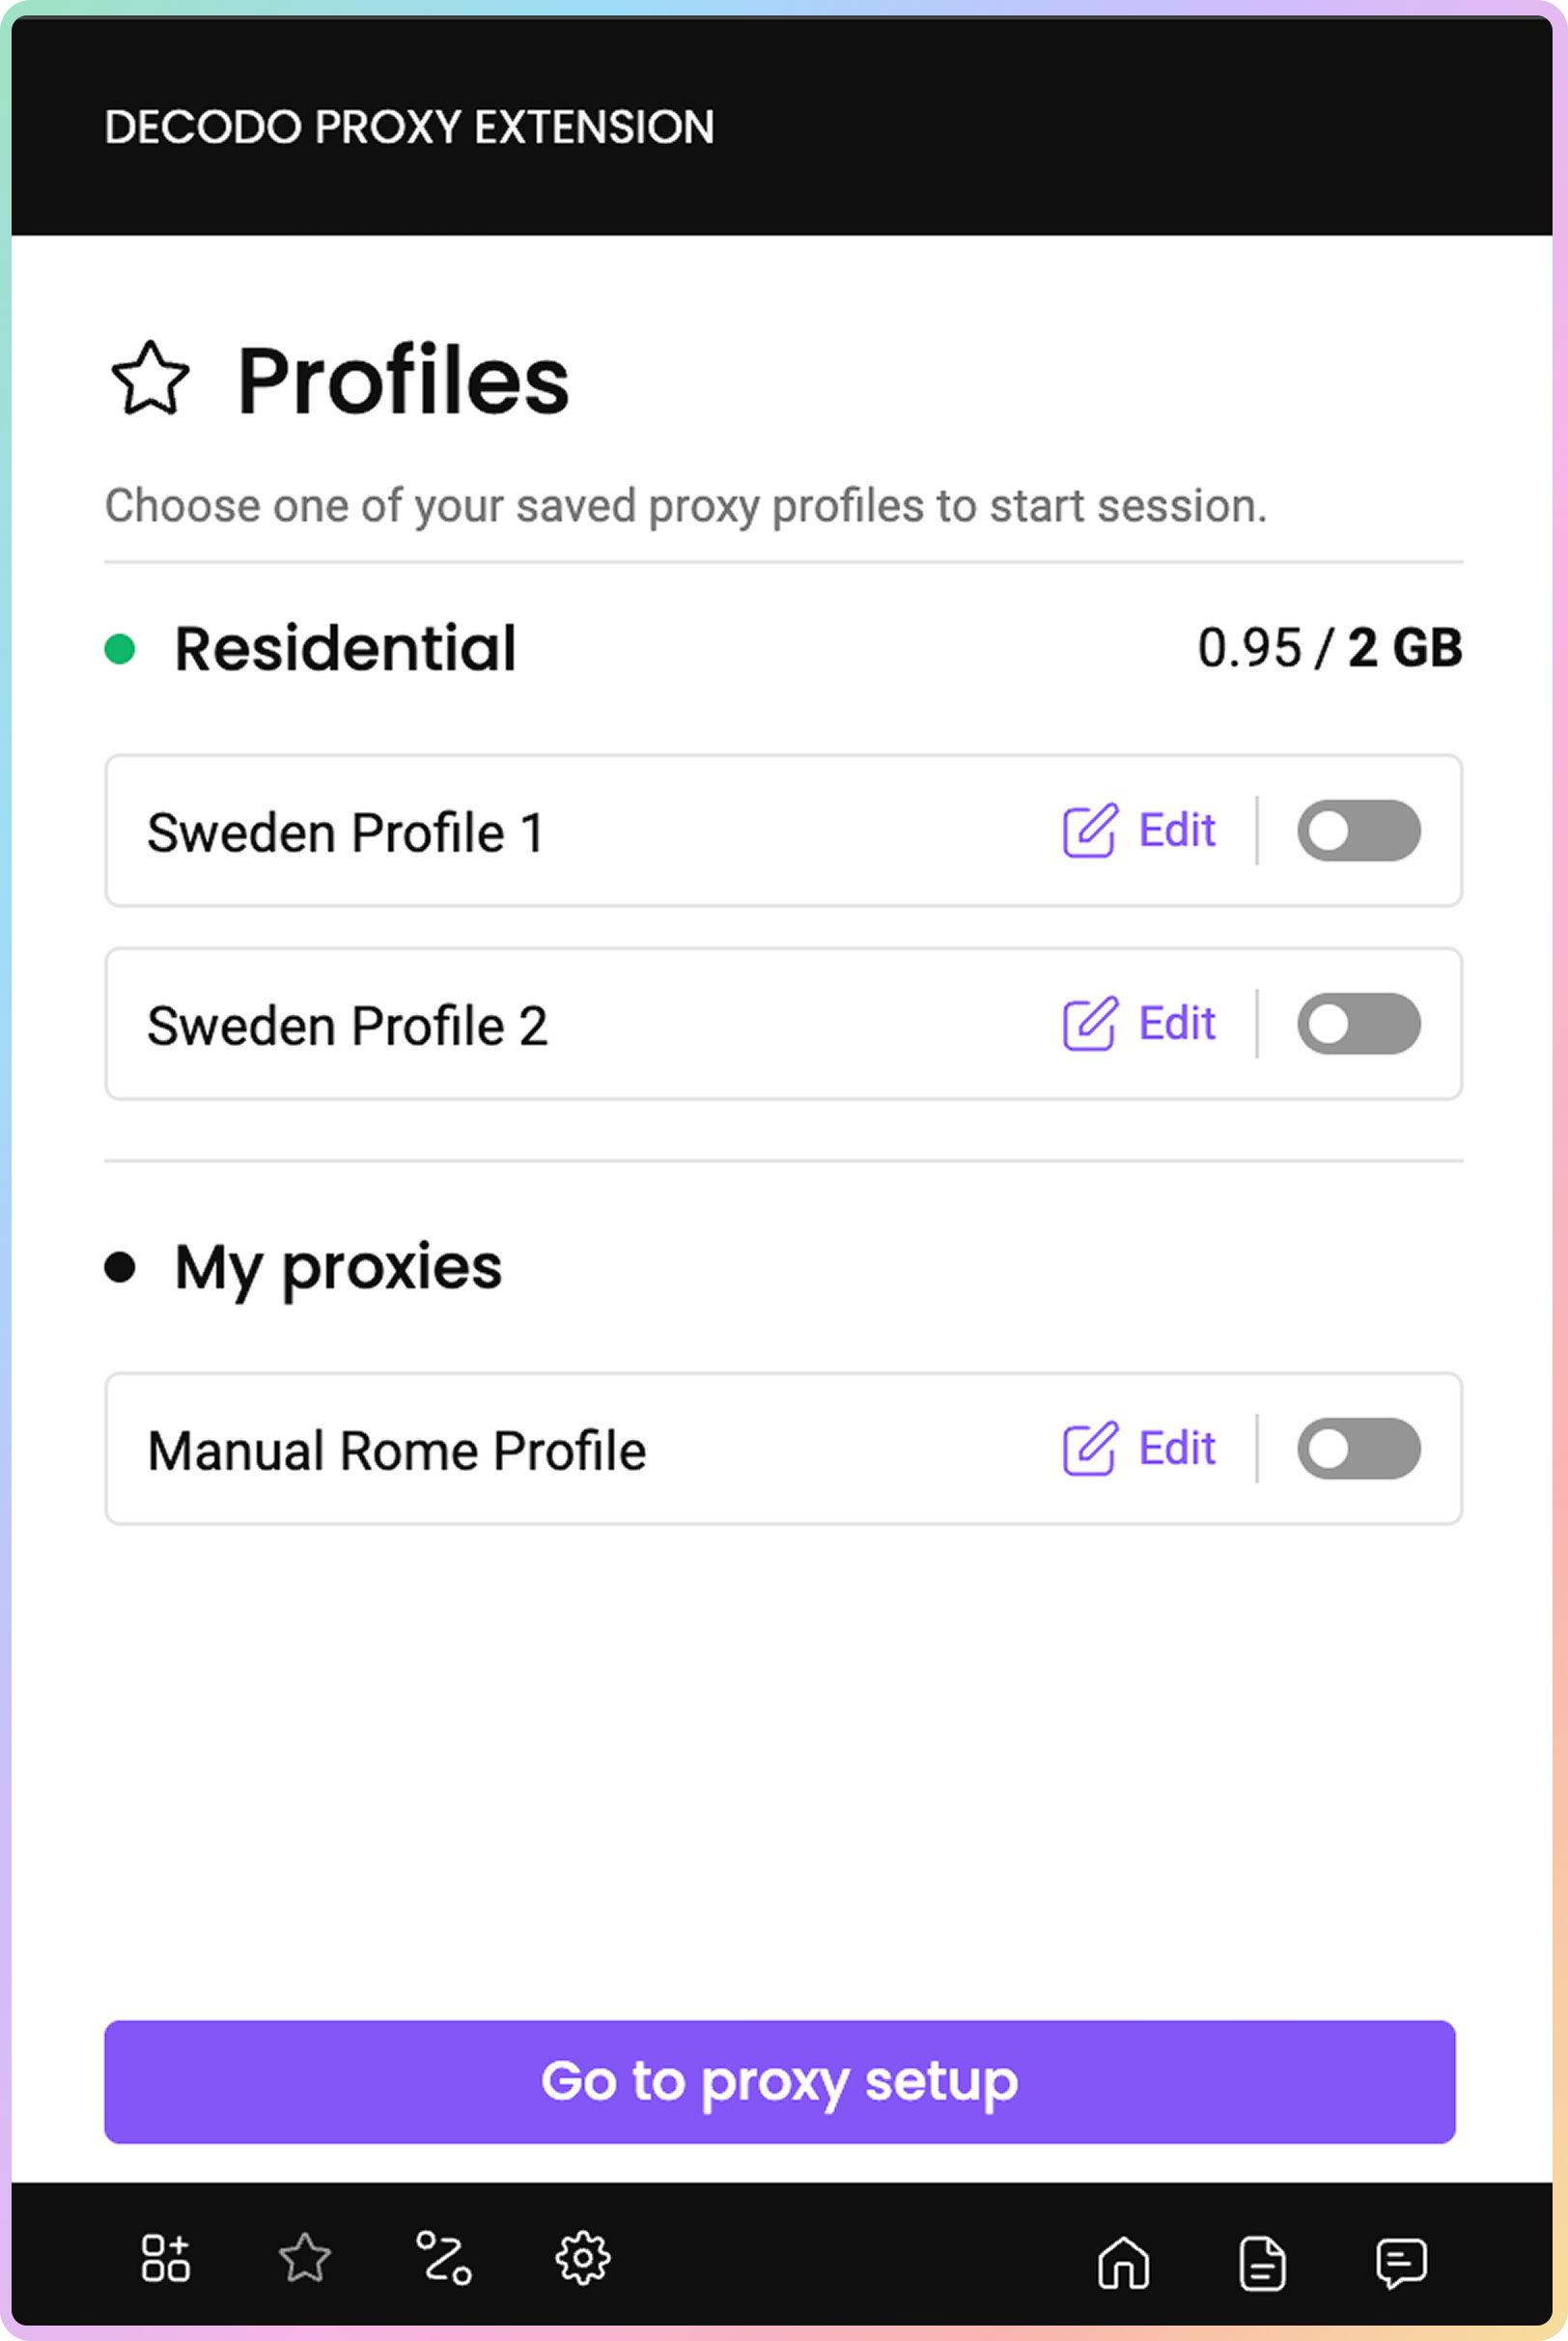
 You can view, manage, or connect to your saved profiles by clicking on the ★ symbol at the bottom left of the extension:
 ## Bypass list
To exclude websites from being proxied, you can enter the undesired website domain names in the **Bypass list** extension window. To open the Bypass list extension window:
Open the Decodo extension and click on the Bypass list button in the bottom-right corner.
Then, simply enter the website domain you'd like to avoid proxying. You can enter multiple websites.
## Bypass list
To exclude websites from being proxied, you can enter the undesired website domain names in the **Bypass list** extension window. To open the Bypass list extension window:
Open the Decodo extension and click on the Bypass list button in the bottom-right corner.
Then, simply enter the website domain you'd like to avoid proxying. You can enter multiple websites.
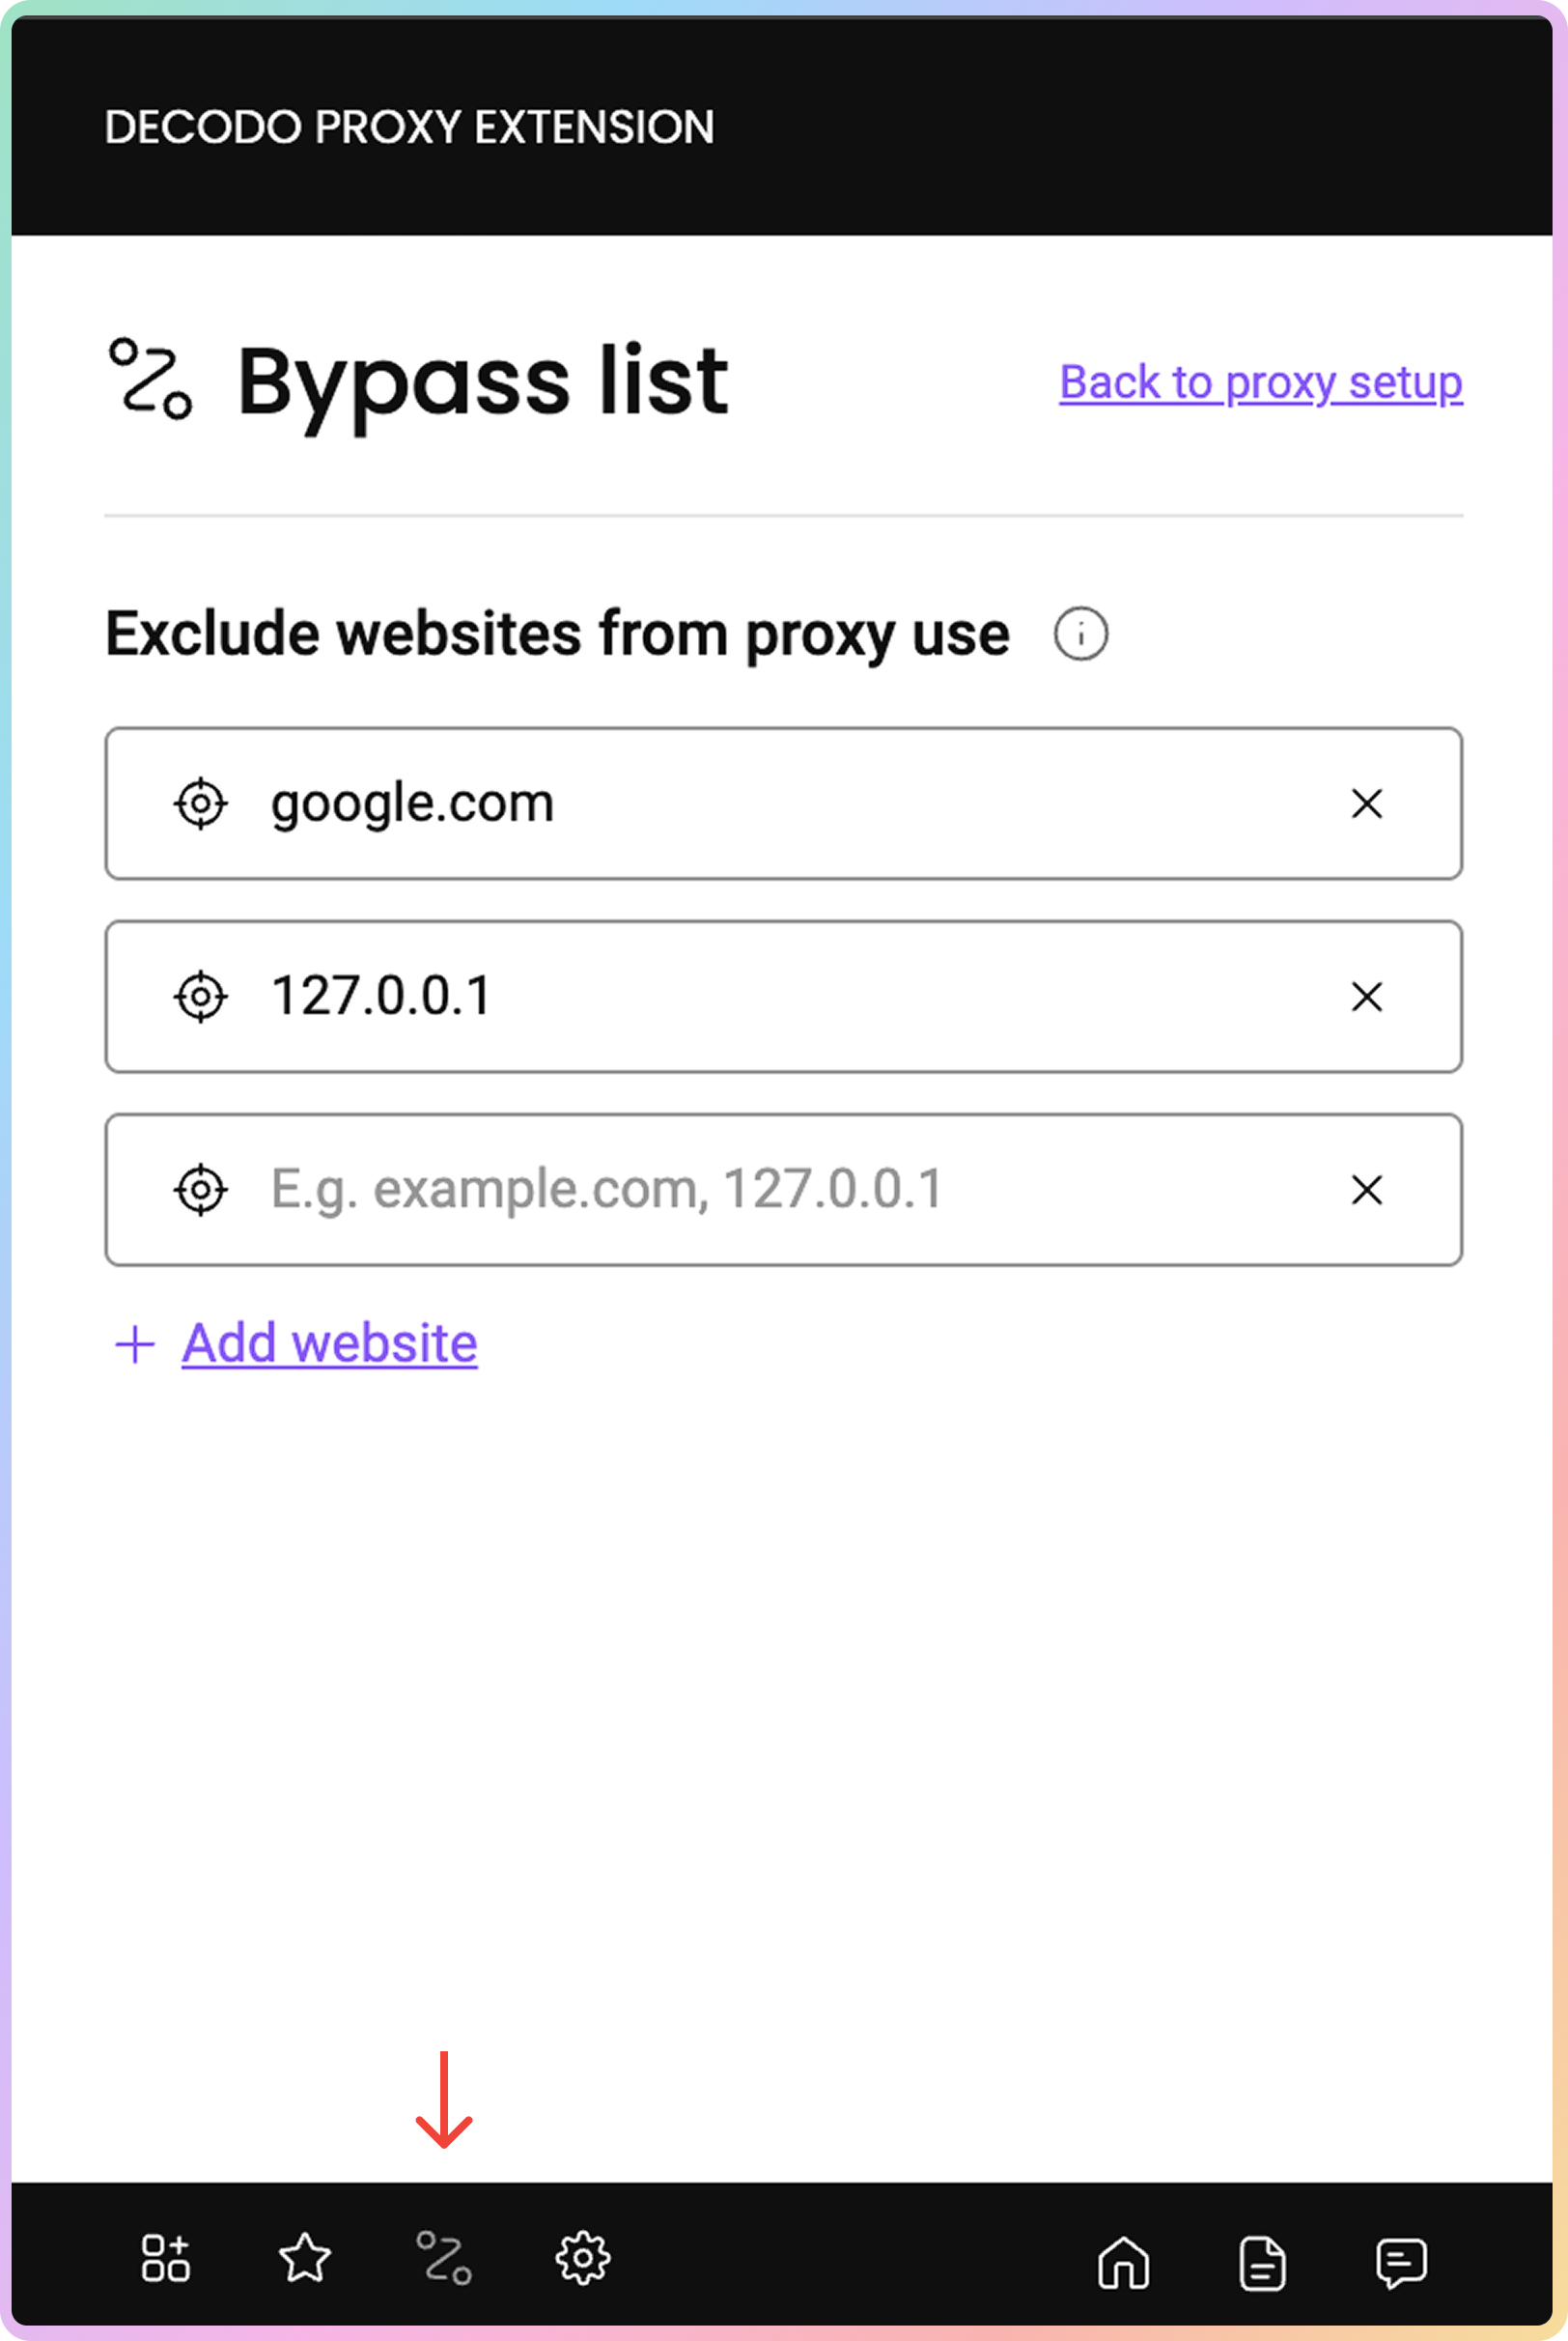 There are multiple formats that can be included in the bypass list. You can learn more about them via the [Chrome Developer API](https://developer.chrome.com/docs/extensions/reference/api/proxy#bypass_list).
## Workplaces
Press the icon at the bottom center of the extension.
You will be able to choose your desired Workspace and use the products shared by the selected Workplace in the extension.
There are multiple formats that can be included in the bypass list. You can learn more about them via the [Chrome Developer API](https://developer.chrome.com/docs/extensions/reference/api/proxy#bypass_list).
## Workplaces
Press the icon at the bottom center of the extension.
You will be able to choose your desired Workspace and use the products shared by the selected Workplace in the extension.
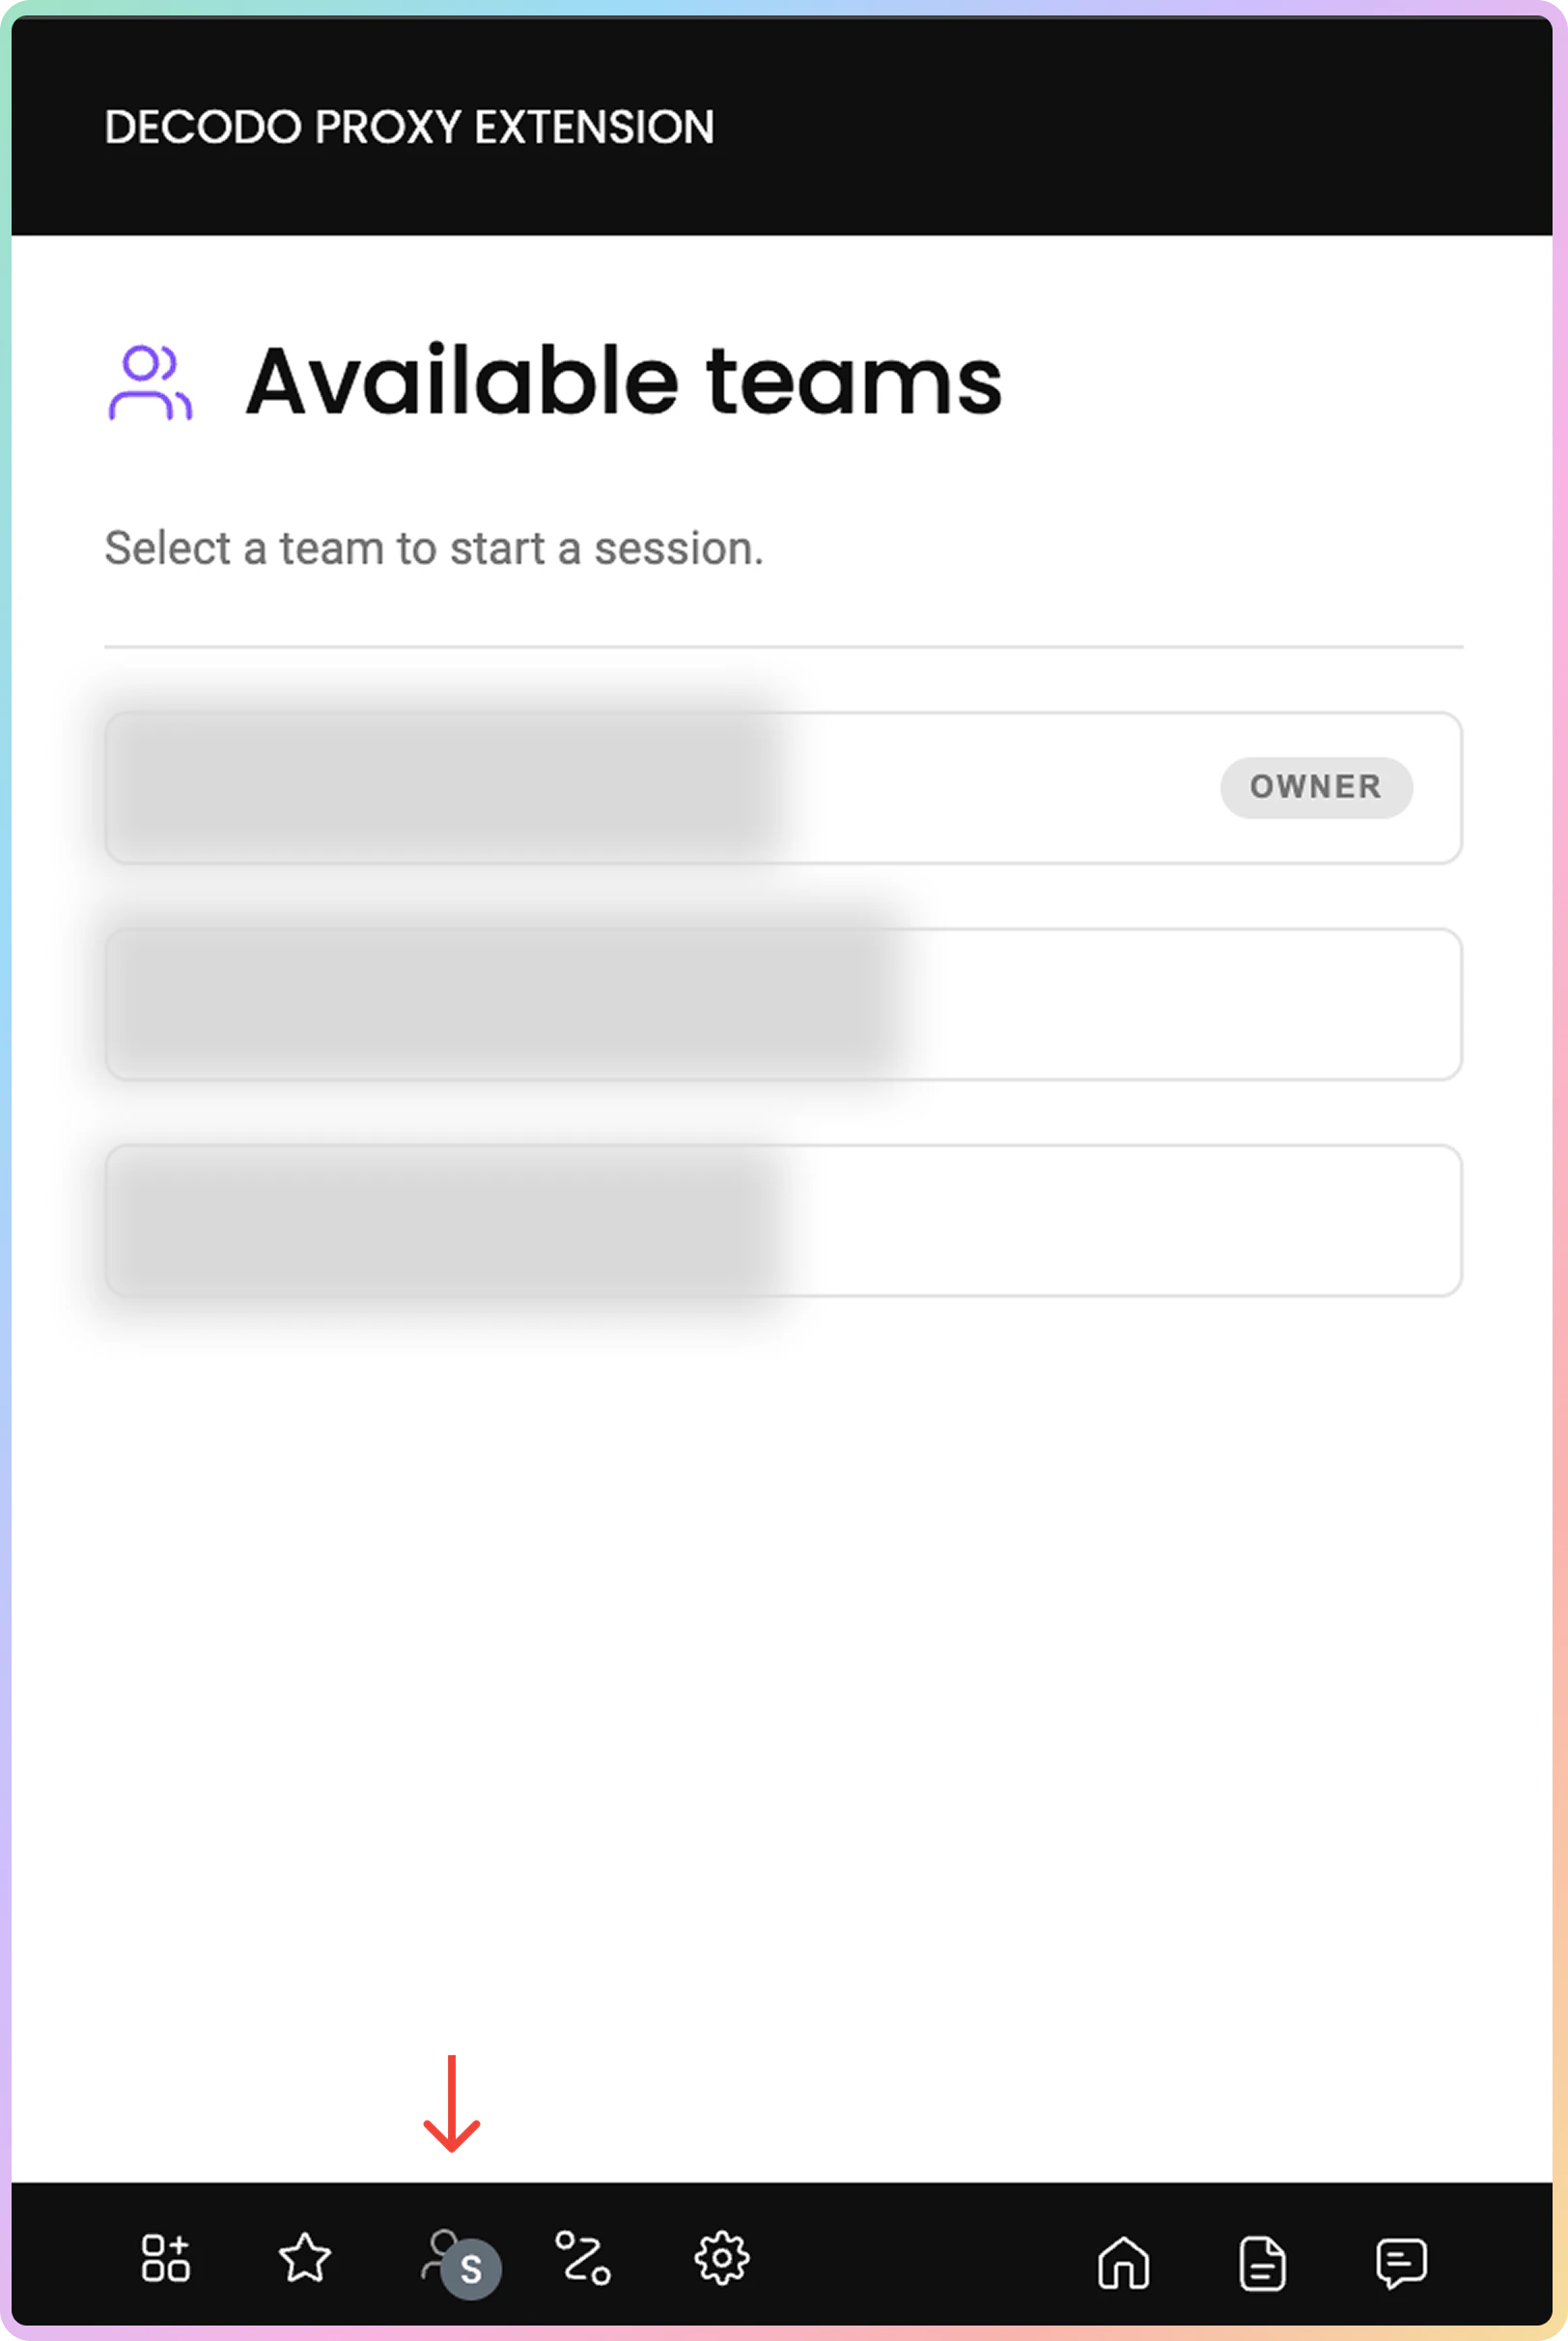 This feature will appear only when your account is part of **two or more** Workplaces.
## Errors
* **Unable to connect with the credentials provided.** This error means that you have entered your proxy username and/or password incorrectly. Please log in to your dashboard account and go to the Proxy setup section. You can adjust the credentials there.
* **Unsuccessful request. Try changing the location or the session type and connect again.** If you receive this error, try enabling the proxy using a different location or session type. If the error message persists, make sure the following details are correct:
* Your residential or datacenter subscription is active.
* No traffic limit has been set for your Proxy User. You can check that in the **Proxy Setup** section of your **Dashboard**.
* If you are using Whitelisted IP authentication, check if the current IP of your device is whitelisted. If everything looks fine, but you still get this error, let us know via [**Live chat**](https://direct.lc.chat/12092754/1)!
* **Unsuccessful request. Try changing the location or the proxy rotation type and connect again.** If you receive this error, try enabling the proxy using a different location or rotation type. If the error message persists, try doing the steps in the error message above.
* **Unsuccessful request. Please ensure that you enter a valid proxy username, password, and IP address.** This error means that you have entered your proxy username, password, or whitelisted IP incorrectly. Please log in to your dashboard account and go to the **Proxy Setup** section. You can double-check the credentials there.
* **Too many unsuccessful login attempts. Please try again later.** You will see this error if you've entered your credentials incorrectly five times in a row. It's there to prevent abuse and ensure that our services are functioning as intended. The block will clear after one hour.
* **No whitelisted IP found, visit the dashboard to manage IPs.** You will see this error if you have selected a whitelisted IP as the authentication method but haven't whitelisted any IP addresses in your dashboard. To do so, go to the **Proxy setup** section and add your desired IP address.
***
Need help or just want to say hello? Our support is available 24/7. \
You can also reach us anytime via email at [support@decodo.com](mailto:support@decodo.com).
Can't find what you're looking for? Request an article! \
Have feedback? Share your thoughts on how we can improve.
This feature will appear only when your account is part of **two or more** Workplaces.
## Errors
* **Unable to connect with the credentials provided.** This error means that you have entered your proxy username and/or password incorrectly. Please log in to your dashboard account and go to the Proxy setup section. You can adjust the credentials there.
* **Unsuccessful request. Try changing the location or the session type and connect again.** If you receive this error, try enabling the proxy using a different location or session type. If the error message persists, make sure the following details are correct:
* Your residential or datacenter subscription is active.
* No traffic limit has been set for your Proxy User. You can check that in the **Proxy Setup** section of your **Dashboard**.
* If you are using Whitelisted IP authentication, check if the current IP of your device is whitelisted. If everything looks fine, but you still get this error, let us know via [**Live chat**](https://direct.lc.chat/12092754/1)!
* **Unsuccessful request. Try changing the location or the proxy rotation type and connect again.** If you receive this error, try enabling the proxy using a different location or rotation type. If the error message persists, try doing the steps in the error message above.
* **Unsuccessful request. Please ensure that you enter a valid proxy username, password, and IP address.** This error means that you have entered your proxy username, password, or whitelisted IP incorrectly. Please log in to your dashboard account and go to the **Proxy Setup** section. You can double-check the credentials there.
* **Too many unsuccessful login attempts. Please try again later.** You will see this error if you've entered your credentials incorrectly five times in a row. It's there to prevent abuse and ensure that our services are functioning as intended. The block will clear after one hour.
* **No whitelisted IP found, visit the dashboard to manage IPs.** You will see this error if you have selected a whitelisted IP as the authentication method but haven't whitelisted any IP addresses in your dashboard. To do so, go to the **Proxy setup** section and add your desired IP address.
***
Need help or just want to say hello? Our support is available 24/7. \
You can also reach us anytime via email at [support@decodo.com](mailto:support@decodo.com).
Can't find what you're looking for? Request an article! \
Have feedback? Share your thoughts on how we can improve.