Getting the Proxies
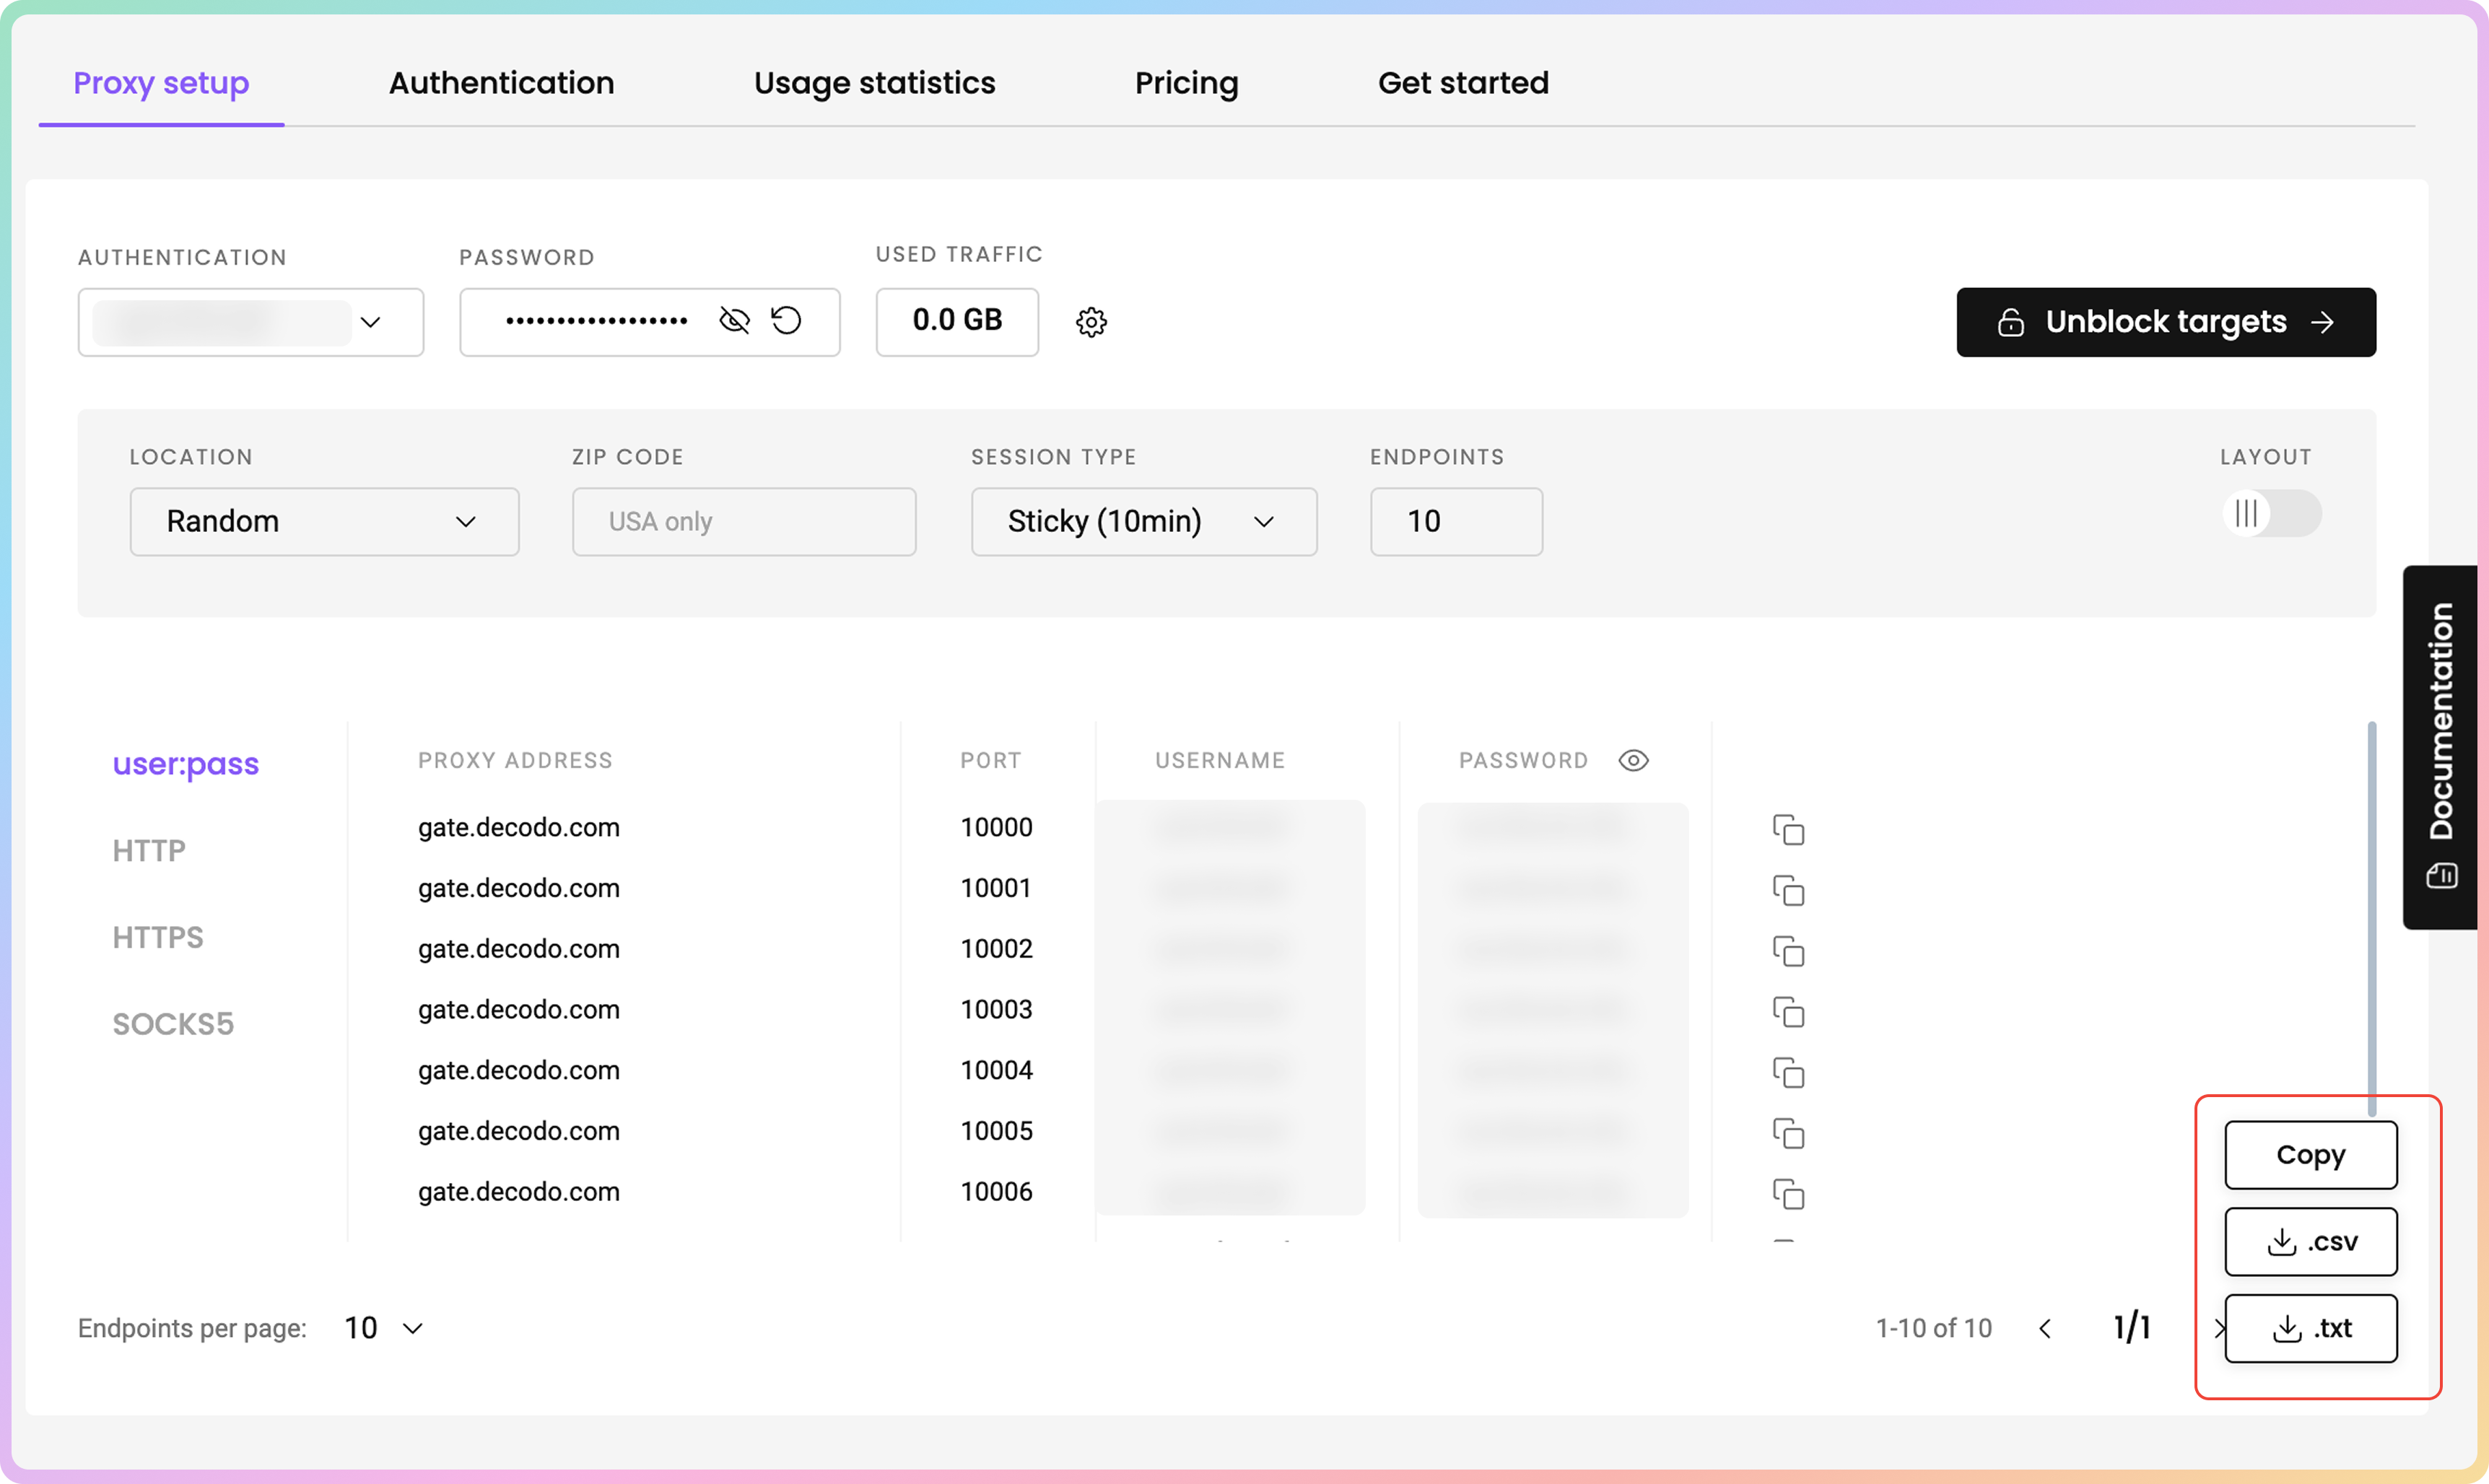
Log in to your dashboard. Navigate to the Residential - Proxy setup page. You will find the Endpoint generator by scrolling down.
Select your Authentication method and Location.
Select the Protocol. If needed, you can change the number of proxies you want right above the generated list on the right side.
Proxy Setup
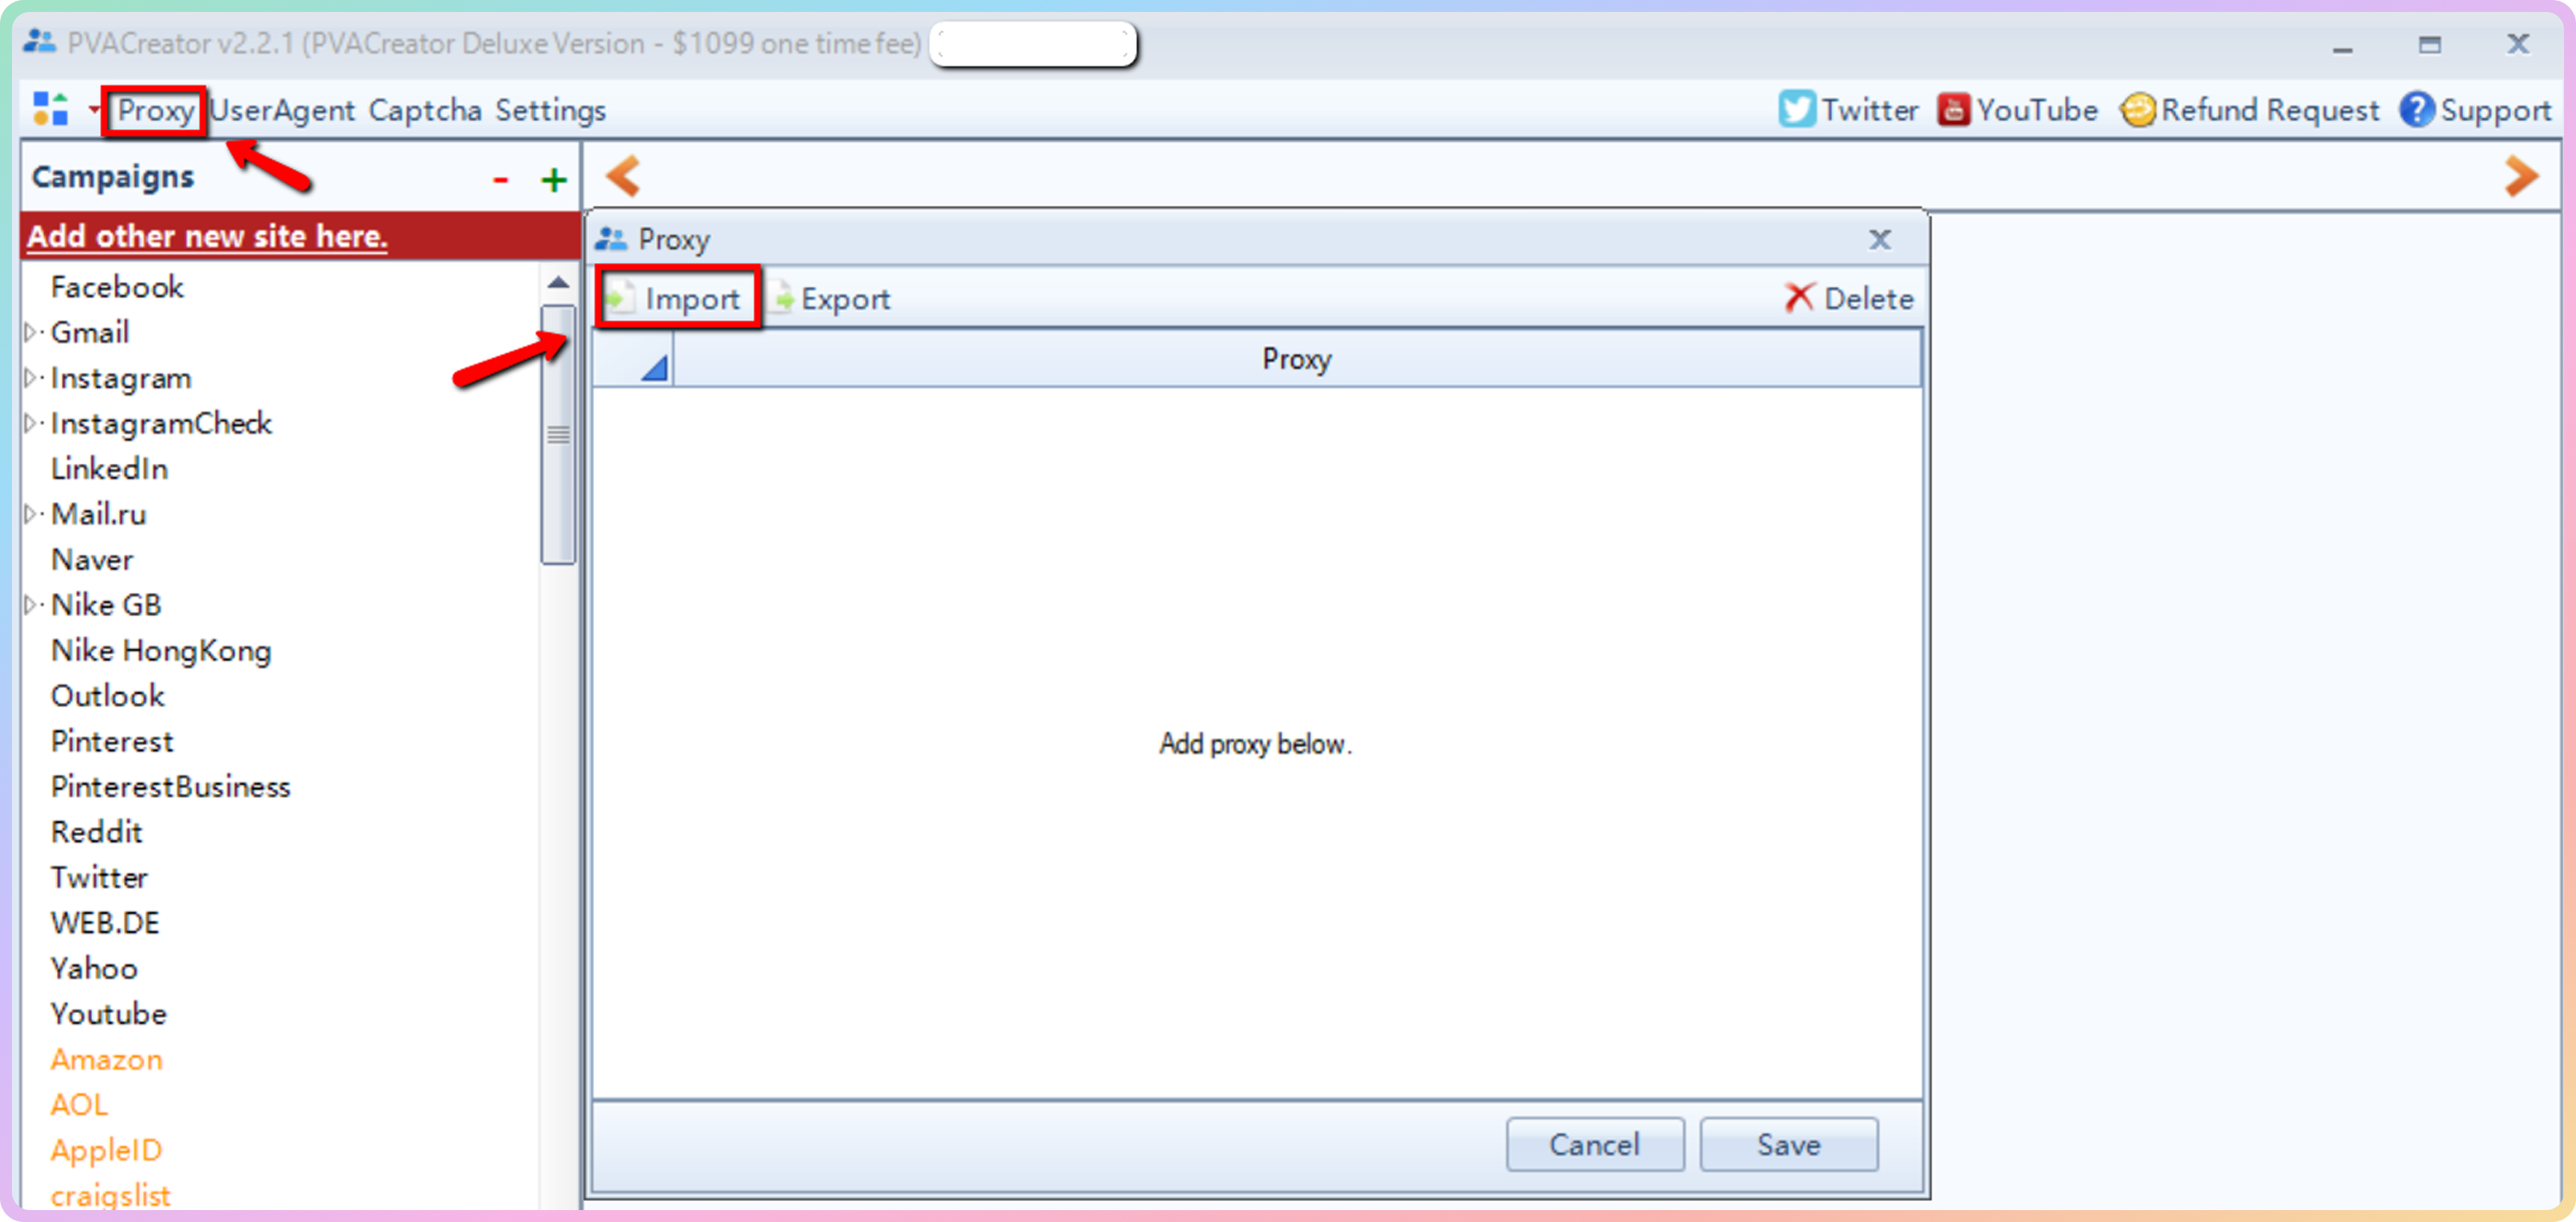
Once you open the campaign, go to the Proxy tab, and then click Bind proxy. This will fill in the proxy table with the proxies that you’ve already imported. Alternatively, you can select Import (instead of Bind Proxy).
Support
Need help or just want to say hello? Our support is available 24/7.
You can also reach us anytime via email at support@decodo.com.
You can also reach us anytime via email at support@decodo.com.
Feedback
Can’t find what you’re looking for? Request an article!
Have feedback? Share your thoughts on how we can improve.
Have feedback? Share your thoughts on how we can improve.