- Static Residential proxies use the following endpoint and port for random requests:
- Here are a few basic request examples in various programming languages:
Authentication
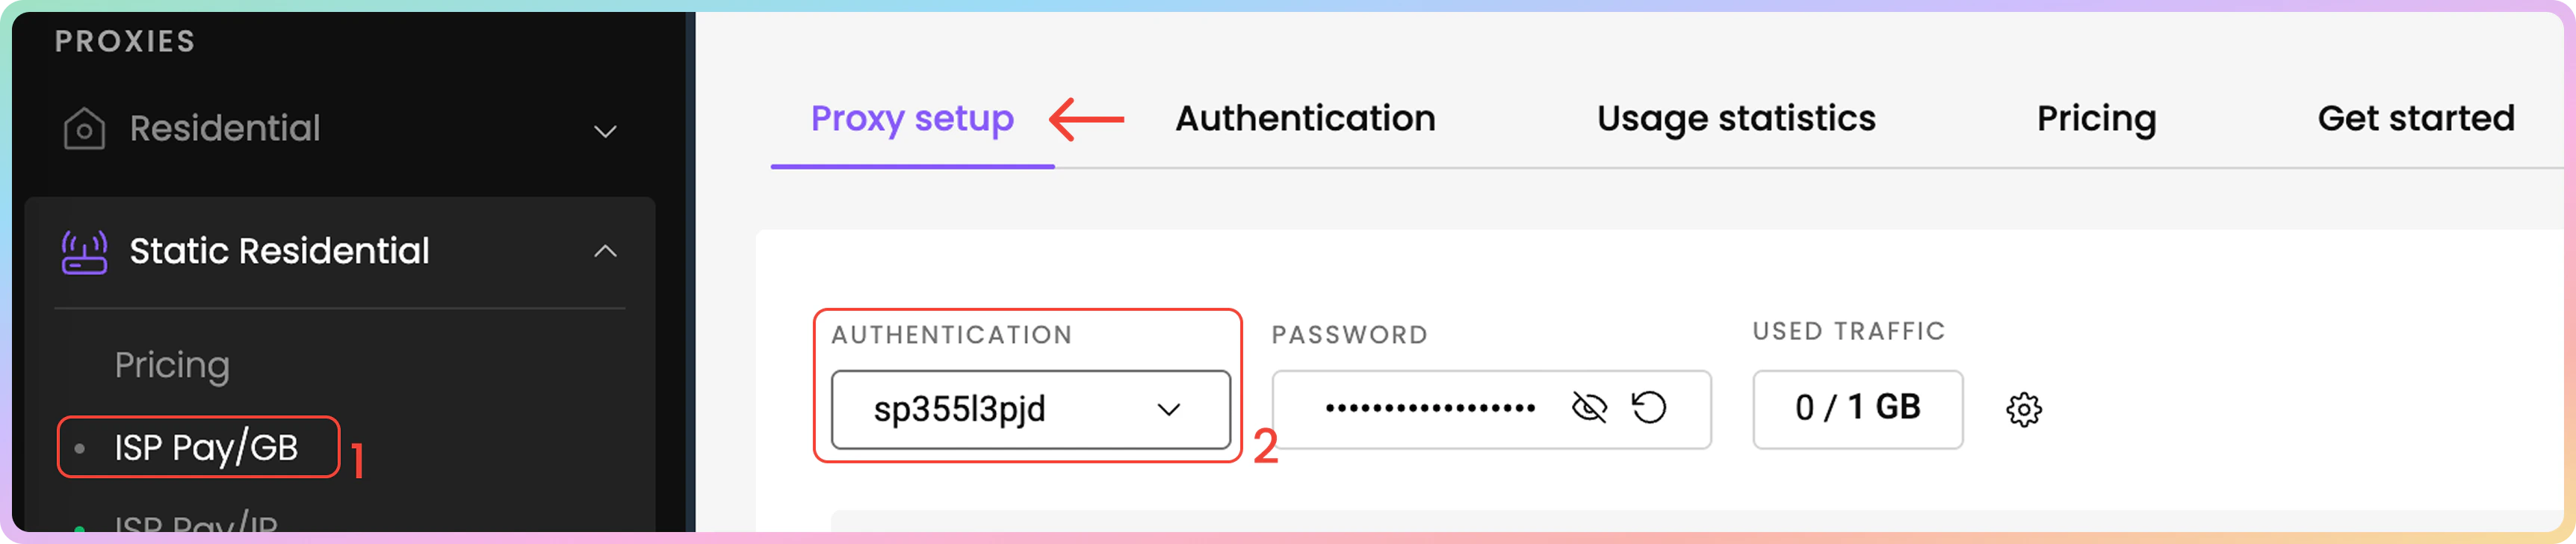
- First, navigate to the Static Residential → ISP Pay/GB → Proxy setup page on your dashboard and look for the Authentication section.
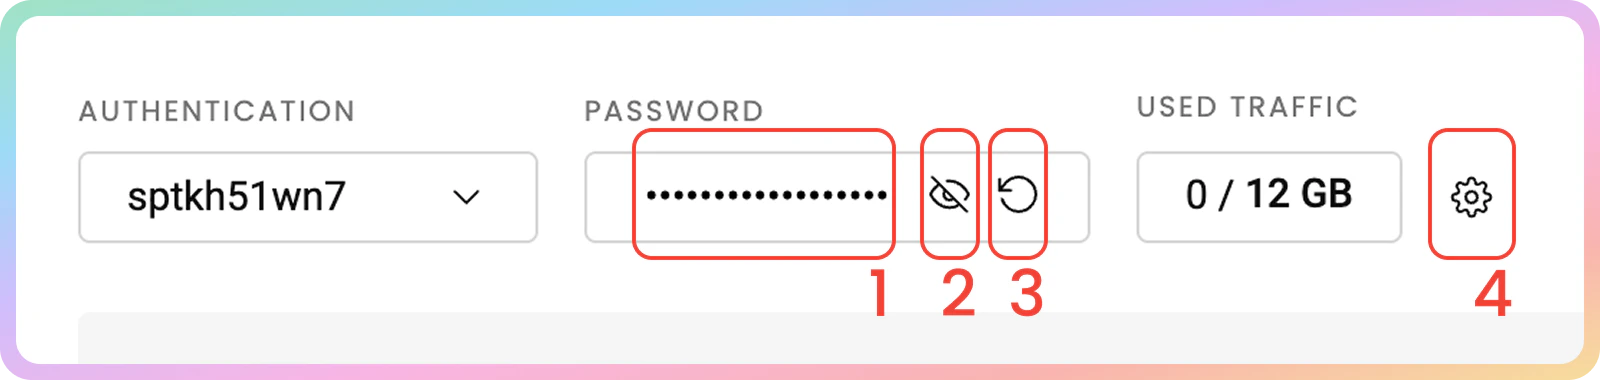
- You’ll see that your first proxy user and password are created automatically.
- Next, select your proxy authentication method.
- This can be either your whitelisted IP address or one of your proxy users
Proxy Setup
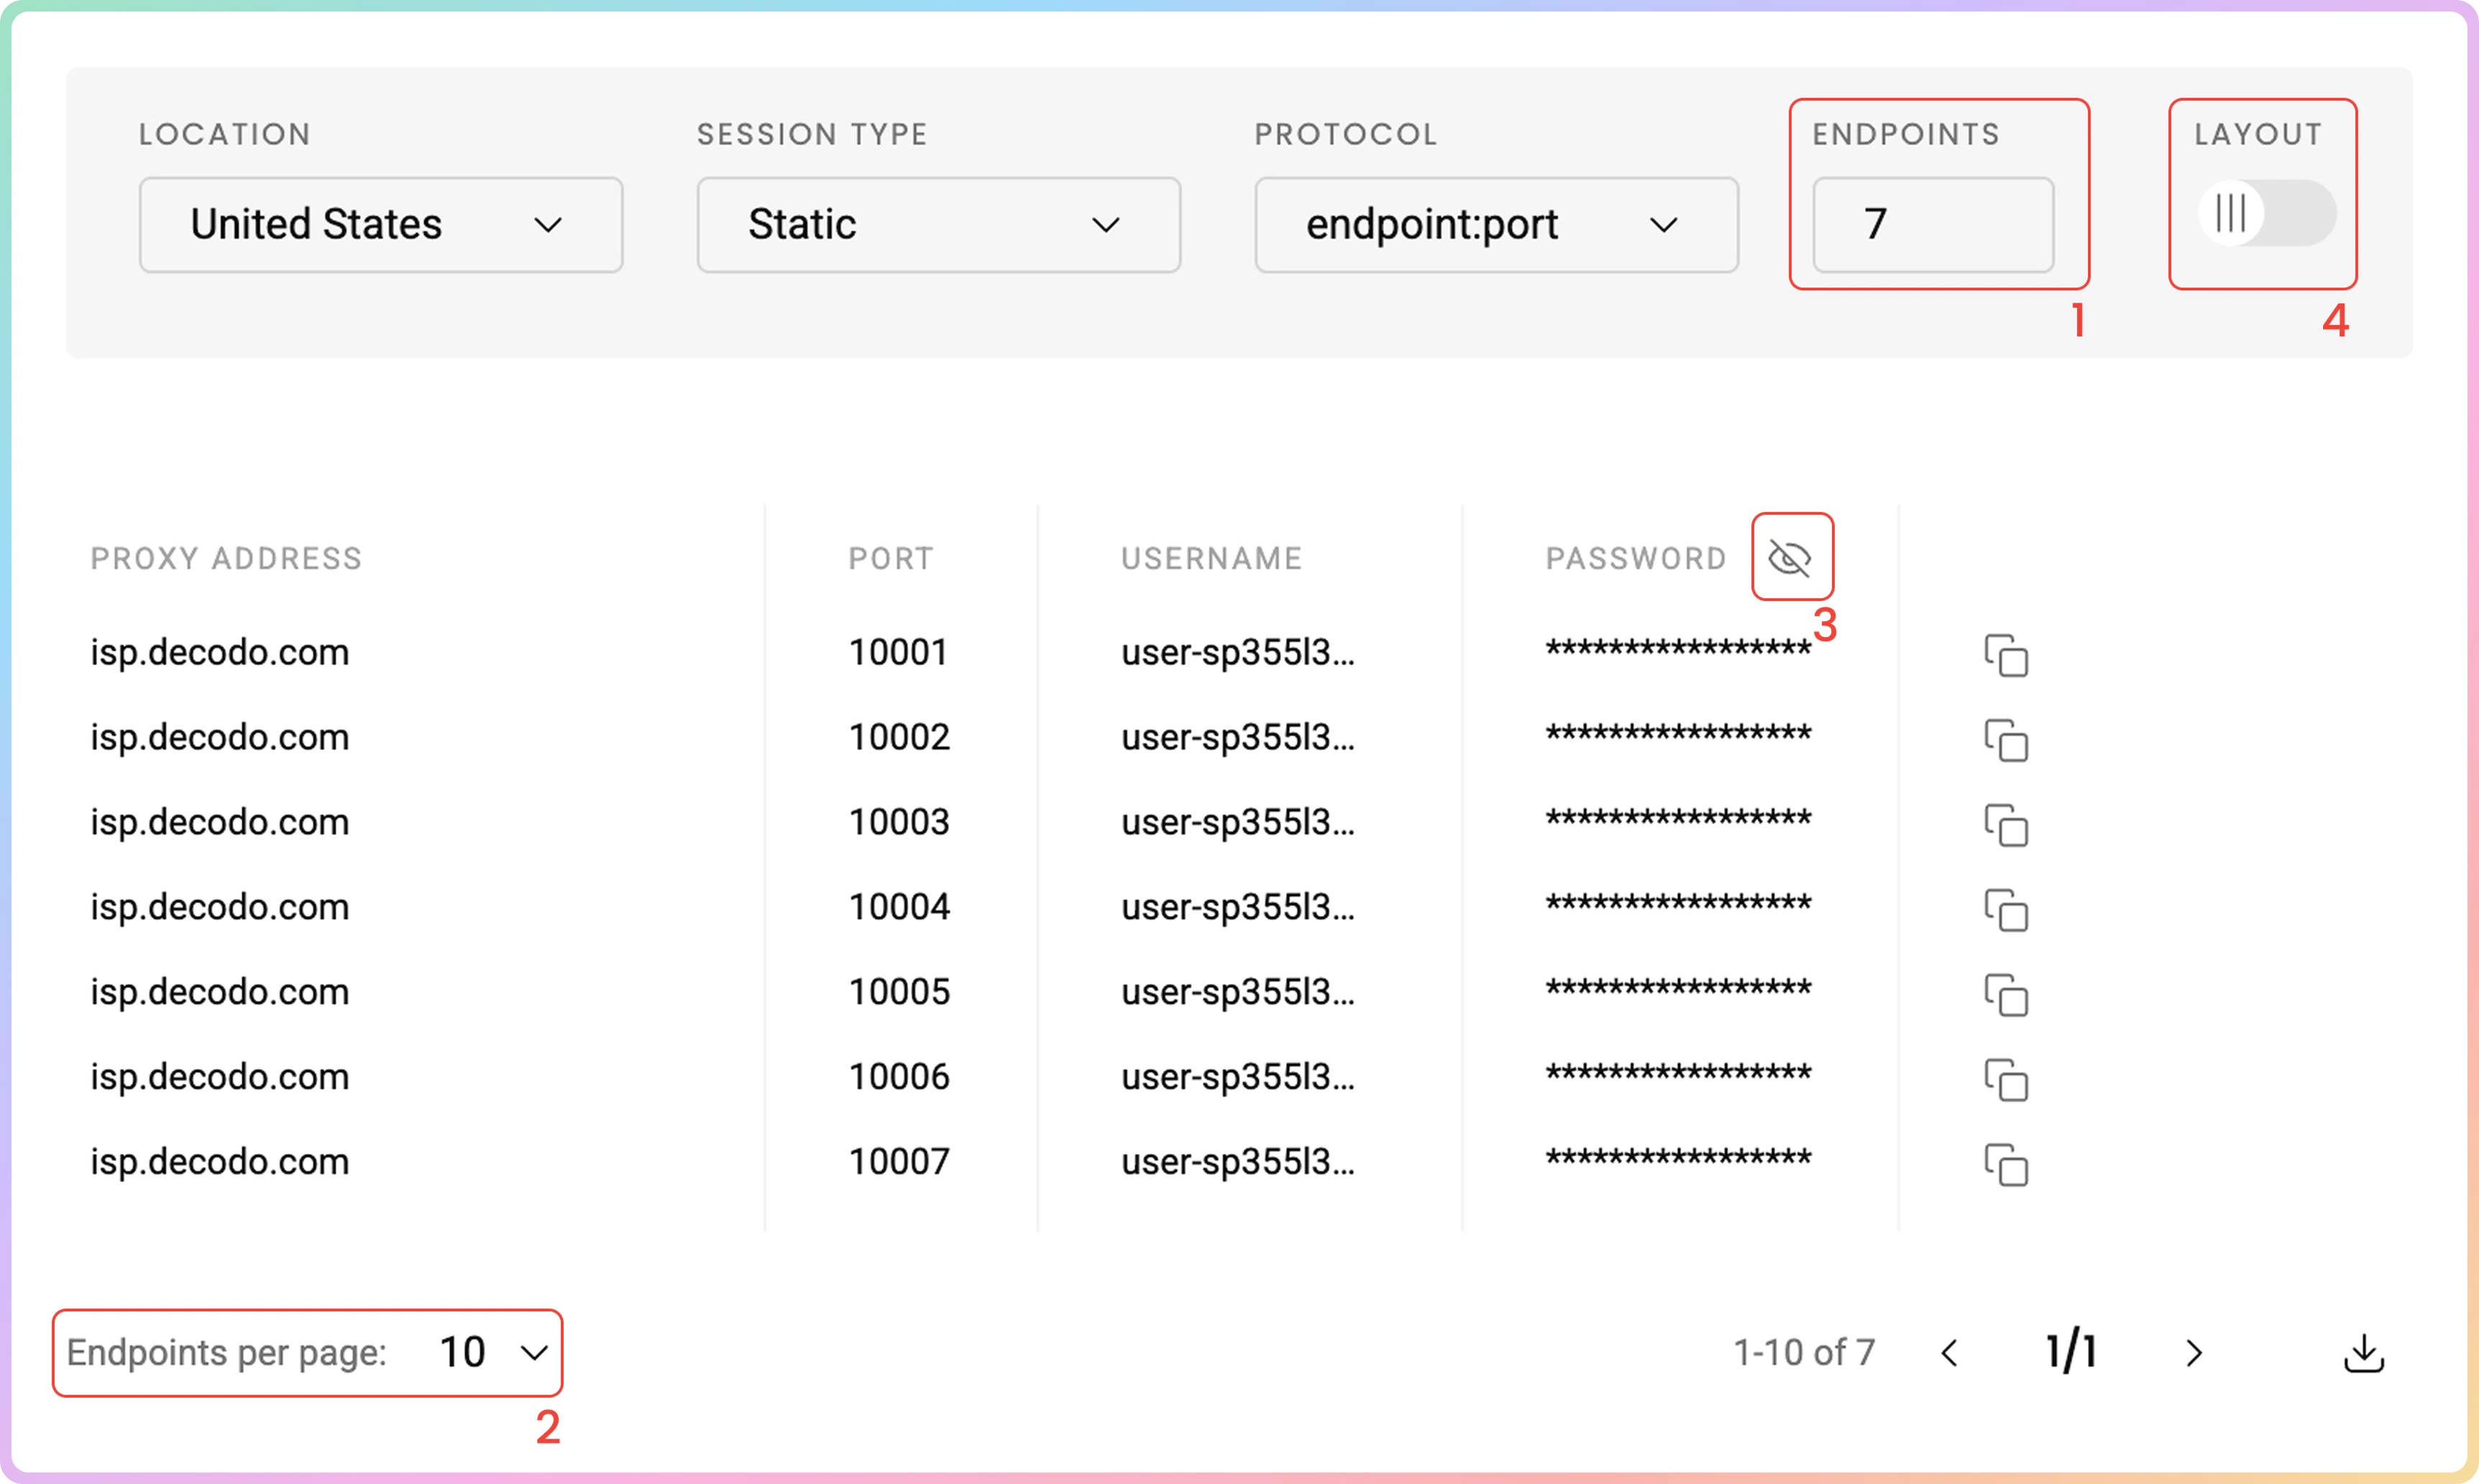
In the ISP Pay/GB Proxy Setup section of your dashboard, selecting various parameters will generate examples you can easily copy into your applications, tools, or code.- On the Static Residential → ISP Pay/GB → Proxy setup page, find the parameter selection section below your authentication methods.

Location
- First, select the Location of your proxy.
IP-based Whitelisting And Location Selection
- For ISP Pay/GB Proxies a location can only be specified when using the
user:passauthentication method. Otherwise, you can only select arandomlocation with a whitelisted IP.
-1.png?fit=max&auto=format&n=5nAanidmwbHFDo3f&q=85&s=2623b42014ceede686934955519e9133)
.png?fit=max&auto=format&n=5nAanidmwbHFDo3f&q=85&s=d2b7a3bdcf8775ee5e40cee662c21cf5)
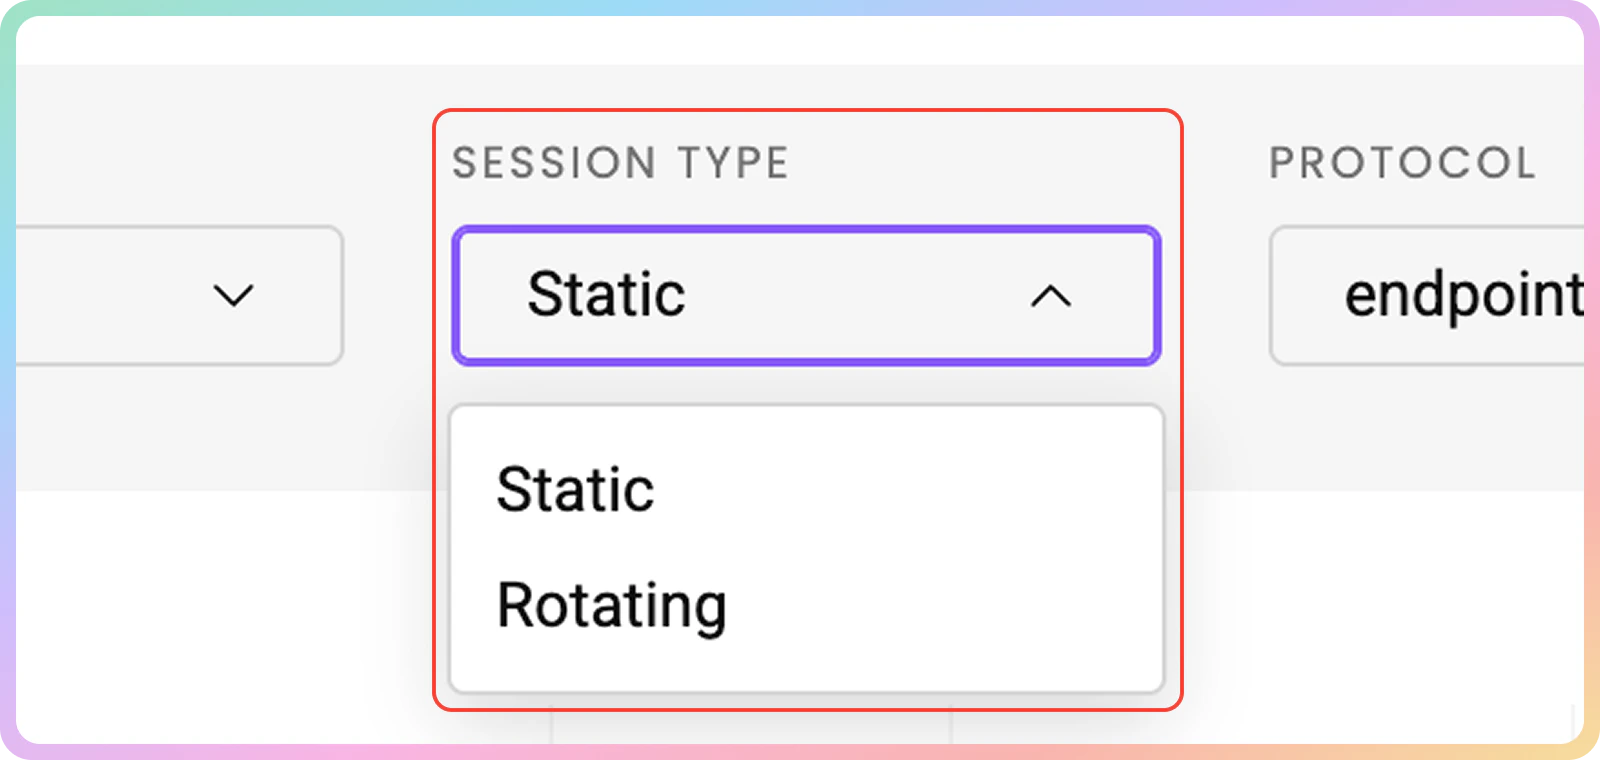
Session Type
- Afterward, select your preferred Session Type, Rotating or Static.
Session Ports
- Static – Ports
10001-63000provide a static IP address that remains until you decide to change it or the session ends. - Rotating – Port
10000rotates the IP address on every request you make.
Protocol
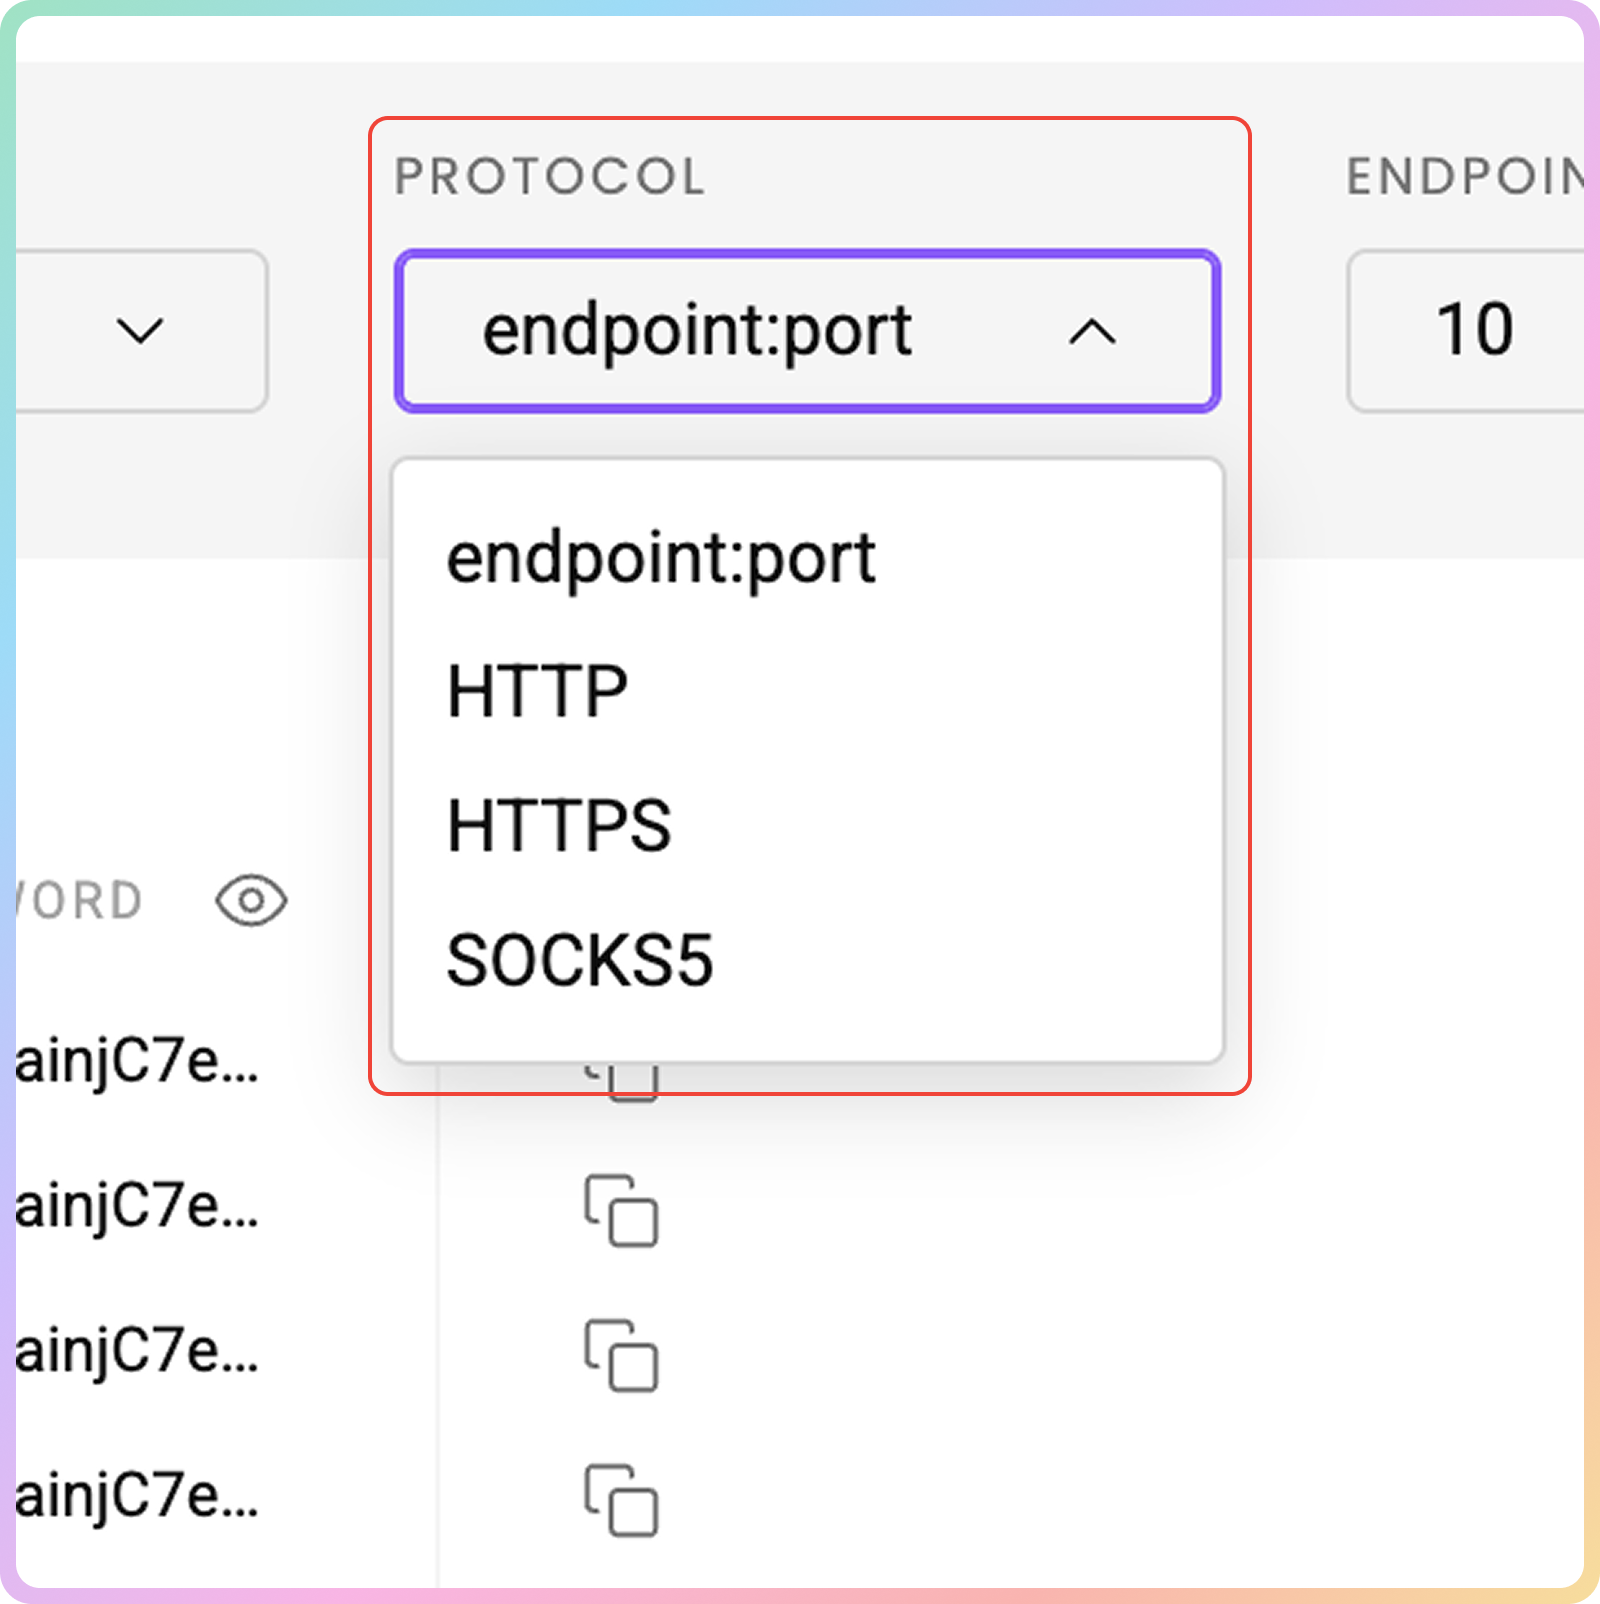
- Finally, choose the Protocol format.
Endpoint:port,HTTP,HTTPS, andSOCKS5options are available.
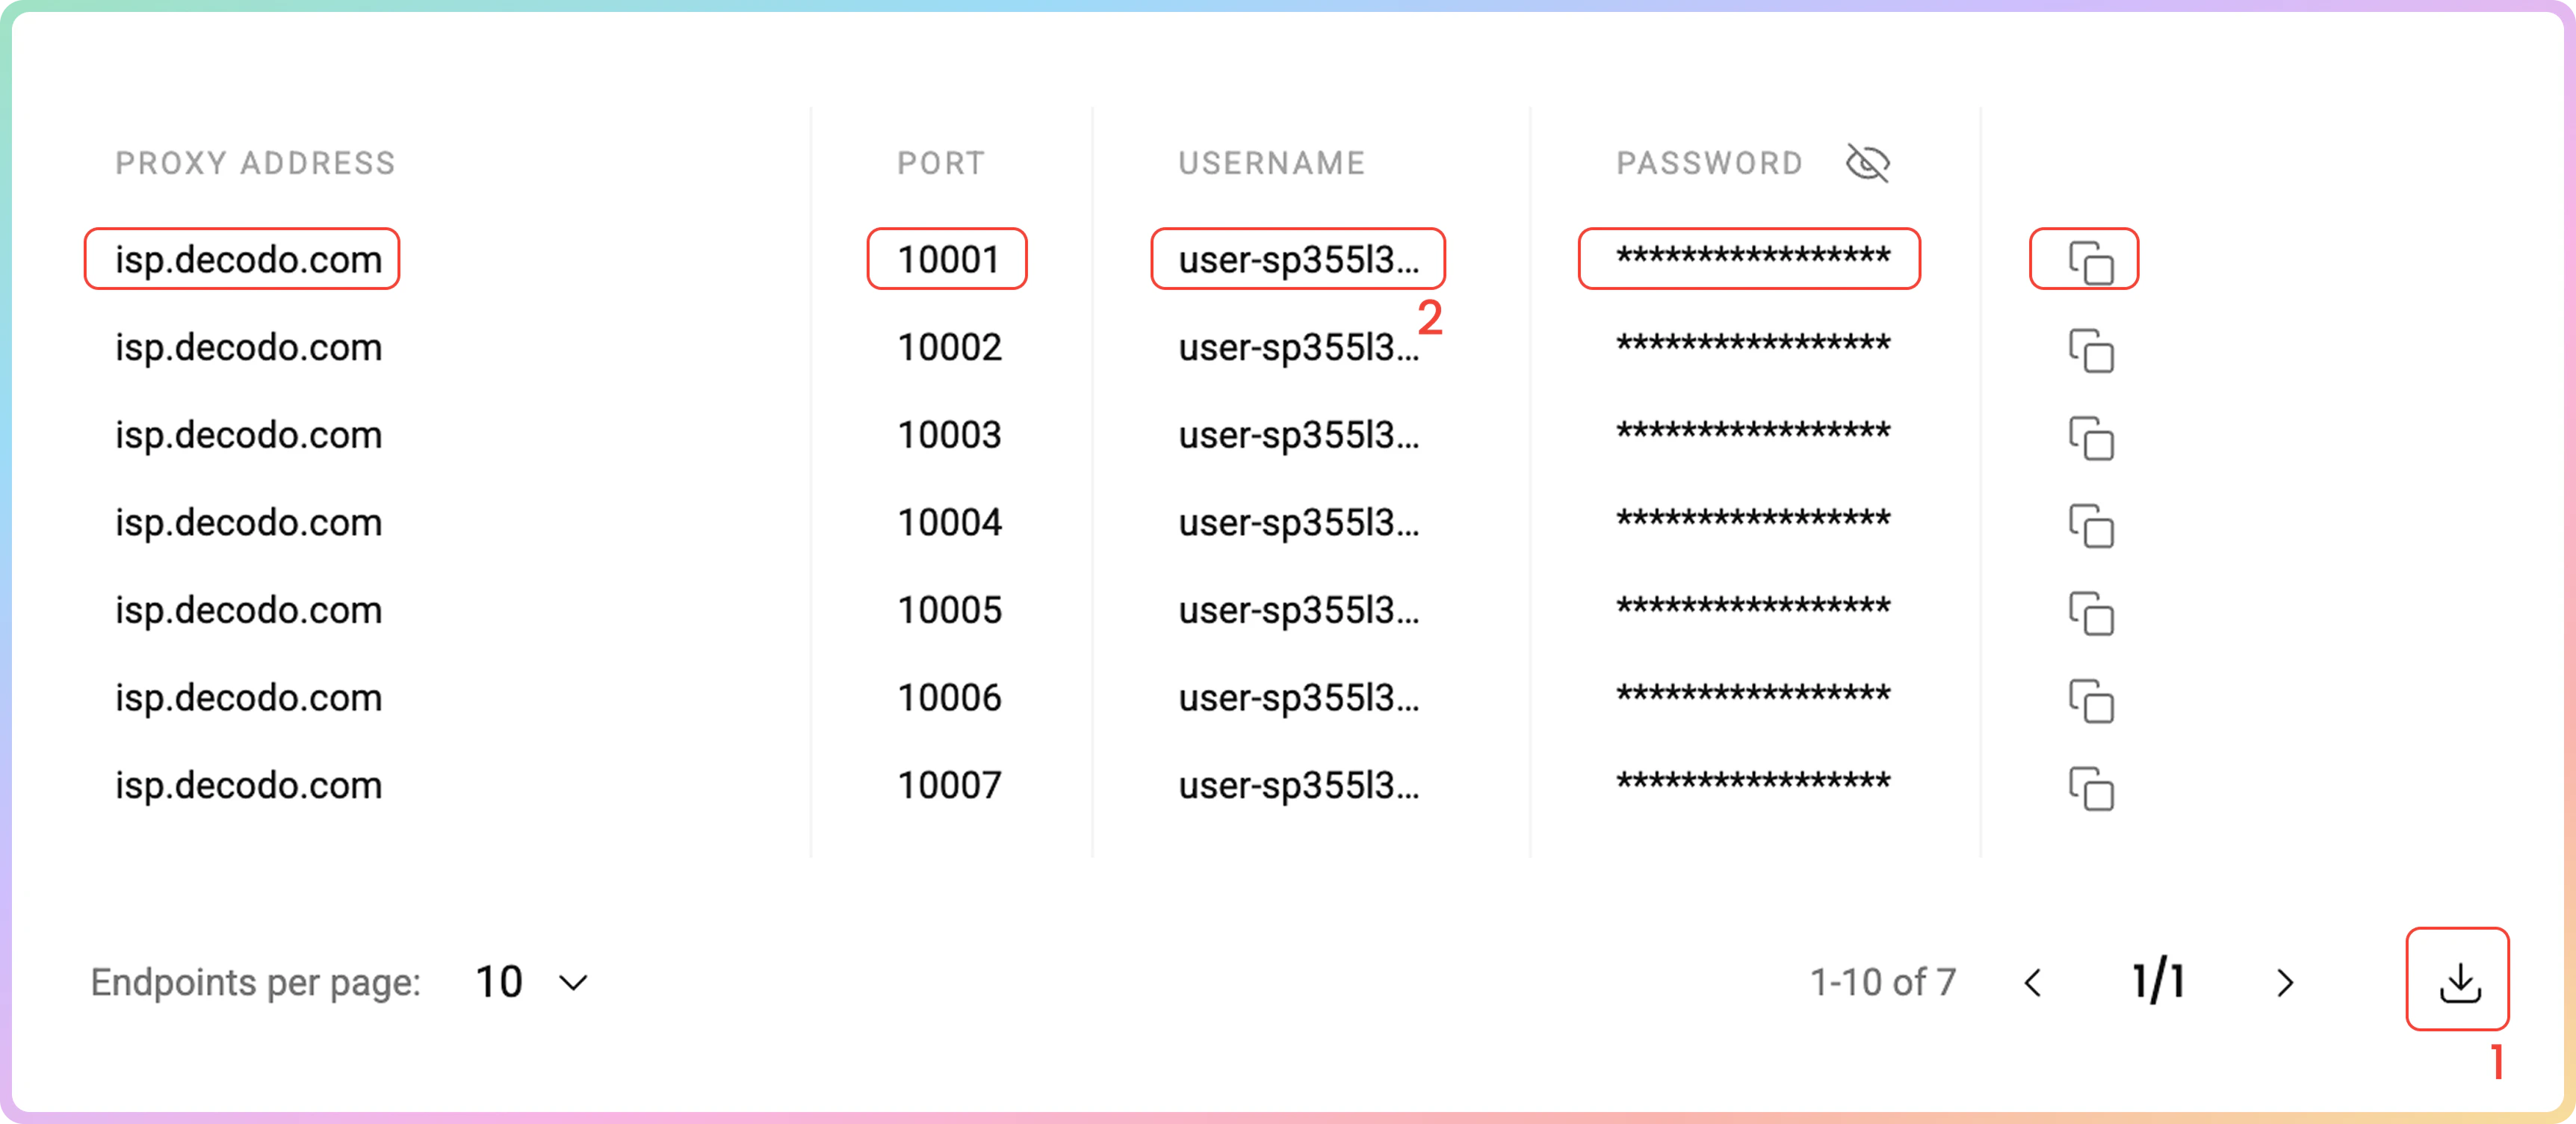
Proxy List Examples
Once you’re done setting up in the Proxy Setup section, you will see a proxy list of generated endpoints and ports based on your selection.- Simply copy it to your clipboard, or download a
.csvor.txtfile of the created proxy list. - Alternatively, copy single elements of the generated parameters, such as the Proxy Address, Port, Username, and Password, or copy the entire example string.
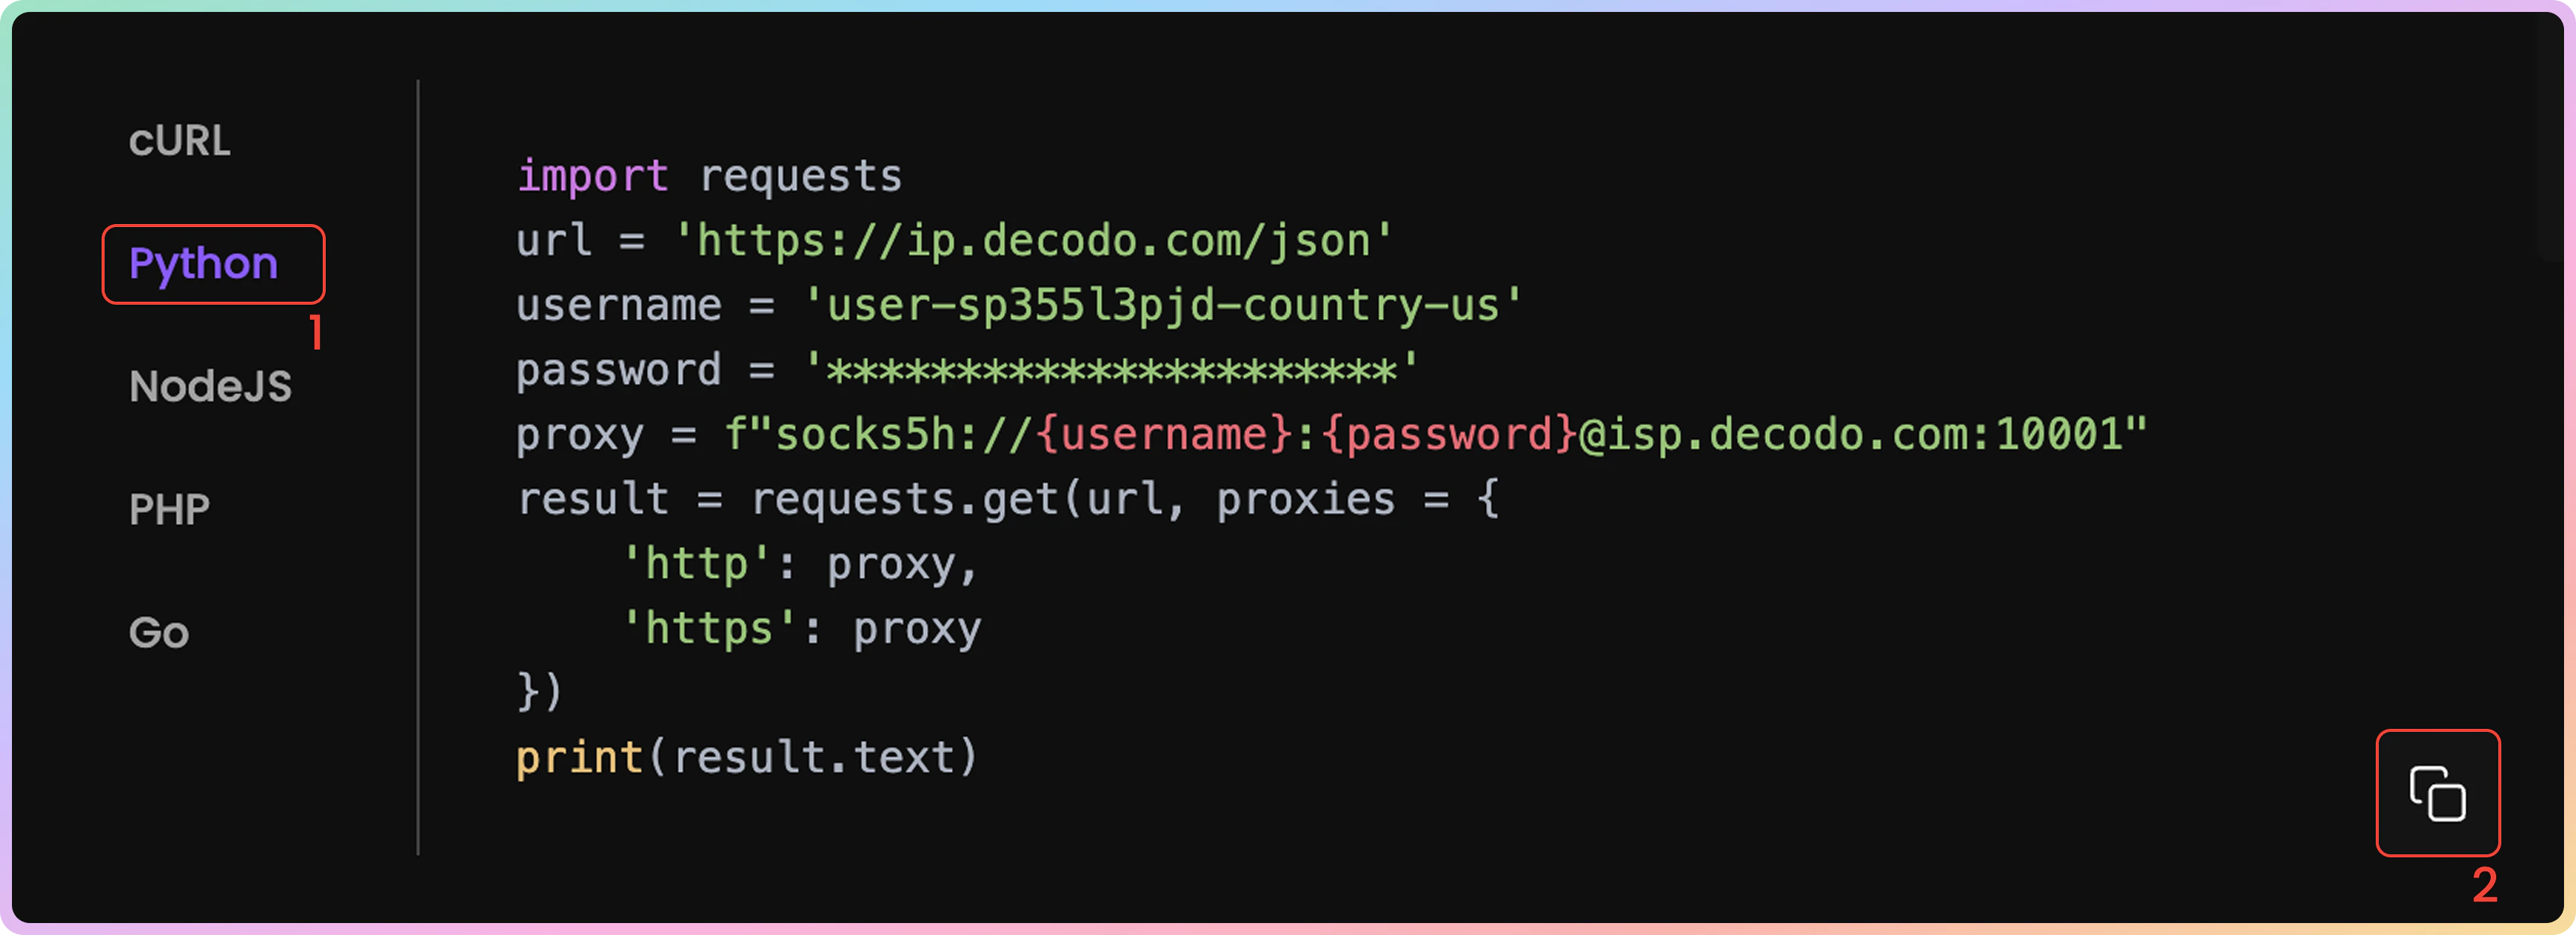
Code Examples
It’s important to confirm your proxy is operational before using it in your projects. The code examples generated based on your previous selection at the bottom of your Proxy Setup dashboard allow you to quickly test whether your proxy is connecting correctly and displaying your new IP address.- You can select any of the available languages:
cURL,Python,NodeJS,PHP, orGO. - Copy the pre-configured code example by clicking Copy in the bottom right corner.
- Paste and run the code in your environment.
- The response will show the proxy IP address and location information, confirming your proxy is working properly.
- If you see the proxy’s IP address (not your actual IP) in the response, congratulations! Your proxy is successfully configured and ready to use.
Integration Guides
Once you generate the endpoints and ports, you can apply them to any application or tool to start using proxies instantly.Integration Guides
- Check out the most popular 3rd party tool guides in the Integrations overview section.
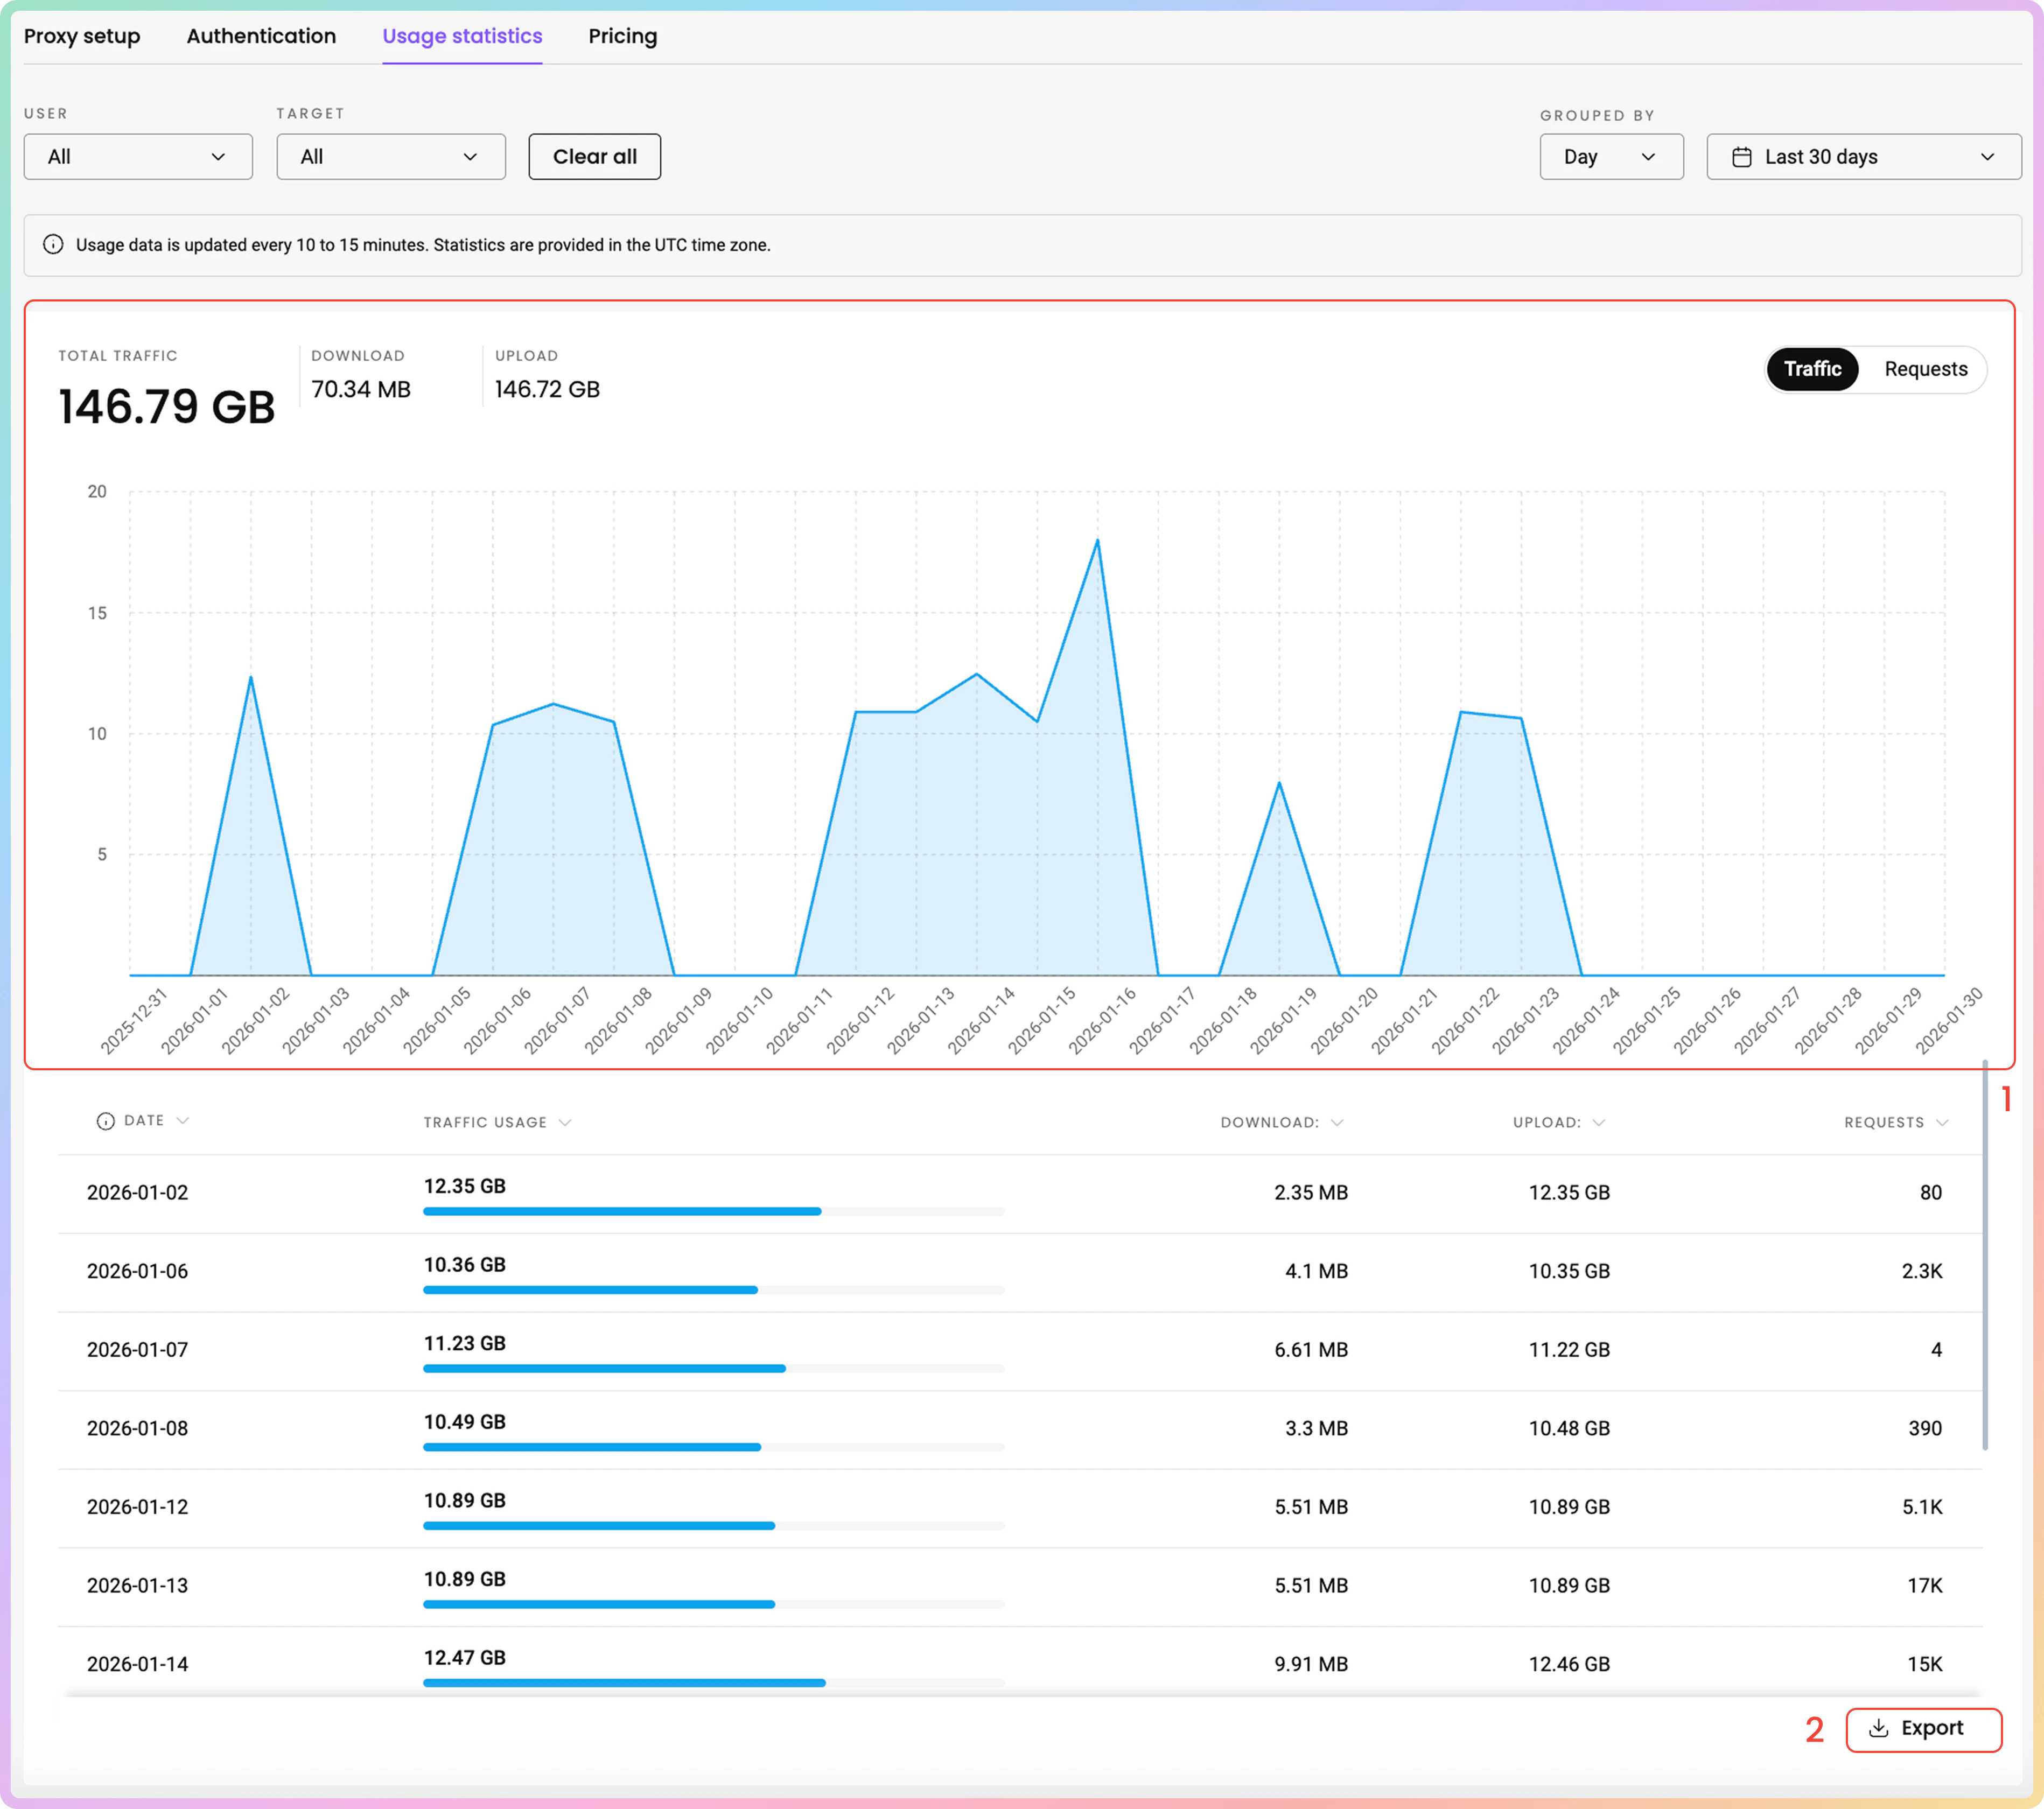
Statistics
To track ISP Pay/GB proxy usage, navigate to the Static Residential → ISP Pay/GB → Usage statistics section.- Here, you can view a Graph of traffic or request usage sorted by: User, Target, and choose the time period.
- Export raw or table data in
.CSV,.TXT, or.JSONformats.
- All dates are in
UTC. Traffic history is limited to180days maximum.
Top Targets, Countries, Users, and IPs
- Below, you can see even more detailed information in dedicated sections:
- Top Targets: No., Target, Traffic, Requests.
- Top Countries: Country, Traffic, Requests.
- Top Users: User, Traffic, Requests.
- Top IPs: No., IP, Traffic, Requests.
Here you can find a more comprehensive look at the ISP Pay/GB Usage statistics page.