Quick Start
Dedicated ISP Proxy Quick Start
Decodo Proxies Use Endpoints
- Endpoints are like gateways to IP pools.
- When you connect to an endpoint, your traffic is automatically routed through a random IP address from the Decodo IP pool.
- Static Residential proxies use the following endpoint and port for random requests:
isp.decodo.com:10000- Here are a few basic request examples in various programming languages:
curl -U "USERNAME:PASSWORD" -x "isp.decodo.com:10000" "https://ip.decodo.com/json"import requests
url = 'https://ip.decodo.com/json'
username = 'USERNAME'
password = 'PASSWORD'
proxy = f"http://{username}:{password}@isp.decodo.com:10000"
result = requests.get(url, proxies = {
'http': proxy,
'https': proxy
})
print(result.text)const axios = require('axios');
const { HttpsProxyAgent } = require('https-proxy-agent');
const url = 'https://ip.decodo.com/json';
const proxyAgent = new HttpsProxyAgent(
'http://username:[email protected]:10000');
axios
.get(url, {
httpsAgent: proxyAgent,
})
.then((response) => {
console.log(response.data);
});<?php
$url = 'ip.decodo.com/json';
$proxy = 'isp.decodo.com';
$port = 10000;
$user = 'username';
$psw = 'password';
$ch = curl_init($url);
curl_setopt($ch, CURLOPT_RETURNTRANSFER, 1);
curl_setopt($ch, CURLOPT_PROXY, "$proxy:$port");
curl_setopt($ch, CURLOPT_PROXYUSERPWD, "$user:$psw");
$result = curl_exec($ch);
curl_close($ch);
if ($result) {
echo $result . PHP_EOL;
}package main
import (
"log"
"net/http"
"net/url"
)
func main() {
proxyUrl, err := url.Parse("http://username:[email protected]:10000")
if err != nil {
log.Fatalln(err)
}
client := &http.Client{
Transport: &http.Transport{Proxy: http.ProxyURL(proxyUrl)},
}
req, err := http.NewRequest("GET", "https://ip.decodo.com/json", nil)
if err != nil {
log.Println(err)
}
res, err := client.Do(req)
log.Println(res)
if err != nil {
log.Println(err)
}
}import java.net.*;
import java.io.*;
import java.util.Scanner;
public class ProxyTest
{
public static void main(String[] args) throws Exception
{
InetSocketAddress proxyAddress = new InetSocketAddress("isp.decodo.com", 10000); // Set proxy IP/port.
Proxy proxy = new Proxy(Proxy.Type.HTTP, proxyAddress);
URL url = new URI("https://ip.decodo.com/").toURL(); //enter target URL
Authenticator authenticator = new Authenticator() {
public PasswordAuthentication getPasswordAuthentication() {
return (new PasswordAuthentication("username","password".toCharArray())); //enter credentials
}
};
Authenticator.setDefault(authenticator);
URLConnection urlConnection = url.openConnection(proxy);
//Scanner to view output
Scanner scanner = new Scanner(urlConnection.getInputStream());
System.out.println(scanner.nextLine());
scanner.close();
}
}
Control Your Connection
- You can make this more specific by adding parameters to control the IP selection and location.
- Keep reading for a step-by-step walkthrough on specifying and generating more examples.
Authentication
- First, navigate to the Static Residential → Dedicated ISP → Proxy setup page on your dashboard and look for the Authentication section.
- You’ll see that your first proxy user and password are created automatically.
- Next, select your proxy authentication method.
- This can be either your whitelisted IP address or one of your proxy users

Additional Authentication Options
You may copy your password by clicking on it
To see the password click the eye icon.
You can generate a new password by clicking on the arrow icon and choosing Confirm.
Here, you can also see the used traffic per proxy user, or check the used traffic sum of your whitelisted IPs.
- You can further manage your credentials in the Authentication tab. For more details, check out the Authentication Methods article.

Proxy Setup
In the ISP Pay/GB Proxy Setup section of your dashboard, selecting various parameters will generate examples you can easily copy into your applications, tools, or code.
- On the Static Residential → Dedicated ISP → Proxy setup page, find the parameter selection section below your authentication methods.

Location
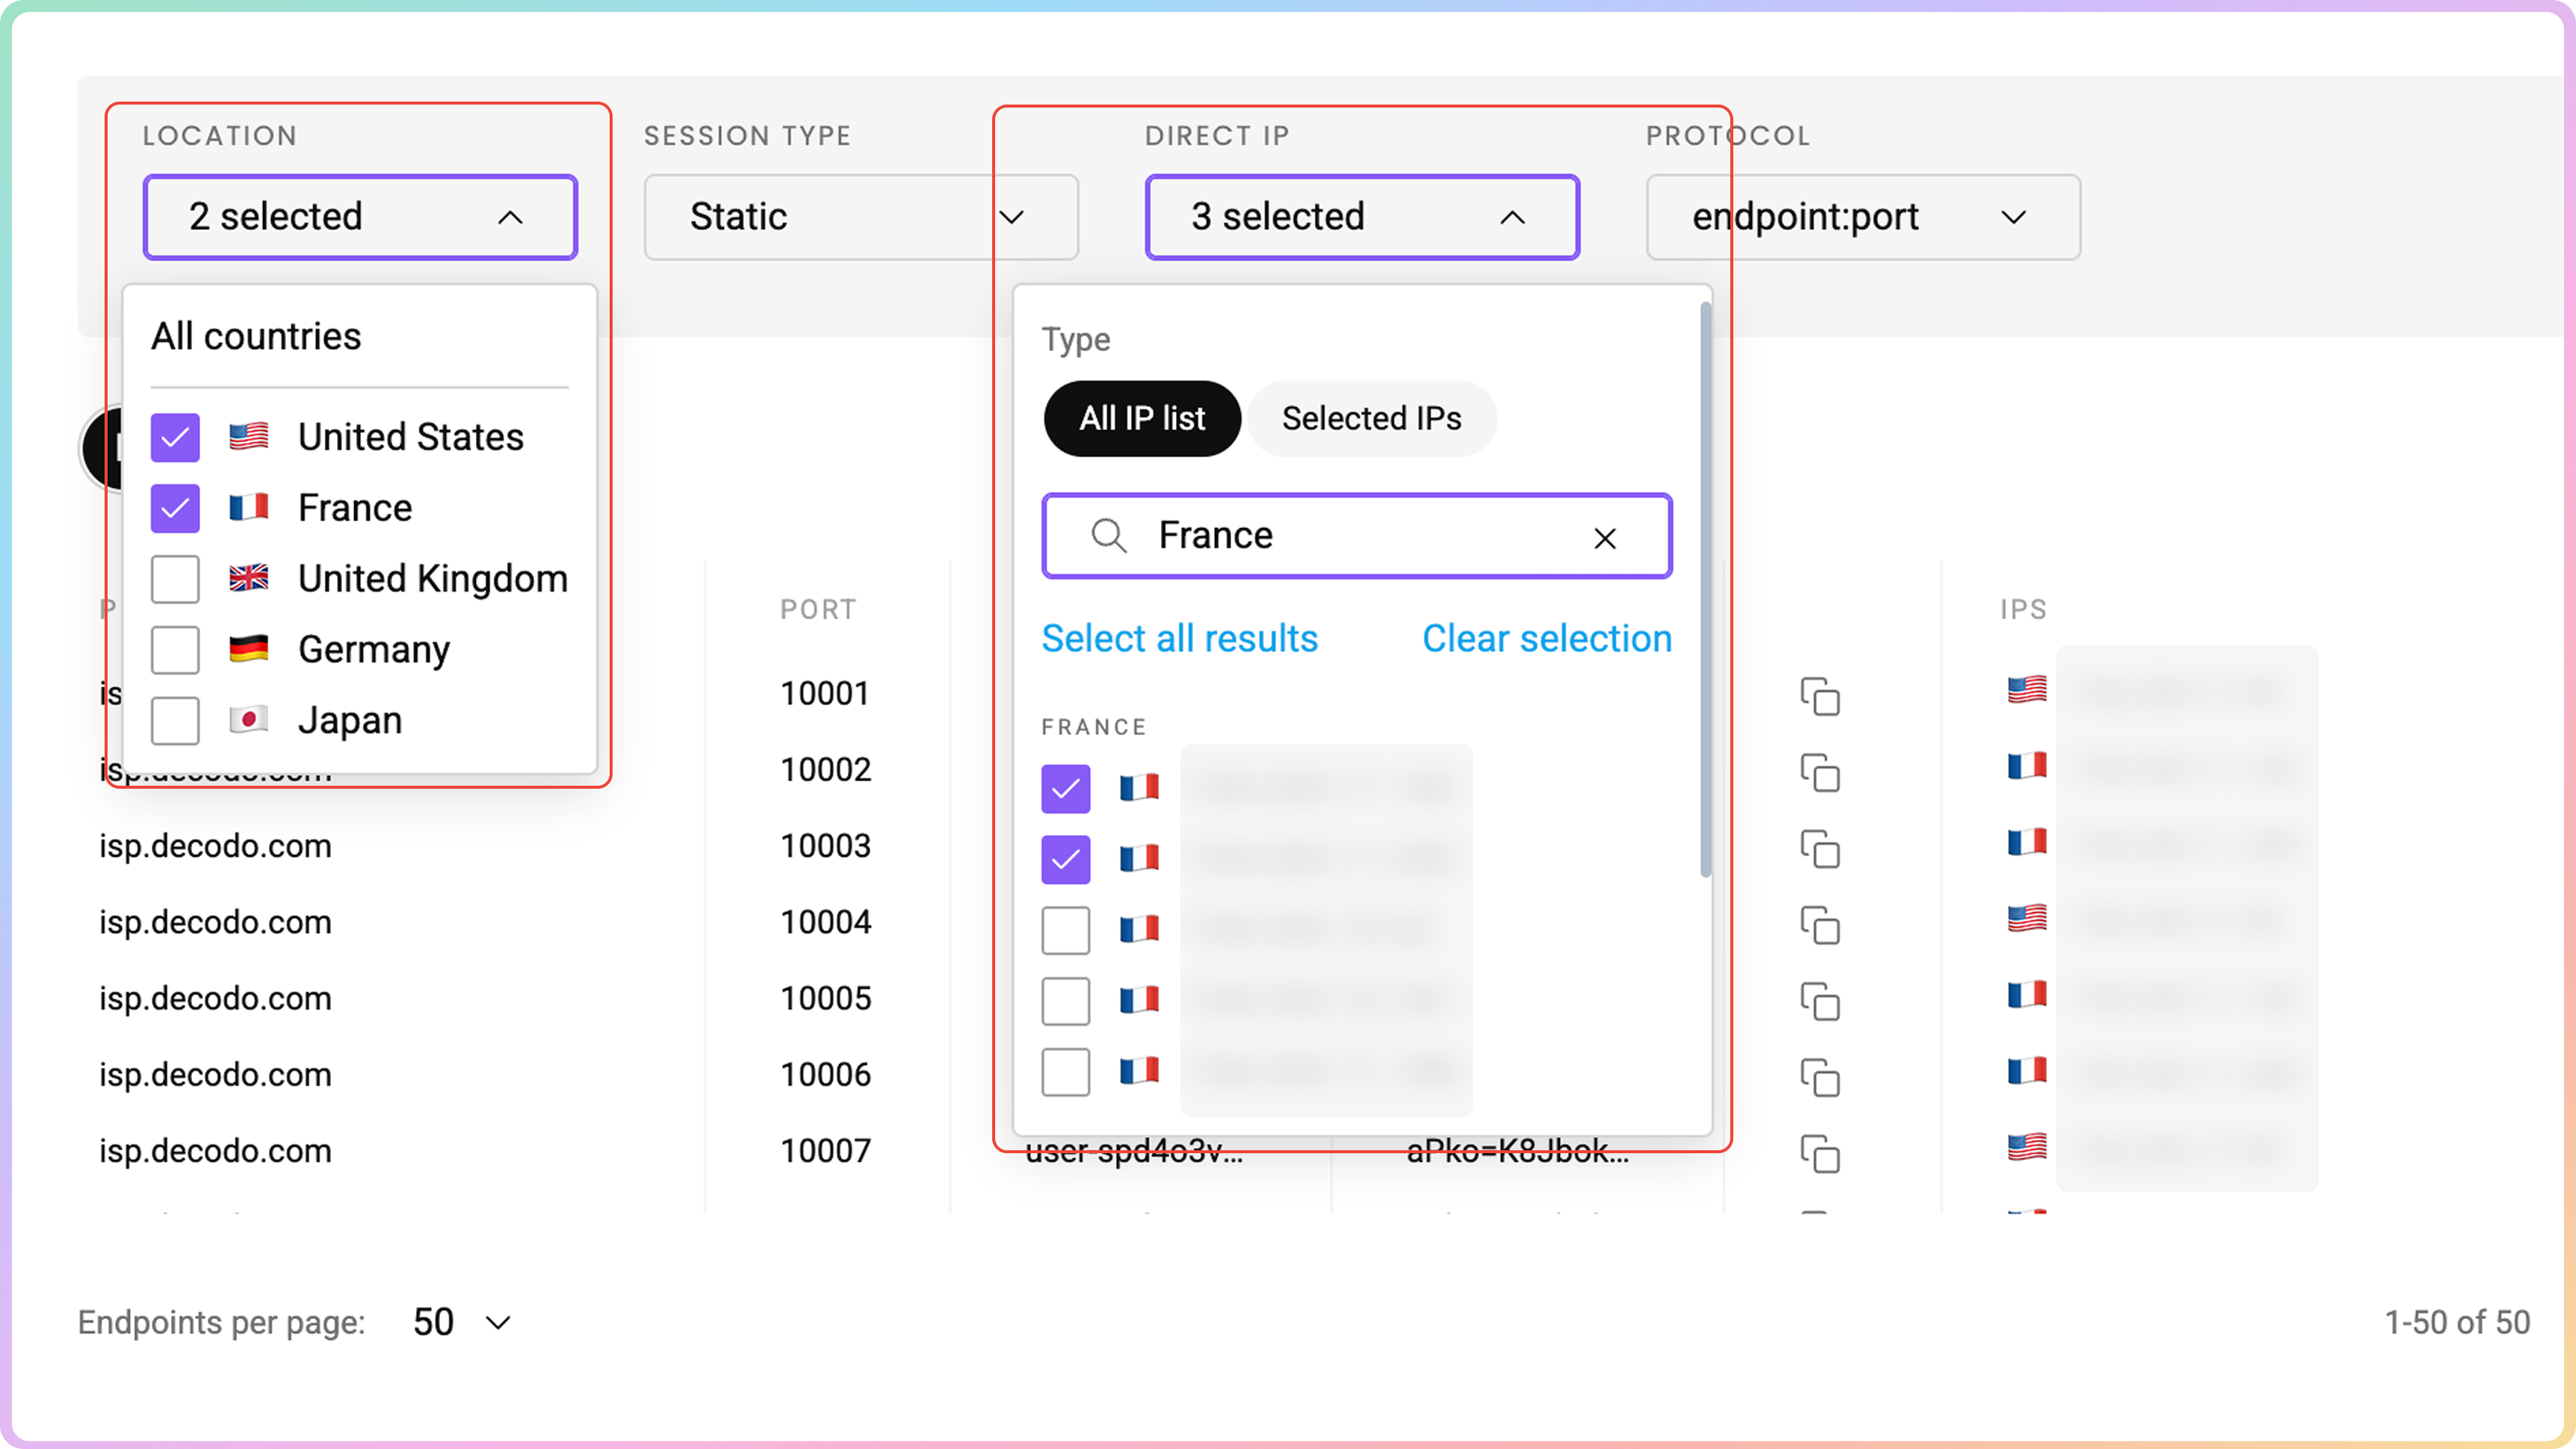
- First, select the Location of your proxy. Choosing a specific country or multiple countries will allow you to generate a list with only those locations.
Direct IPTargeting
- You can specify the IPs you would like to connect as a parameter by selecting the Direct IP option.
- You can toggle the IPs, select all, or use the search field to create a list.
- The IP selection will be limited to selected countries under Location (All countries will provide an entire list).
IP-based Whitelisting and Location Selection
- For Dedicated ISP Proxies, a location or IP can only be specified when using the
user:passauthentication method. Otherwise, All countries will be preselected with a whitelisted IP.
Session Type
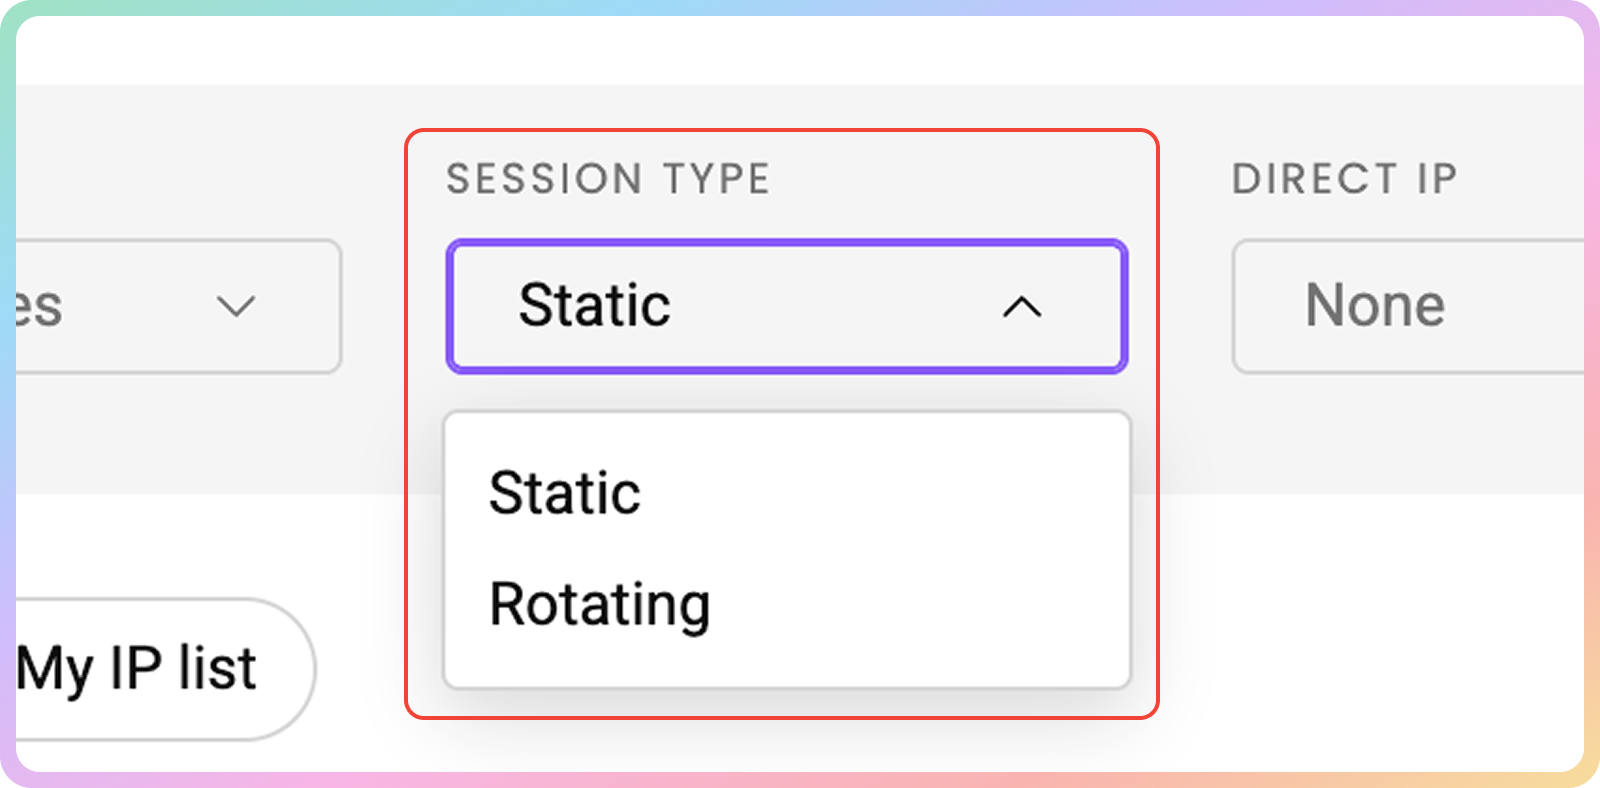
- Afterward, select your preferred Session Type, Rotating or Static.
Session Ports
- Static – Ports
10001-63000provide a static IP address that remains until you decide to change it or the session ends.- Rotating – Port
10000rotates the IP address on every request you make.
Protocol
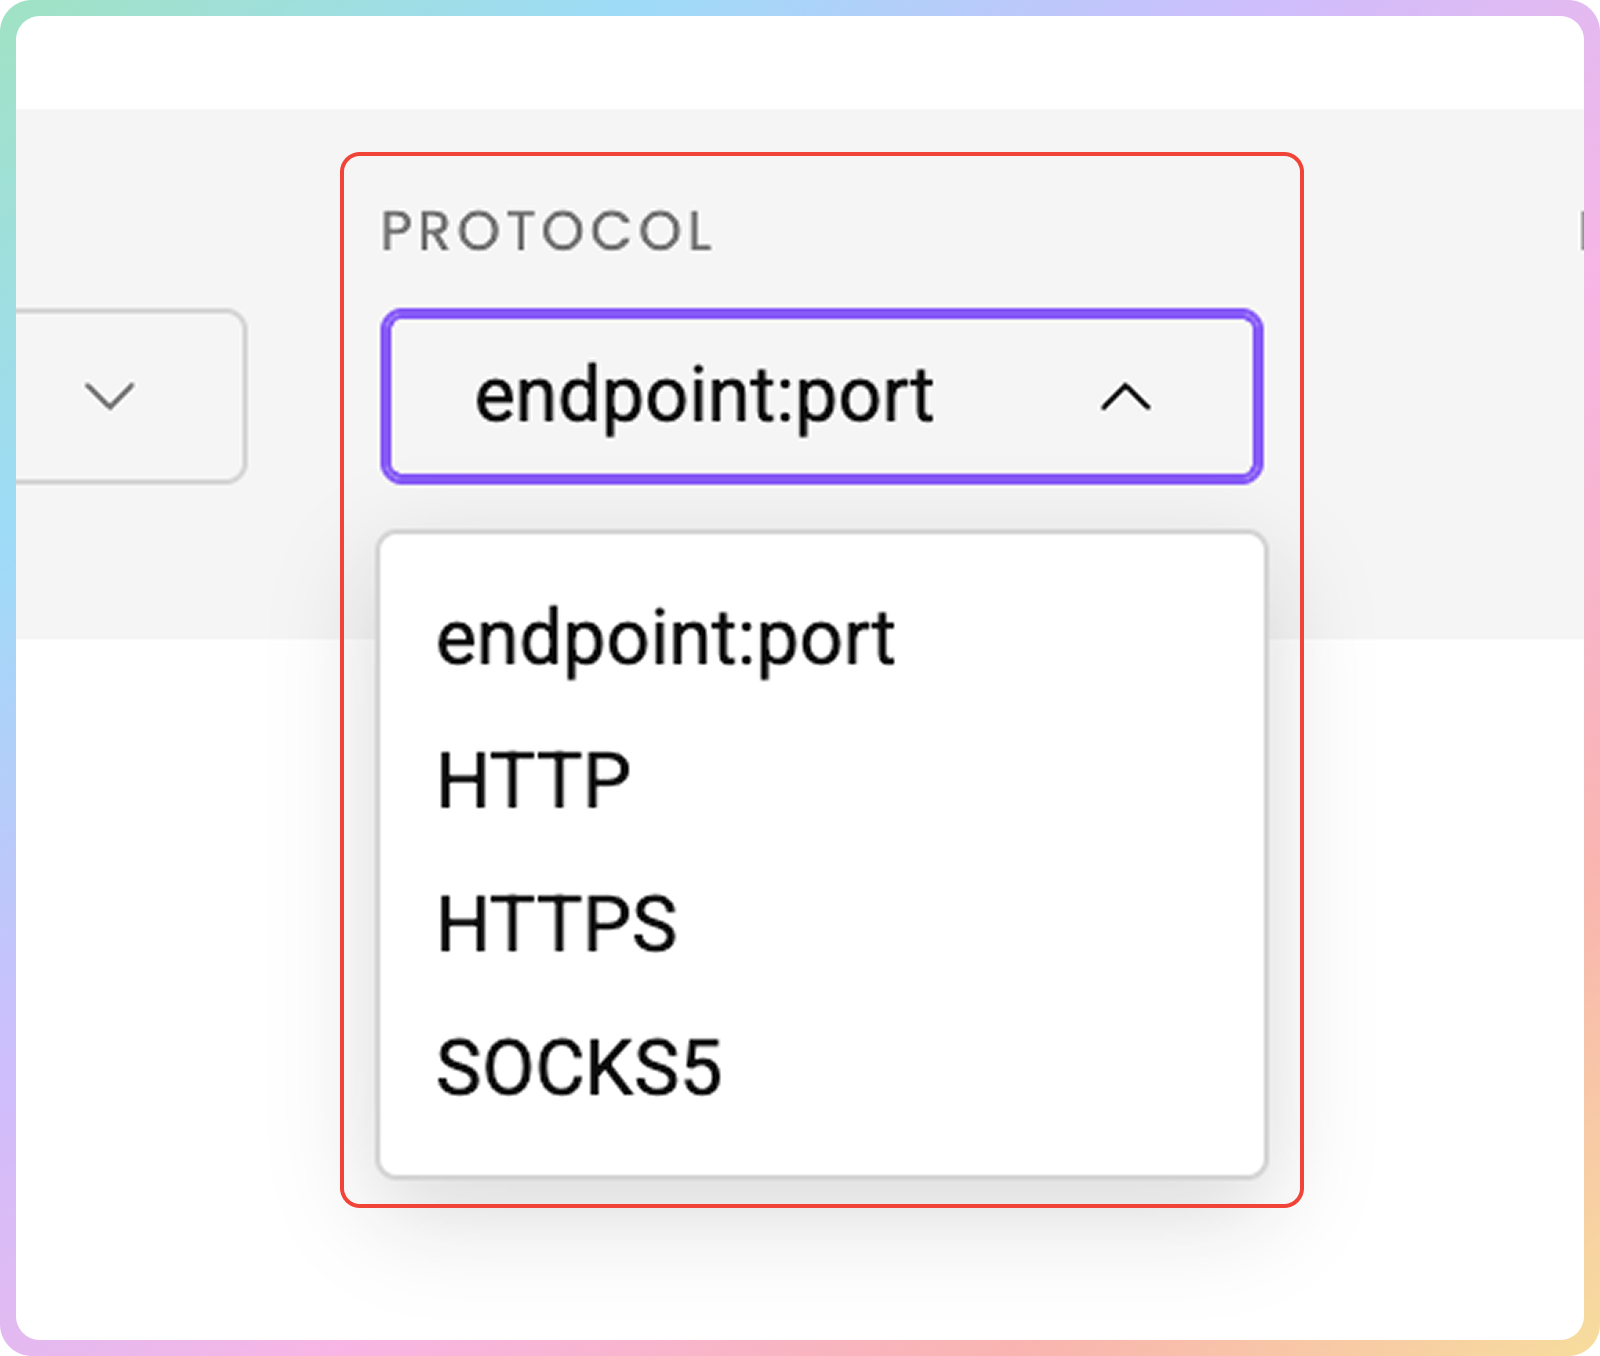
- Finally, choose the Protocol format.
Endpoint:port,HTTP,HTTPS, andSOCKS5options are available.
Proxy List Examples
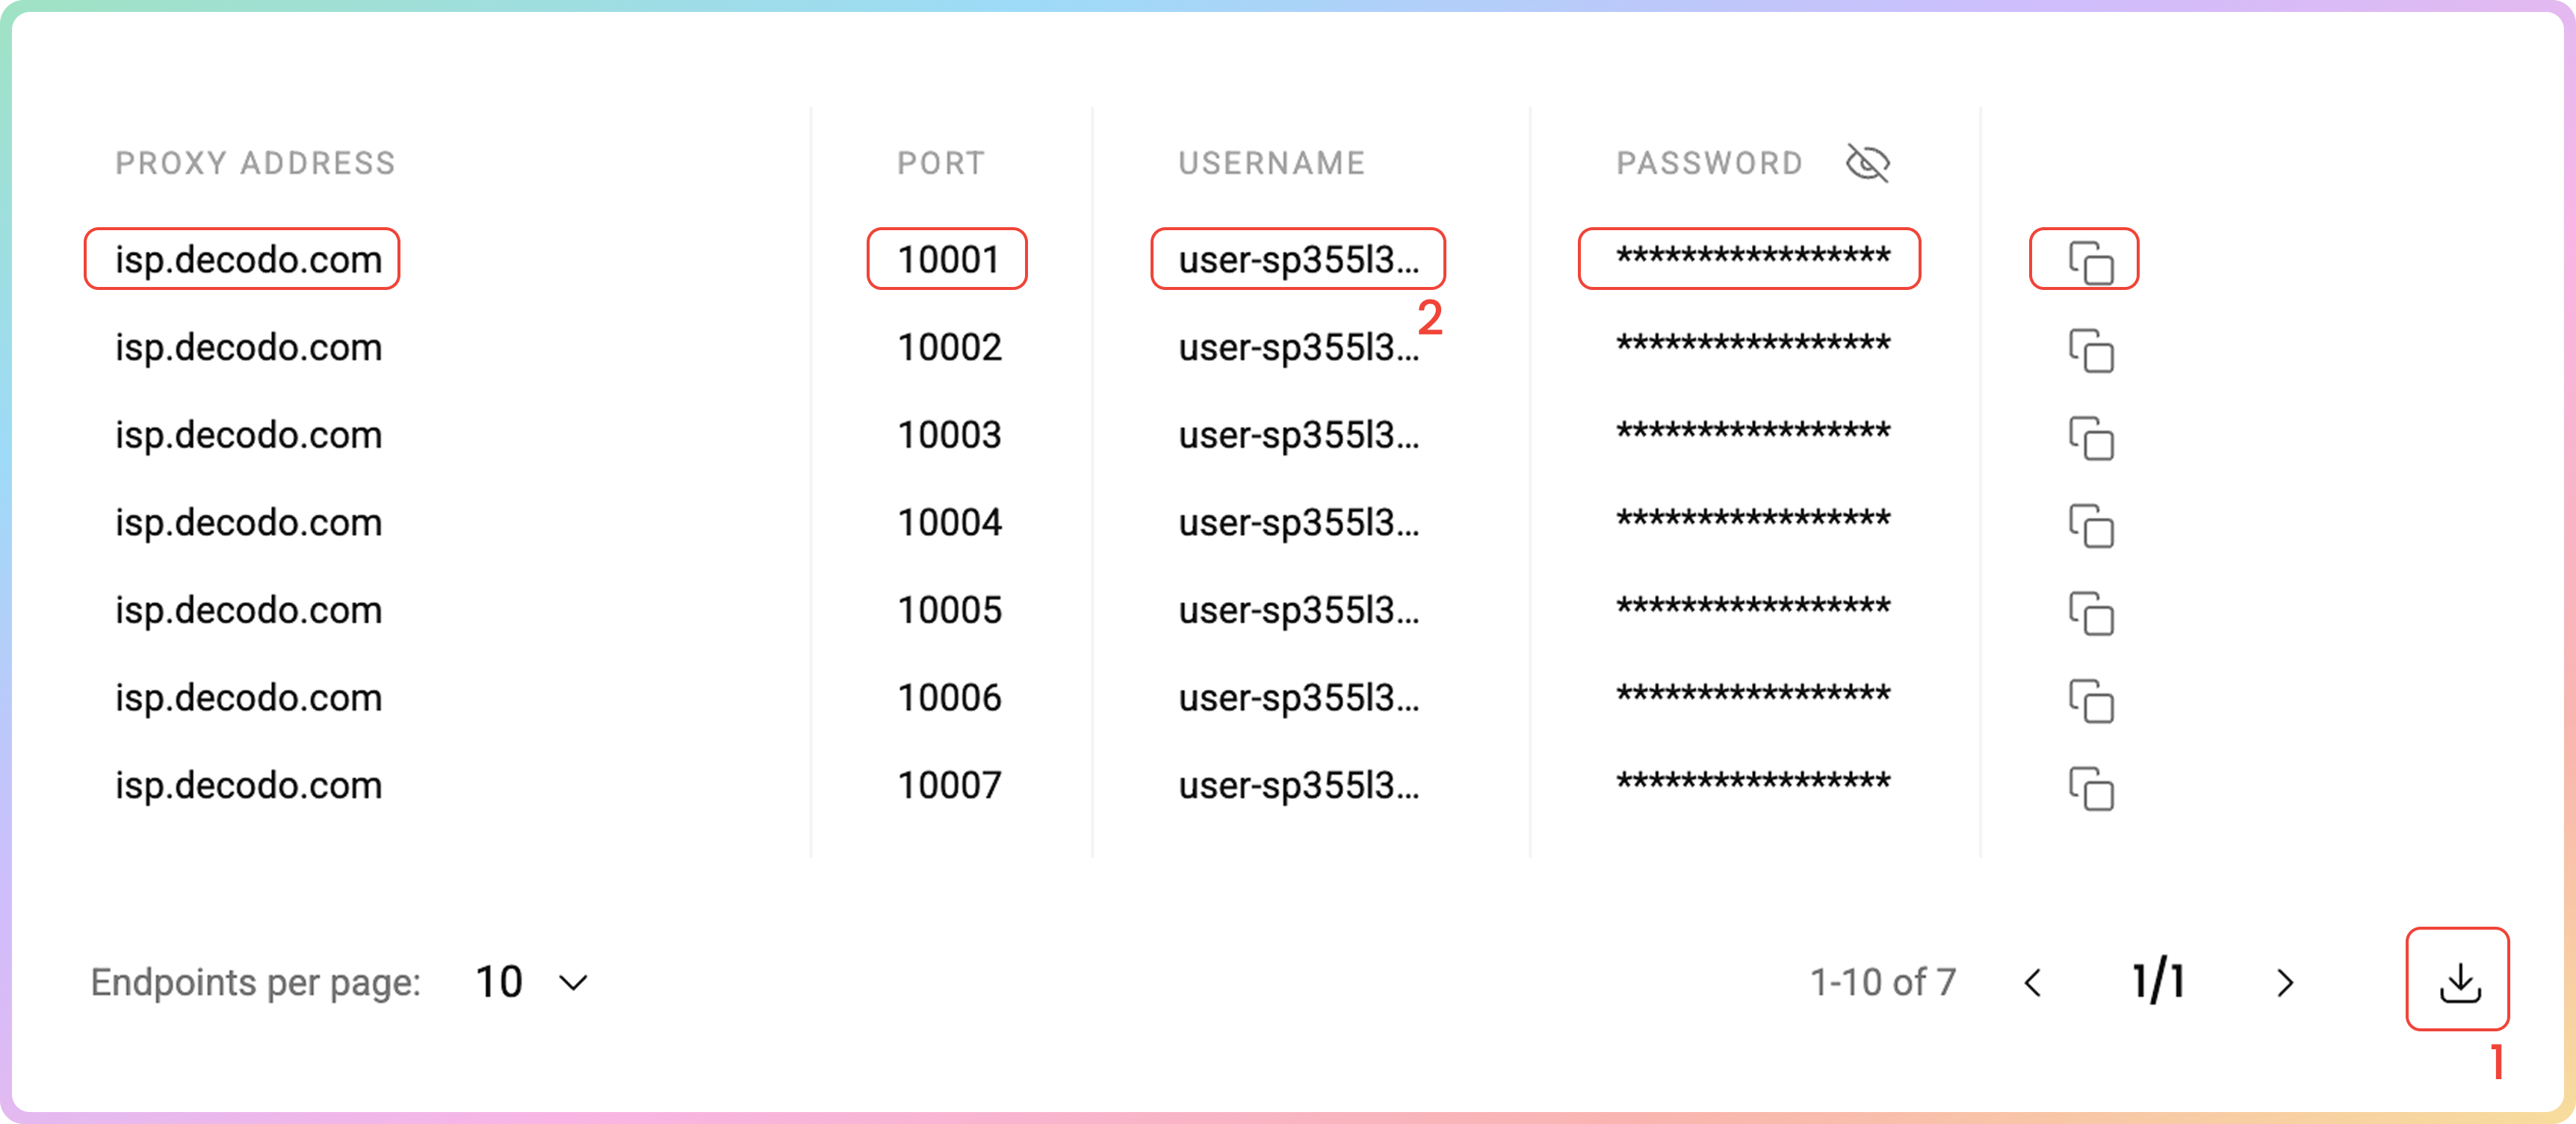
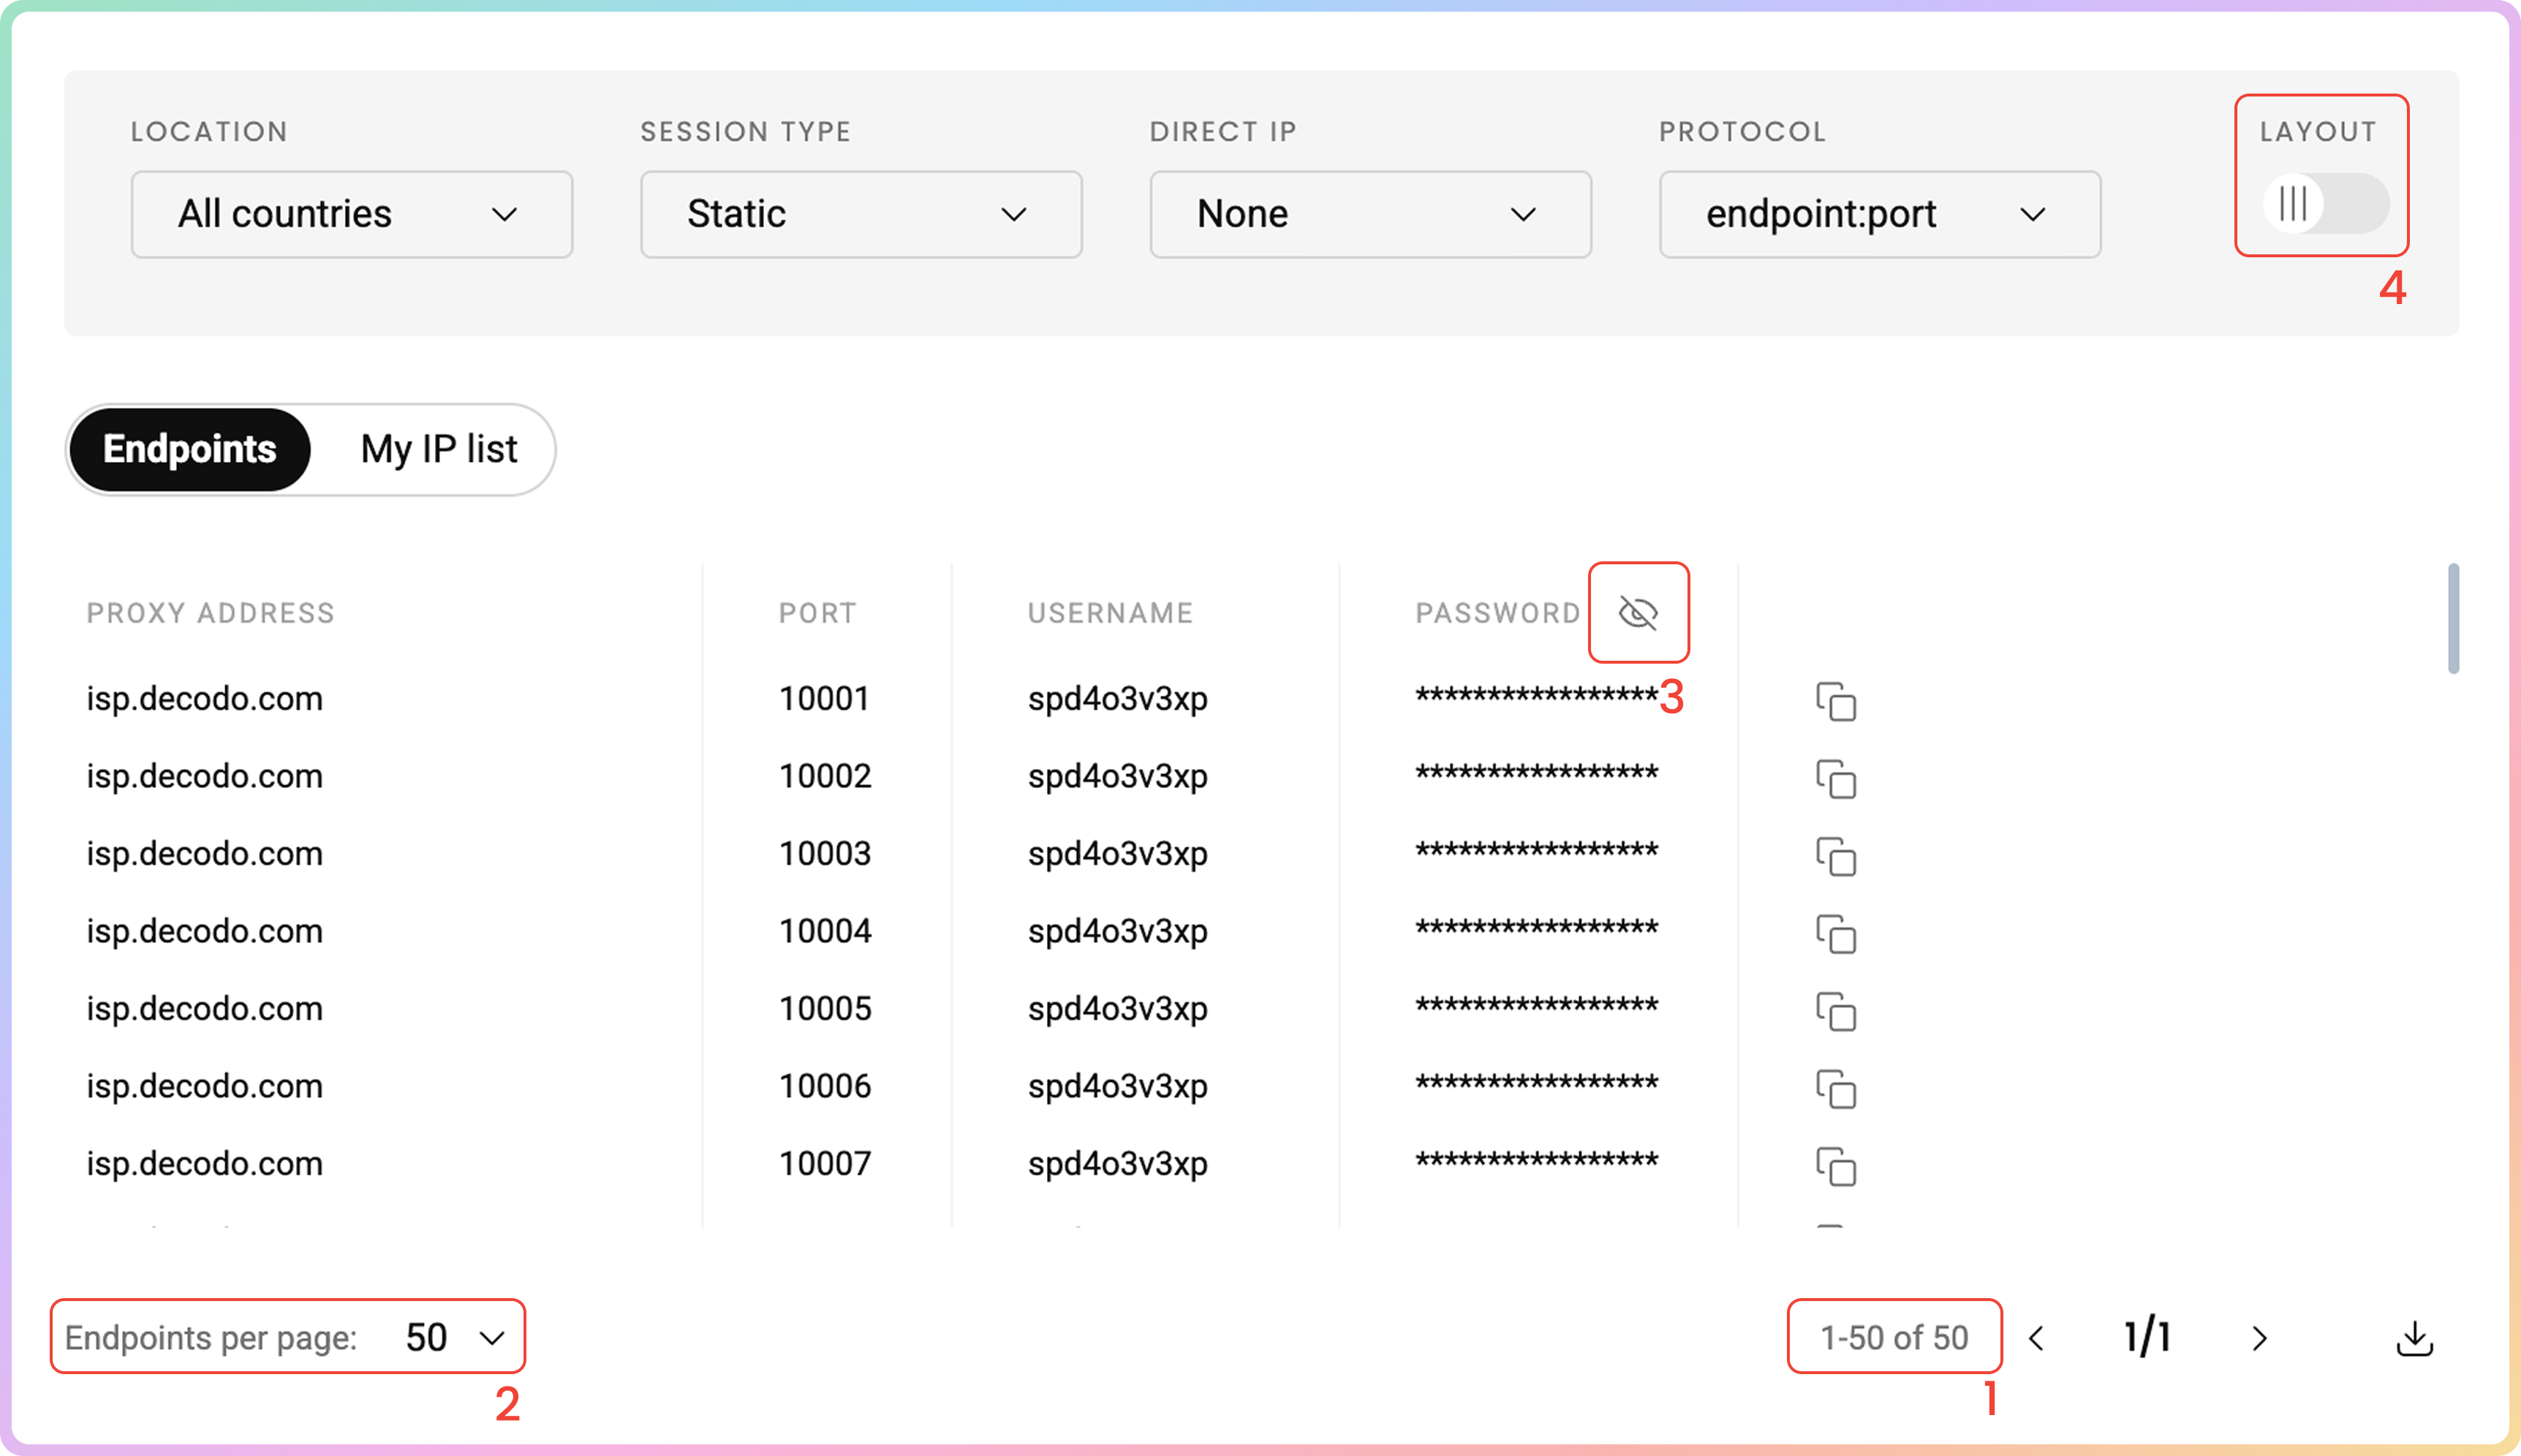
Once you're done setting up in the Proxy Setup section, you will see a proxy list of generated endpoints and ports based on your selection.
- Simply copy it to your clipboard, or download a
.csvor.txtfile of the created proxy list. - Alternatively, copy single elements of the generated parameters, such as the Proxy Address, Port, Username, Password, and IP, or copy the entire example string.
Endpoint List Control
- The number of generated endpoints in the list will depend on how many IPs you purchased with your plan.
- If you select only specific IPs or countries, the total number of generated endpoints will equal your plan's IP count, but the generated IPs will repeat to fill the list.
- Set the number of how many endpoints to display per page (
10,25,50, or100).- Hide your password by clicking on the eye icon. This will not affect the copy & paste function.
- Click Switch view at the top right under Layout to display the entire parameter string.
Code Examples
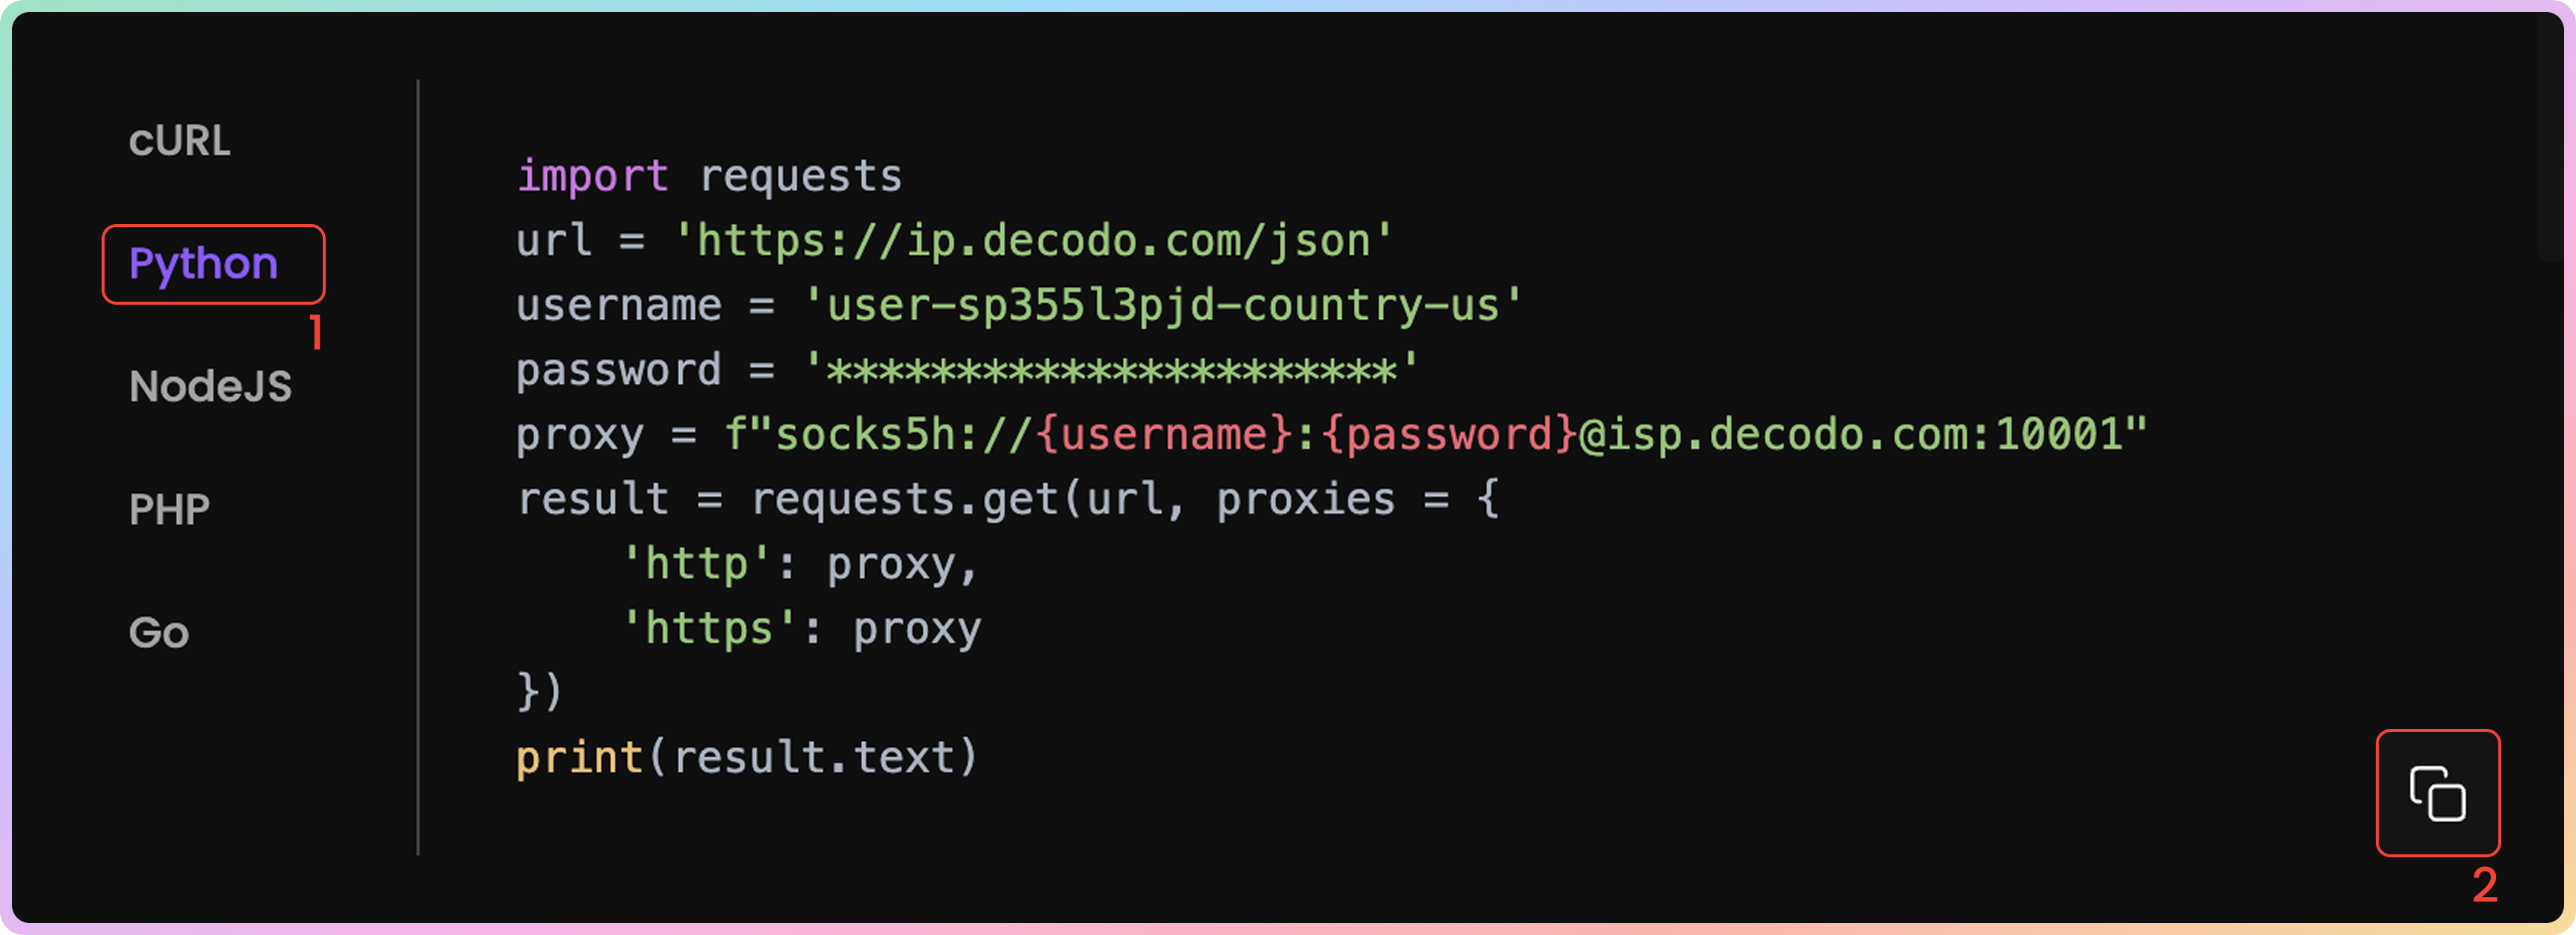
It's important to confirm your proxy is operational before using it in your projects. The code examples generated based on your previous selection at the bottom of your Proxy Setup dashboard allow you to quickly test whether your proxy is connecting correctly and displaying your new IP address.
- You can select any of the available languages:
cURL,Python,NodeJS,PHP, orGO. - Copy the pre-configured code example by clicking Copy in the bottom right corner.
- Paste and run the code in your environment.
- The response will show the proxy IP address and location information, confirming your proxy is working properly.
- If you see the proxy's IP address (not your actual IP) in the response, congratulations! Your proxy is successfully configured and ready to use.
Integration Guides
Once you generate the endpoints and ports, you can apply them to any application or tool to start using proxies instantly.
Decodo Tools
Integration Guides
- Check out the most popular 3rd party tool guides in the Integrations overview section.
GitHub
- For any advanced code samples and middleware please visit our GitHub page.
Statistics
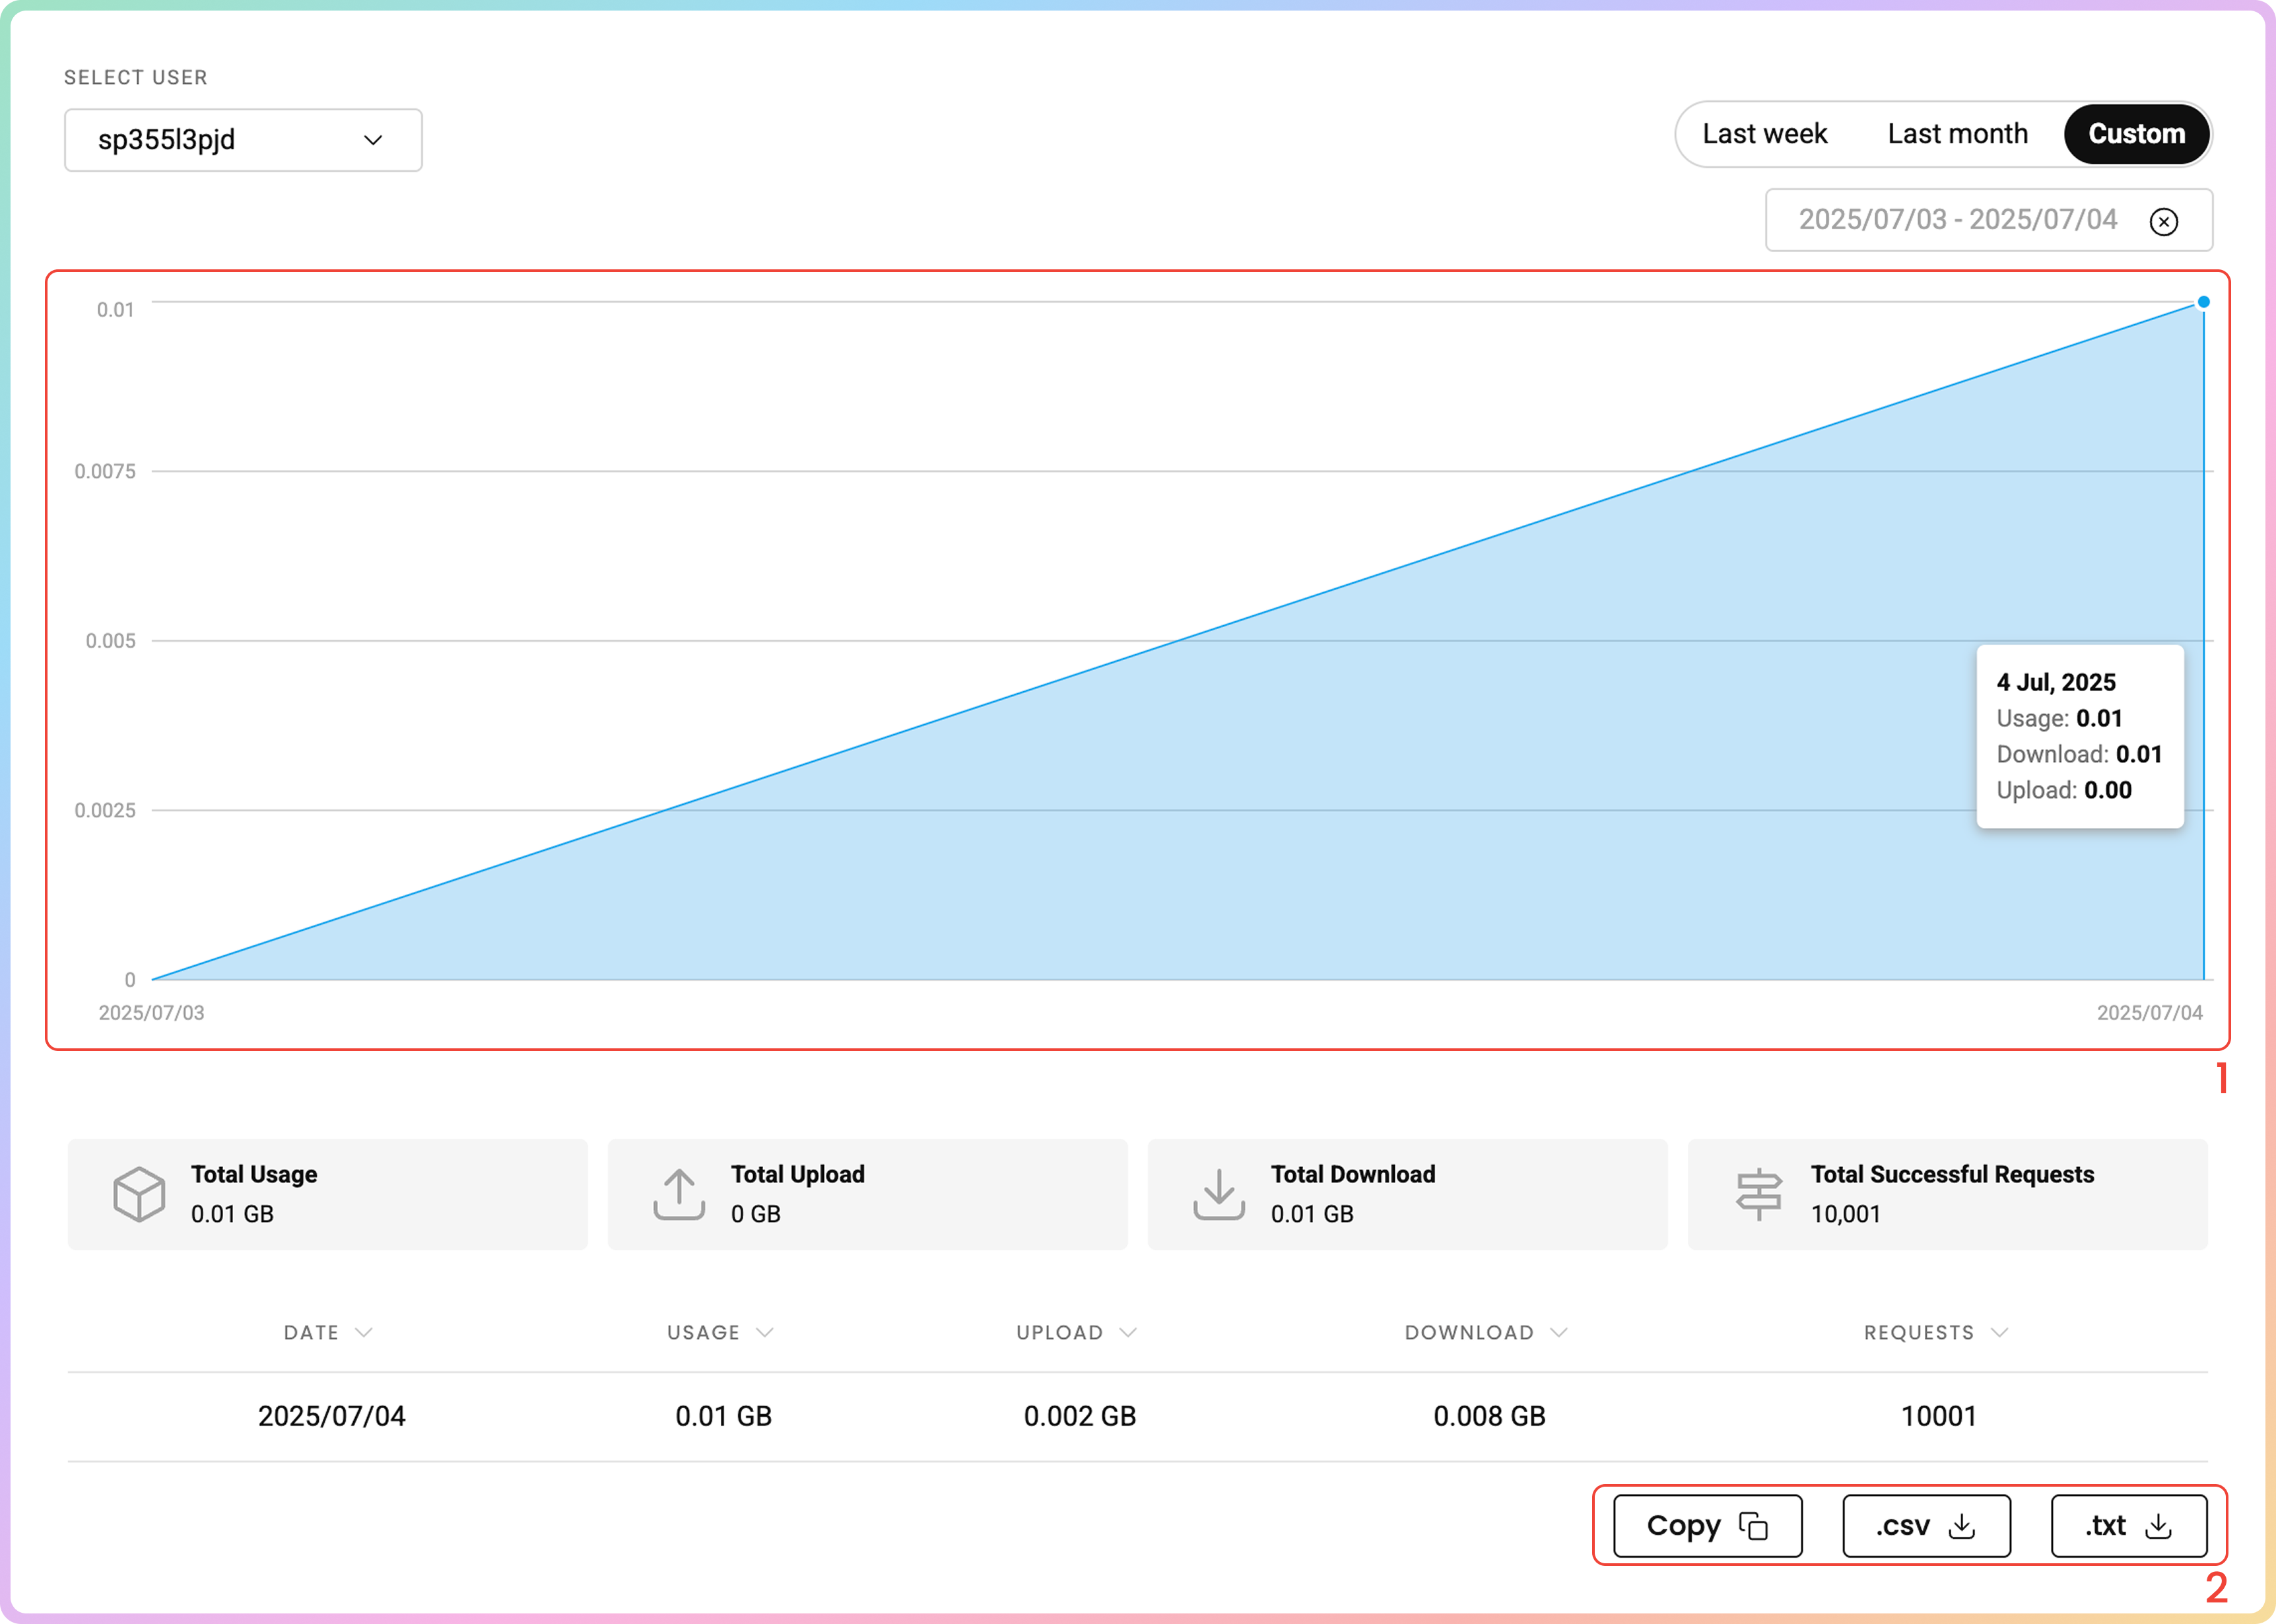
To track Dedicated ISP proxy usage, navigate to the Static Residential → Dedicated ISP → Usage statistics section.
- Here, you can view a Graph of traffic usage sorted by Proxy users and Date, as well as see the total Usage, Total Upload, Total Download, and Total Successful Requests.
- Export in
.CSV,.TXTformats or simply Copy the data to your clipboard.
- All dates are in
UTC.
Troubleshooting
If you are experiencing any issues, please refer to our troubleshooting section or contact our support team directly, which is available 24/7.
Support
Still can't find an answer? Want to say hi? We take pride in our 24/7 customer support. Alternatively, you can reach us via our support email at [email protected].
Updated 6 months ago